About us
Select category
  • Select category
  • Dyeing Lab Machine
  • Lab Equipment & Instrument
  • Physical Testing & Fabric Testing
  • Yarn Dyeing Machine & Equipment
2 items $0.00
Menu
About us
2 items $0.00
  • Home
  • Products
    • Dyeing Lab Machine
      • Products
        • IR Dyeing Machine Dunlin IR Dyeing Machine Dunlin
        • Digital Ph meter
        • Color fastness to washing machine
        • Rainin Digital Pipette
        • HTHP Glycerin bath dyeing machine
        • Laboratory mini stenter Dryer
        • Laboratory tenter
        • Laboretory hydro Extractor
        • Laboretory Padder
        • Oscillation type Dyeing Machine
        • Orbital Shaker Machine
        • Steam Soaping machine

      IR Dyeing Machine Dunlin

      View More
    • Physical Testing & Fabric Testing Machine
      • Products
        • Tensile Strength tester
        • Martindale abrasion tester
        • Martindale abrasion tester updated Martindale abrasion tester Updated
        • Digital Elmendorf tearing tester
        • Bursting strength tester
        • ICI pilling & Snagging test machine
        • Fabric Stiffness Tester
        • Color Fastness to washing machine
        • Fabric air permeability tester
        • Fabric drape tester
        • Fabric flame retardant tester
        • fabric moisture permeability tester
      • Products
        • Stretch Recovery Tester Static Method
        • Xenon Arc Light Fastness Tester
        • Fastness rotary friction tester
        • Fiber oil fast extractor
        • Fabric flame retardant tester
        • Random Tumble Pilling Tester
        • Spray Rating Tester
        • Fatigue tester for Elastic fabric
    • Lab Equipment & Instrument
      • Products
        • Counting Balance /Weighing Scale
        • controller for Ir Dyeing Machine
        • Analog Thickness gauge
        • color matching cabinet/Light box
        • VeriVide Colour Assessment Cabinets
        • Digital hotplate magnetic stirrer
        • Digital Temperature Humidity meter
        • Digital Ink Rubbing Tester
        • Digital paper dot meter Densitometer
        • Digital Bench top PH Meter
        • Digital precision balance
        • Digital thickness gauge
      • Products
        • Pantone book
        • Hydraulic GSM Cutter
        • Gray scale
        • GSM Cutter & Balance
        • Hand needle detector
      • Products
        • Perspiration Tester
        • Textile moisture meter tem aqua boy
        • VeriVide D65 Tube Light
        • Yarn Tension Meter
    • Wet & Dry Process Instrument
      • Products
        • Bosch tumble dryer
        • Bosch-Washing-Machine-WAJ2018SGC-4
        • Capillary effect tester
        • Color fastness to wash
        • Color fastness to sublimation & heating
        • Durawash print Durability tester
        • Formaldehyde tester for textiles
        • Ozone Exposure chamber
        • Pilling assessment viewer
        • Whirlpool washer & Dryer
      Textile Machinery Supplier in Bangladesh

      MAAM TEX

      Lab Machine Supplier in Bangladesh, Testing machine supplier in Bangladesh, Dyeing Machine supplier in Bangladesh, Lab Machine Supplier in Dhaka, yarn Dyeing machine supplier in Bangladesh, Lab Dispensing Machine supplier in Bangladesh, soft winding machine supplier in Bangladesh, Hard winding machine supplier in Bangladesh, IR Dyeing machine supplier in Bangladesh, Lab machine Price in Bangladesh, 

    • Yarn Dyeing Machine-Equipment
      • Products
        • Cone yarn Dyeing machine
        • Automatic Bobbin Hydroextractor
        • Card winding machine for yarn
        • Sample Cone Yarn Dyeing machine
        • Digital yarn twist Tester
        • Electronic wrap reel
        • Fully Automatic Radio Frequency Dryer
        • Thread Cone Winding Machine
        • High speed hard winding machine
        • High speed Soft cone winding machine
        • Yarn evenness tester
      • Products
        • Yarn evenness tester
    • Washing-Drying Machine
      • Products
        • Automatic washing project
  • About us
  • Contact us
“Digital precision balance” has been added to your cart. View cart
“High speed hard winding machine” has been added to your cart. View cart
Digital Yarn Twist Tester
360 product view
    0%
    Click to enlarge
    Digital Yarn Twist Tester
    Digital Yarn Twist Tester
    Home Yarn Dyeing Machine & Equipment Digital Yarn Twist Tester
    Card Winding Machine
    Card winding machine $0.00
    Back to products
    Sample Cone Yarn Dyeing Machine
    Sample Cone Yarn Dyeing machine $0.00

    Digital Yarn Twist Tester

    $0.00

    Digital Yarn Twist Tester

    Digital Yarn Twist Tester

    Digital Yarn Twist Tester


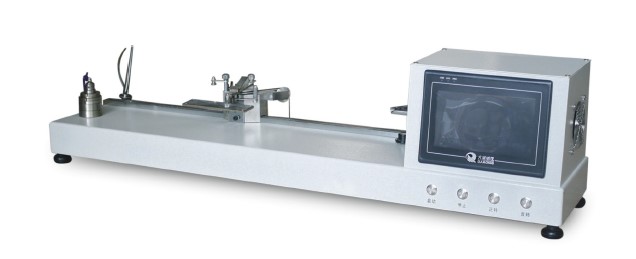
    A Digital Yarn Twist Tester is a laboratory device used to measure the number of twists (turns) per unit length in a yarn. It’s crucial for evaluating yarn quality, strength, elasticity, and uniformity. The digital version offers precise, automated readings for both S-twist and Z-twist yarns.


    Purpose Digital Yarn Twist Tester:

    To determine twist per inch (TPI) or twist per meter (TPM) in single and plied yarns using direct untwist or untwist-retwist methods.


    Applications Digital Yarn Twist Tester:

    Quality control in spinning mills

    Yarn standard testing (cotton, polyester, blends)

    R&D in textile manufacturing


    Working Principle Digital Yarn Twist Tester:

    One end of the yarn is clamped, and the other is rotated to remove or measure twists.

    The tester counts and displays twist digitally based on length and rotation.


    Benefits of Digital Yarn Twist Tester:

    High Accuracy – Digital readout ensures precise twist measurements.

    Quick Testing – Faster than manual methods, increasing lab efficiency.

    Versatile Application – Suitable for single, doubled, or plied yarns.

    Reduces Human Error – Automated counting improves repeatability and consistency.


    Supports Both S & Z Twist – Measures both twist directions accurately.

    User-Friendly Operation – Intuitive controls and clear display simplify use.


    Features of Digital Yarn Twist Tester:

    Digital Display – Shows real-time twist count and length.

    Motorized Rotation- Smooth, adjustable rotation speed for controlled untwisting.

    Dual Clamp System – Holds yarn securely to prevent slippage.

    Length Measurement Scale – Built-in ruler or encoder for precise yarn length setup.


    Auto Stop Function – Automatically stops when yarn is fully untwisted.

    Selectable Units – Twist readings available in TPI or TPM.


    How to Use Digital Yarn Twist Tester:

    Prepare the Yarn Sample

    – Cut a yarn length (e.g., 250 mm or 10 inches) as per testing standard.

    – Make sure it’s free from knots or damage.

    Mount the Yarn   – Fix one end in the stationary clamp and the other in the rotating clamp.

    – Ensure the yarn is straight and under slight tension.


    Set the Gauge Length – Adjust the length scale or input it digitally, depending on the machine.

    Select Twist Direction – Choose S or Z direction based on the yarn’s twist.

    Start the Test – Activate the motor to untwist (or untwist-retwist, if applicable).   – The display shows the number of rotations. Read the Twist Value  – The twist (TPI/TPM) appears automatically based on the set length.


    Stop and Unload – Once reading is complete, stop the machine and remove the yarn.

    Record the Result – Note the reading for documentation or further analysis.


    Maintenance Tips for Digital Yarn Twist Tester:

    Daily:

    ☐ Wipe down the machine and clamps to remove dust or fibers

    ☐ Check for yarn residue on rotating parts

    ☐ Ensure display and buttons are responsive


    Weekly:

    ☐ Lubricate rotating spindle lightly (if required)

    ☐ Inspect clamps for wear or misalignment

    ☐ Test motor rotation for smooth operation

    ☐ Check twist direction selector switch


    Monthly:

    ☐ Calibrate digital display if twist readings drift

    ☐ Inspect electrical wiring and connectors

    ☐ Tighten any loose screws or panel parts


    Safety Tips:

    Avoid Loose Clothing: Prevent getting caught in the rotating spindle

    Use Proper Yarn Tension: Overstretching may snap the yarn or damage clamps

    Handle With Care: Avoid rough handling of the digital panel or twist arm

    Power Off When Not in Use: Prevents accidental operation

    Follow Manual: Refer to user guide for specific calibration or cleaning procedures


    Digital Yarn Twist Tester – Maintenance & Safety Checklist


    Daily Maintenance:

    ☐ Clean clamps and body surface

    ☐ Remove lint or yarn fragments

    ☐ Verify display & control buttons function properly


    Weekly Maintenance:

    ☐ Lightly lubricate spindle if required

    ☐ Inspect clamp alignment and grip

    ☐ Test motor for smooth, silent operation

    ☐ Check twist direction switch


    Monthly Maintenance:

    ☐ Calibrate twist reading accuracy

    ☐ Inspect cables and connectors

    ☐ Tighten loose hardware

    ☐ Run full test to ensure system performance


    Safety Checklist:

    ☐ Keep hands clear of rotating parts during testing

    ☐ Avoid loose clothing or jewelry

    ☐ Do not overstretch or over tension yarn

    ☐ Power off when cleaning or not in use

    ☐ Follow the machine’s manual for calibration and service


    Basic Troubleshooting Guide – Digital Yarn Twist Tester


    Issue: No Power / Display Not Turning On

    –  Check power cable and socket

    –  Inspect fuse or main switch

    –  Ensure emergency stop isn’t engaged


    Issue: Twist Count Seems Inaccurate

    –  Recalibrate the machine

    –  Verify yarn length input is correct

    –  Check for slippage in clamps


    Issue: Motor Not Rotating

    –  Ensure motor switch is ON

    –  Inspect motor connection and wiring

    –  Test rotation manually to check for blockage


    Issue: Display Freezes or Buttons Unresponsive

    –  Restart the machine

    –  Check control panel for dust or moisture

    –  Contact support if issue persists


    Issue: Auto-Stop Not Working

    –  Ensure length and twist direction are set

    –  Check sensor alignment or damage

    –  Reboot and re-run test


    Scope of application
    It is used for testing the twist, twist irregularity and twist shrinkage of all kinds of yarns.
    [Related standards]
    GB/T2543.1/2 FZ/T10001 ISO2061 ASTM D1422 JIS L1095 etc.


    Technical parameters
    1. Work mode:Computer program control, data processing, printout results
    2. Test methods:
    A, Average twisting slip elongation
    B, Average maximum twisting elongation.
    C, Direct counting method D, twisting twisting A method
    E, Twisting twisting B method f and three times twisting twisting method

    3. Sample length:10、25、50、100、200、250、500mm
    4. Twist test range:1~1998 twist /10cm, 1~1998 twist /m
    5. The extent of twist removal:Maximum 50mm
    6. Maximum twist measurement.20mm
    7. Speed:600~3000r/min
    8. Pre tension:0.5~171.5cN

    Digital Yarn Twist Tester

    Digital Yarn Twist Tester

    9. Size:920×170×220mm
    10. Power supply:Ac220V 50Hz 25W
    11. Weight:16kg

    Category: Yarn Dyeing Machine & Equipment Tags: Digital Yarn Twist Tester, Digital Yarn Twist Tester for Lab, Digital Yarn Twist Tester formula, Digital Yarn Twist Tester price in Bangladesh, lab Digital Yarn Twist Tester, Lab Machine Supplier in Bangladesh, Textile lab Machine supplier, textile lab machine supplier in Bangladesh, Textile testing equipment in Bangladesh, Twist Tester, Yarn Twist Tester Brand: DARONG, DUNLIN, FEIHU
    Share:
    • Shipping & Delivery
    Shipping & Delivery

    Related products

    Steam Soaping Machine
    Steam Soaping Machine

    Steam Soaping machine

    Dyeing Lab Machine
    $0.00
    Steam Soaping Machine

    Steam Soaping Machine

    Steam Soaping Machine

    A Steam Soaping Machine is a specialized laboratory apparatus used in textile dyeing processes, particularly for post-dyeing treatments like soaping, which enhances color fastness and removes unfixed dyes from fabric samples. This machine is designed to perform soaping treatments on dyed textile samples using steam. Soaping is a critical step in dyeing, especially for reactive dyes, as it removes unfixed dye particles, ensuring better color fastness and preventing dye bleeding. The steam soaping process involves treating the dyed fabric with a soaping solution at elevated temperatures, facilitated by steam, to achieve optimal results. ⚙️ Key Features of Steam Soaping Machine - Beaker Material: Constructed with high-grade 316L stainless steel for excellent corrosion resistance and durability.- Operation Modes: Offers both automatic control and manual water filling options, providing flexibility in operation. - Drainage System: Equipped with an automatic drainage device for efficient removal of used solutions.- Temperature Control: Precise temperature regulation to maintain optimal soaping conditions.- Compact Design: Suitable for laboratory settings, occupying minimal space while delivering effective performance. ✅ Benefits of  Steam Soaping Machine - Enhanced Color Fastness: Effectively removes unfixed dyes, resulting in improved wash and rub fastness of the fabric.- Efficient Processing: Reduces the time required for post-dyeing treatments compared to conventional methods.- Consistent Results: Provides uniform treatment across samples, ensuring reproducibility in testing and quality control.- Resource Optimization: Minimizes water and chemical usage through controlled processing parameters.- Versatility: Applicable to various fabric types and dye classes, making it a valuable tool in research and development. Typical Applications - Laboratory Testing: Used in dyeing laboratories for evaluating the fastness properties of dyed samples. - Research and Development: Assists in developing and optimizing dyeing processes and formulations. - Quality Control: Ensures that dyed fabrics meet specified fastness standards before bulk production. In summary, a Steam Soaping Machine is an essential laboratory instrument in the textile industry, facilitating efficient and effective post-dyeing treatments to enhance the quality and durability of dyed fabrics. Features of Steam Soaping Machine:
    1. High-Grade Stainless Steel Beakers - Made from 316L stainless steel for excellent chemical and heat resistance.
    2. Steam-Based Heating - Uses direct or indirect steam to maintain consistent high temperatures ideal for soaping.
    1. Precise Temperature Control - Maintains stable temperatures (typically up to 98–100°C) for effective removal of unfixed dyes.
    2. Automatic and Manual Modes - Offers both programmable automatic cycles and manual operation for flexibility.
     
    1. Beaker Agitation or Rotation - Ensures uniform soaping action across fabric surfaces.
    2. Automatic Drainage System - Efficiently removes used soaping solution to speed up cycle changeovers.
    1. Compact Design - Fits well in lab settings while allowing multiple samples to be processed simultaneously.
    2. Safety Features - Includes pressure and temperature protection systems to ensure safe operation.
     
    1. Low Water and Chemical Use - Designed for minimal liquor ratios, enhancing sustainability.
    2. User-Friendly Interface - Simple digital controls or touch panel for easy operation and cycle programming.
    How to Use a Steam Soaping Machine:
    1. Prepare the Dyed Sample - After dyeing, rinse the fabric to remove surface dye and prepare it for soaping.
    2. Load the Fabric - Place the dyed fabric or sample into the beakers or holders inside the machine.
    1. Add Soaping Solution - Pour the prepared soaping agent (usually a detergent solution) into the beakers or tank as per recipe.
    2. Set Parameters
    - Use the control panel to set: - Temperature (usually 95–98°C) - Soaping time (typically 10–20 minutes) - Steam mode (direct or indirect, if applicable)  
    1. Start the Cycle - Begin the soaping process. The machine will heat the solution using steam and agitate/rotate the beakers for even treatment.
    1. Drain and Rinse - After the cycle ends, the machine may auto-drain. Rinse the fabric with warm water to remove residual chemicals.
    1. Unload the Samples - Carefully remove the fabric. Inspect for evenness and color fastness improvement.
    2. Clean the Machine - Rinse and dry the beakers or tank to maintain hygiene for the next use.
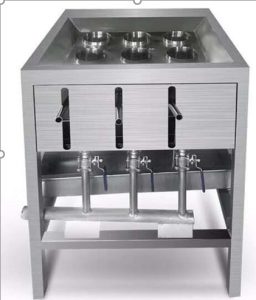
      Safety Tips: - Wear gloves and goggles. - Do not open the lid during operation. - Ensure steam connections are secure.       Steam Soaping machine used for sample soaping after dyeing in laboratory Beaker material: 316L S/S automatic control / manual filling water device, with automatic drainage device. Steam Soaping machine Dunlin price in Bangladesh Steam Soaping machine Dunlin in textile testing equipment Textile testing equipment in Bangladesh Textile testing equipment in Dhaka Textile testing equipment in Uttara MAAM tex Steam Soaping machine Dunlin price in Bangladesh
    Add to cart
    Quick view
    Sample Cone Yarn Dyeing Machine
    Sample Cone Yarn Dyeing Machine

    Sample Cone Yarn Dyeing machine

    Yarn Dyeing Machine & Equipment
    $0.00
    Sample Cone Yarn Dyeing Machine
    Sample Cone Yarn Dyeing Machine

    Sample Cone Yarn Dyeing Machine

      A Sample Cone Yarn Dyeing Machine is a lab-scale dyeing unit designed for dyeing small batches of yarn wound on cones. It simulates the bulk cone dyeing process, allowing testing of dye formulations, shade matching, and process development before large-scale production.   Purpose Sample Cone Yarn Dyeing Machine: To dye yarn cones under controlled conditions using a small quantity of dyes, water, and chemicals.   Working Principle Sample Cone Yarn Dyeing Machine: Yarn cones are mounted on dyeing spindles. The dye liquor is circulated through the yarn from inside (inward flow) or outside (outward flow), ensuring uniform penetration. Temperature, pressure, and time are controlled digitally.   Applications of Sample Cone Yarn Dyeing Machine: Lab trials in dye houses R&D in dye and chemical manufacturing Shade and recipe matching Process optimization before bulk production   Benefits of Sample Cone Yarn Dyeing Machine: Cost-Effective Testing - Uses minimal dye, water, and energy for trial batches. Accurate Shade Development - Matches production dyeing conditions for reliable color matching. Quick Recipe Validation - Fast testing of dyeing recipes before bulk production. Time Saving - Rapid cycle time helps speed up R&D and approvals.   Versatile Applications - Suitable for different yarn types: cotton, polyester, blends, etc. Improved Quality Control - Identifies dyeing issues early in lab conditions.   Features of Sample Cone Yarn Dyeing Machine: Compact Design - Lab-friendly, space-saving build. Digital Controller - Precise control of temperature, time, and pressure. Reversible Flow System - Ensures uniform dyeing by alternating liquor flow. Stainless Steel Construction - Durable and corrosion-resistant. Pressure & Temperature Safety Devices - For safe high-temperature operations. Easy Loading & Unloading - Designed for quick cone placement and removal.   How to Use Sample Cone Yarn Dyeing Machine: Prepare the Yarn - Wind yarn uniformly onto dye able cones (perforated cones preferred). Load the Machine - Mount the cones on dyeing spindles and secure the lid properly. Add Dye Liquor - Fill the tank with water, dye, auxiliaries, and chemicals based on the recipe. Set Parameters - Use the digital controller to set: - Dyeing temperature - Holding time - Heating rate   - Flow direction (inward/outward)   Start Dyeing Cycle - Begin the process; the machine will heat and circulate dye liquor. Monitor the Process - Watch for pressure, temperature, and flow direction changes if applicable. Cool Down & Drain - After dyeing, allow the machine to cool. Drain the bath and rinse the yarn. Unload and Dry - Remove the cones carefully and dry them using a hydro extractor or dryer.   Safety Tips for Sample Cone Yarn Dyeing Machine: Use Heat-Resistant Gloves - Always wear gloves when handling hot parts or dye liquor. Secure the Lid properly - Ensure the lid is tightly closed before starting to avoid leaks under pressure. Avoid Overloading - Do not exceed the recommended cone or liquor load to prevent uneven dyeing or damage.   Stay Clear During Operation - Keep hands and tools away from moving or hot parts while in use. Ventilation - Operate in a well-ventilated area to avoid inhaling steam or fumes. Emergency Stop - Know the location and function of the emergency stop button.   Basic Maintenance Checklist: Daily: [ ] Clean machine interior and remove dye residue [ ] Check for any leaks or unusual noises [ ] Rinse pump and pipes with clean water   Weekly: [ ] Inspect gaskets and lid seals for wear [ ] Check electrical connections and display panel [ ] Clean and lubricate valve mechanisms   Monthly: [ ] Test temperature and pressure sensors [ ] Inspect flow direction system for proper switching [ ] Calibrate temperature control if needed     Sample Cone Yarn Dyeing Machine – Maintenance & Safety Checklist Daily Maintenance: ☐ Clean dyeing vessel and spindles ☐ Rinse piping and pump with clean water ☐ Check for leaks, noises, or unusual vibrations   Weekly Maintenance: ☐ Inspect lid gasket and seals ☐ Clean valves and filter (if present) ☐ Check control panel buttons and display ☐ Tighten any loose screws or fittings Monthly Maintenance: ☐ Test and calibrate temperature & pressure sensors ☐ Inspect and clean reversible flow system ☐ Check motor and pump for overheating or wear   Safety Checklist: ☐ Wear heat-resistant gloves & protective eyewear ☐ Secure lid tightly before starting ☐ Do not exceed load capacity ☐ Keep area ventilated during operation ☐ Know emergency stop location ☐ Let machine cool before cleaning or unloading       TECHNICAL DATA OF THE MACHINE
    • Computer system: Foshan HuaGao Chinese English computer, equipped with LG PLC.
    • Electromagnetic valve: Ningbo Jiaerling
    • Frequency converter: Use Made in China frequency converters.
    • Pump: self-made high head and large flow centrifugal water pump.
    • Main pump motor: Anhui Wannan Motor.
     
    • Master cylinder liquid level: Use 4-20mA analog signal output.
    • Level of deputy temporary worker: use foam water level gauge. (American Mike)
    • Temperature detection and display: digital temperature display instrument, dual temperature measuring probes.
    • The safety system has a triple cylinder head safety interlock mechanism, and the main cylinder is equipped with a stainless
    • steel safety valve.
    • Heat exchanger: external spacer heating.
    • Feeding system: Quantitative feeding based on the process curve.
    • Circulation system: The main pump flows internally and externally, which is automatically controlled by a computer or manually controlled by a relay.
     
    • Valves: Y valves are used for heating, stainless steel Y valves are used for single inlet and single row, and other Y valves are produced by joint ventures.
    • Temperature control: on-off temperature control, controlled by a computer, with automatic heating, cooling, and insulation functions.
    • Dyeing method: air cushion type.
    • Opening method: manual opening.
    • Surface treatment: polishing inside and outside the cylinder.
    • Cage: Each dyeing machine is equipped with butterfly blades and self-locking locks.
    • Body plate: high-quality stainless steel. (S31603)
    • Bath ratio: 1:5-1:6
     
    • Chemical material system: including heating and water adding functions, including overflow type salt melting device.
    • Overflow cleaning: The cleaning port is installed on the upper part of the cylinder port, and the bottom of the cylinder is filled with water, while the cylinder is drained for easy cleaning.
    • Commutation method: Novel "U" type commutation.
    • Random accessories: Each model comes with one set of mechanical seals, pot mouth rings, and reversing seals for the main and auxiliary pumps.
      Sample Cone Yarn Dyeing Machine

      Sample Cone Yarn Dyeing Machine

    Add to cart
    Quick view
    Fully Automatic Radio Frequency Dryer
    Fully Automatic Radio Frequency Dryer
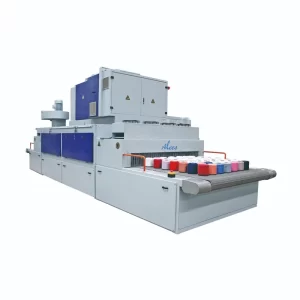
    Fully Automatic Radio Frequency Dryer

    Yarn Dyeing Machine & Equipment
    $0.00
    Rated 3.00 out of 5
    Fully Automatic Radio Frequency Dryer
    Fully Automatic Radio Frequency Dryer

    Fully Automatic Radio Frequency Dryer

      A Fully Automatic Radio Frequency (RF) Dryer is an advanced drying machine that uses radio frequency waves (similar to microwaves but at lower frequency) to dry materials like textiles, paper, wood, and food products. It delivers uniform and rapid moisture removal from within the material, rather than just the surface.   Purpose of Fully Automatic Radio Frequency Dryer: To dry moisture-sensitive materials quickly and evenly using electromagnetic energy, especially where conventional drying is slow or inconsistent.   How It Works: RF waves penetrate deep into the material. Moisture molecules absorb RF energy, generating heat internally. This causes water to evaporate from the inside out. Built-in sensors and controls automate and optimize the process.     Applications of Fully Automatic Radio Frequency Dryer: Textile drying (especially for fabrics with high GSM or special finishes) Paper and nonwoven industries Wood drying Food processing (e.g., pasta, fruits)   Benefits of Fully Automatic Radio Frequency Dryer: Fast Drying Time - RF energy dries materials from the inside out, significantly reducing drying time. Uniform Drying - Prevents surface overheating or under-drying issues common with conventional dryers. Energy Efficient - Targets moisture directly, using less energy compared to thermal dryers.   Improves Product Quality - Reduces shrinkage, deformation, and color fading, especially in textiles. Fully Automatic Operation - Programmable controls minimize manual handling and ensure consistency. Safe for Delicate Materials - Ideal for sensitive or high-value products that can't withstand high surface heat. Reduced Footprint - Compact, vertical designs save floor space in industrial setups.     Features of Fully Automatic Radio Frequency Dryer: Touchscreen Control Panel- For setting drying time, temperature, and moisture target. Auto Load/Unload System - Increases productivity with minimal labor. Moisture Sensors - Monitor and control drying to prevent over-drying. RF Power Generator - High-efficiency RF unit for stable energy output.   Cooling System Built-in cooling for temperature-sensitive materials post-drying. Safety Interlocks - Automatic shutoff if overheating or door open detected.   How to Use Fully Automatic Radio Frequency Dryer: Prepare the Material - Ensure the fabric or material is clean and evenly spread or stacked as required. Power On the Machine - Switch on the main power and wait for the system to initialize. Load the Material - Use the conveyor or auto-loader to place material inside the drying chamber.   Set Drying Parameters of Fully Automatic Radio Frequency Dryer - On the touchscreen panel, input: - Drying time - Target moisture level - RF power level - Temperature limits (if applicable)   Start the Drying Cycle - Press the start button. The RF system activates and begins drying internally. Monitor Process (Auto/Manual) - Most machines auto-adjust based on moisture sensor feedback. - You can monitor real-time temperature and drying progress on the display.   Cooling (Optional) - If enabled, the cooling cycle will activate after drying to stabilize the material. Unload Material - Use the conveyor or manual method to remove the dried product safely.   Shutdown - Turn off the system and clean the chamber if required. Maintenance Tips for Fully Automatic RF Dryer: Daily Cleaning   - Wipe down the drying chamber and conveyor to remove lint, dust, and moisture residue. Check RF Generator   - Inspect cables, connectors, and ventilation; clean RF components weekly.   Inspect Moisture Sensors - Clean sensor surfaces regularly for accurate readings. Lubricate Moving Parts - Grease conveyor rollers and motor bearings as per the maintenance schedule. Filter Maintenance - Clean or replace air filters monthly to ensure proper ventilation and cooling. Software Updates - Keep the control system firmware updated if your model supports it. Electrical Checks - Inspect wiring, switches, and interlocks for wear or overheating signs.     Safety Precautions:  Use Trained Operators Only - Ensure only qualified personnel operate and maintain the machine. Avoid Overloading - Exceeding material load limits can reduce efficiency and risk damage. Keep Away from RF Area during Operation - Follow RF safety guidelines—do not tamper with shielding or interlocks. Emergency Stop - Know the location and function of the emergency stop switch. Allow Cooling Before Maintenance Let the system cool completely before touching internal components.   Daily Maintenance Checklist – Fully Automatic RF Dryer: [ ] Wipe inside drying chamber [ ] Remove lint/debris from conveyor [ ] Check for unusual noise or vibration [ ] Verify sensor readings on display [ ] Ensure air vents are unobstructed [ ] Inspect emergency stop function   Weekly Maintenance Checklist: [ ] Clean moisture sensors with soft cloth [ ] Inspect RF generator cables and connections [ ] Check conveyor belt tension and alignment [ ] Lubricate moving mechanical parts [ ] Test auto-stop and safety interlocks [ ] Review system logs (if digital system is used)     Monthly Maintenance Checklist: [ ] Clean or replace air and dust filters [ ] Inspect electrical wiring and panel for wear [ ] Tighten loose bolts, screws, or fasteners [ ] Calibrate moisture sensors if needed [ ] Verify RF power output levels [ ] Back up control panel settings and software (if applicable)  
    Fully Automatic Radio Frequency Dryer

    Fully Automatic Radio Frequency Dryer

     
    Add to cart
    Quick view
    Fabric Stiffness Tester
    Fabric Stiffness Tester

    Fabric Stiffness Tester

    Physical Testing & Fabric Testing
    $0.00

    Fabric Stiffness Tester

    Fabric Stiffness Tester

    Fabric Stiffness Tester

      Fabric Stiffness Tester is a lab instrument used to measure the stiffness or flexural rigidity of fabric materials. It evaluates how resistant a fabric is to bending, which influences its drape, comfort, and handling characteristics. Purpose of Fabric Stiffness Tester: To determine the stiffness of textiles by measuring the bending length and calculating flexural rigidity, often using methods like the Cantilever Test (as per ASTM D1388 or ISO 9073-7).   Working Principle of Fabric Stiffness Tester: A fabric strip is slid over a horizontal platform until its free end bends under its own weight to a specific angle (usually 41.5°). The length at which this occurs is used to calculate bending length and stiffness.   Main Components of Fabric Stiffness Tester: - Test Platform: Flat surface for sample movement. - Graduated Scale: Measures the overhanging length of fabric. - Angle Indicator: Guides the measurement based on standard deflection angle. - Fabric Clamp or Guide: Helps place and move the sample smoothly.   Applications of Fabric Stiffness Tester: - Apparel fabrics (e.g., for comfort and drape analysis) - Technical textiles (e.g., automotive, medical fabrics) - Paper, nonwovens, and films Benefits of Fabric Stiffness Tester:
    1. Accurate Measurement of Flexibility - Provides reliable data on fabric stiffness, essential for quality control and product development.
    2. Improves Product Comfort - Helps assess how soft or rigid a fabric will feel in clothing or furnishings.
    3. Supports Material Selection - Aids designers and engineers in choosing the right fabric for specific applications based on stiffness.
     
    1. Quality Assurance - Detects fabric inconsistencies or defects that affect handling or drape.
    2. Standards Compliance - Enables testing as per international standards like ASTM D1388 and ISO 9073-7 for global product approval.
    3. Quick and Simple Operation - Delivers fast results with minimal operator training or preparation.
     
    1. Applicable to Multiple Materials - Suitable for woven, nonwoven, knitted fabrics, paper, and films.
    2. Enhances R&D Accuracy - Supports consistent material testing during product innovation and textile finishing.
      Features of Fabric Stiffness Tester:
    1. Graduated Measurement Scale - Precise scale to measure overhang length for accurate stiffness calculation.
    2. Flat Test Platform - Smooth, level surface ensures consistent and reliable fabric movement.
    3. Standard Deflection Angle Guide - Built-in 41.5° angle reference for consistent stiffness testing (per ASTM/ISO).
    4. Manual or Motorized Models - Available in both types for simple or automated operation depending on lab needs.
    5. Compact Design - Space-saving unit ideal for textile labs and quality control rooms.
     
    1. Sample Holder or Clamp - Ensures correct alignment and smooth feeding of fabric strips during testing.
    2. Durable Construction - Made of corrosion-resistant materials like stainless steel or aluminum for long-term use.
    3. Compliance with Standards - Supports methods like ASTM D1388, ISO 9073-7 for stiffness testing of fabrics.
     
    1. Lightweight and Portable - Easy to move and use in various lab settings.
    2. Low Maintenance - Simple mechanical parts require minimal servicing.
      How to Use Fabric Stiffness Tester (Cantilever Method):
    1. Prepare the Sample - Cut the fabric into a rectangular strip (e.g., 25 mm × 200 mm), as per standard.
    2. Place the Sample - Lay the fabric strip flat on the test platform with one end aligned at the zero mark.
    3. Slide the Fabric - Gently push the fabric forward so it slowly overhangs the platform.
     
    1. Watch for Deflection - Stop sliding when the free end of the fabric bends down to the reference angle (typically 41.5°).
    2. Read the Bending Length - Measure the overhang distance from the scale. This is the bending length (C).
    3. Calculate Flexural Rigidity
    - Use the formula: G = W × C³ Where: - G = Flexural rigidity (mg·cm) - W = Fabric weight per unit area (mg/cm²) - C = Bending length (cm)  
    1. Repeat for Accuracy - Test both warp and weft directions and average the results for better accuracy.
    Tip: Always perform the test in a controlled environment (standard temperature and humidity) for reliable results.         Fabric Stiffness Tester Scope of application It is used to measure the stiffness of cotton, wool, silk, linen, chemical fibers and other woven fabrics, knitted fabrics, general nonwovens, coated fabrics, etc. It is also suitable for measuring the stiffness of paper, leather, film and other flexible materials. Relevant Standards GB/T 18318, ASTM D 1388, IS09073-7, BS EN22313 etc. [Instrument Characteristics] 1. Infrared photoelectric invisible inclined plane detection system replaces the traditional tangible inclined plane, realizes non-contact detection, and overcomes the problem that the measurement accuracy is affected by the sample torsion lifted by the inclined plane. 2. The inclination adjustable mechanism of instrument measurement to meet different test requirements. 3. Stepping motor drive, accurate measurement, smooth operation; 4. The color touch screen display can show the extended length, bending length, bending stiffness of the sample, the warp average, the weft average and the total average of the above values respectively. 5. Printing of Chinese report forms for thermal printers. Technical parameters 1. Test methods: The two method (A method: Weft test, B method: Forward and backward test) 2. Measurement angle:41.5 degree, 43 degree and 45 degree adjustable 3. Extend the length range:5-220 mm (special requirements can be made at the time of ordering) 4. Length resolution:0.01mm 5. Measurement accuracy:±0.1mm 6. Specimen specifications:250×25mm 7. Work platform specifications:250×50mm 8. Specification of sample pressing plate:250×25mm 9. Pushing speed of press plate:3 mm/s; 4 mm/s; 5 mm/s 10. Display output: Touch screen display 11. Print Output: Chinese Report 12. Data Processing Volume: A total of 15 groups, each group less than 20 trials 13. Printer: Thermal printer 14, power supply:AC220V 50Hz 15. Host volume:570mm×360mm×490mm 16. Host weight:20kg
    Add to cart
    Quick view
    GSM Cutter with Balance
    GSM Cutter with Balance

    GSM Cutter with Balance

    Physical Testing & Fabric Testing
    $0.00
    GSM Cutter with Balance
    GSM Cutter with Balance

    GSM Cutter with Balance

      A GSM Cutter with Balance is a lab toolset used to determine the GSM (Grams per Square Meter) of fabrics, which indicates the fabric's weight and density. The kit includes a GSM round cutter and a precision weighing balance.   Purpose GSM Cutter with Balance: To accurately measure the weight per unit area of textile, paper, or nonwoven samples for quality control and product classification.   How It Works: GSM Cutter: - A circular blade cuts a fixed area (usually 100 cm²) from the fabric. Weighing Balance: - The cut piece is weighed, and the result is multiplied by 100 to get GSM. GSM = Weight (in grams) × 100   Applications of GSM Cutter with Balance: Textile and garment industry Nonwovens and paper manufacturing QC labs and R&D   Benefits of GSM Cutter with Balance: Accurate GSM Measurement - Ensures precise fabric weight analysis for quality control. Quick and Simple Operation - Allows fast sampling and GSM calculation in minutes. No Need for Area Calculation - Cutter gives a fixed area (usually 100 cm²), simplifying the formula. Improves Product Consistency - Helps maintain uniform fabric weight across batches.   Portable and User-Friendly - Compact design makes it ideal for labs and production floors. Cost-Effective Tool - Offers high accuracy without the need for expensive equipment. Versatile Use - Suitable for fabrics, paper, leather, films, and more.   Features of GSM Cutter with Balance: Rotary Blade Cutter - Stainless steel blades for clean and accurate circular cuts. Fixed Sample Area - Typically 100 cm², eliminating the need for area measurement. Precision Digital Balance   - Measures in grams with high resolution (0.01 g or better).   Rubber Cutting Pad - Protects blade and provides a smooth surface for cutting. Safety Lock - Prevents accidental blade exposure. Compact & Durable Design- Long-lasting, lab-friendly construction.   How to Use GSM Cutter with Balance: Prepare the Fabric Sample- Place the fabric on the rubber cutting pad. Cut the Sample - Hold the GSM cutter firmly and rotate it to cut a 100 cm² circular sample. Turn on the Balance - Power up the digital weighing scale and tare it to zero.   Weigh the Sample - Place the cut fabric piece on the balance and note the weight in grams. Calculate GSM - Multiply the weight by 100 to get GSM.  - GSM = Sample weight (g) × 100 Record the Result- Log the GSM value for quality control or analysis. Clean and Store - Wipe the cutter and balance, and store them safely after use.   GSM Calculation Formula: GSM (g/m²) = (Weight of Sample in grams) × 100 When using a GSM cutter (100 cm²): The cutter gives a fixed area of 100 cm², which is 1/100th of a square meter. So, multiplying the sample's weight by 100 gives the GSM directly. Example: If the sample weighs 1.75 g, then: GSM = 1.75 × 100 = 175 g/m²   Balance Calibration Guide (Manual Calibration): Warm-Up   - Turn on the balance and let it warm up for 10–15 minutes if required. Level the Balance   - Use the built-in bubble level and adjust leveling feet until the bubble is centered. Tare the Balance   - Press the “TARE” or “ZERO” button to reset the display to 0.000 g.   Enter Calibration Mode   - Press the “CAL” or “MODE” button (depends on the model). - Some balances may require holding the button for a few seconds. Use Standard Weight   - When prompted, place a certified calibration weight (e.g., 100g, 200g) on the pan.   - Wait for the display to stabilize.   Confirm Calibration   - The balance will beep or show “PASS” once successful.   - Remove the weight when done. Recheck Zero  - Ensure the display returns to 0.000 g after removing the weight.   Tips: Use certified weights for accuracy (Class F1 or E2). Calibrate in a draft-free, vibration-free environment. Calibrate daily or before critical measurements.     GSM Cutter  & Balance GSM Cutter Brand: Schroder Origin: Germany Capacity: 100 Sq.cm Supplied with 1 pcs cutting Pad and 04 pcs cutting blade. Digital Electronics balance Precision GSM Weight Balance 0.01g to 200g Model: GSM200 Brand: Schroder Origin: Germany
    Add to cart
    Quick view
    Perspiration Tester
    Perspiration Tester

    Perspiration Tester

    Lab Equipment & Instrument
    $0.00

    Perspiration Tester

    Perspiration Tester

    Perspiration Tester

      A Perspiration Tester is a lab device used to evaluate the colorfastness of textiles to artificial perspiration (sweat). It simulates the effects of human sweat—both acidic and alkaline—on dyed or printed fabrics under controlled temperature and pressure.   Purpose of Perspiration Tester: - To test how fabrics react to body sweat and determine whether dyes bleed, fade, or transfer onto adjacent materials.   Working Principle:
    1. Fabric samples are treated with synthetic perspiration solution (acidic or alkaline).
    2. They are sandwiched with adjacent fabric and placed between glass or acrylic plates.
    3. The assembly is loaded into the tester and pressed under specific pressure.
    4. it’s then incubated at 37°C (body temperature) for a fixed time (typically 4 or 16 hours).
    5. Afterward, color change and staining are evaluated using a gray scale.
      Applications of Perspiration Tester: - Garment and sportswear testing - Quality control in textile processing - Compliance with standards like ISO 105 E04, AATCC 15   Benefits of Perspiration Tester:
    1. Accurate Sweat Simulation - Mimics real-life effects of acidic and alkaline perspiration on fabrics.
    2. Improves Product Quality - Ensures textiles retain color and don’t bleed or stain when worn.
    3. Supports Standard Compliance - Follows ISO and AATCC test standards for global market approval.
    4. Protects Brand Reputation- Reduces customer complaints due to dye transfer or fading.
     
    1. Simple and Repeatable- Provides consistent pressure and conditions for reliable results.
    2. Multi-Sample Testing- Tests multiple specimens at once, saving time in labs.
    3. Durable and Low Maintenance- Robust frame with minimal moving parts makes it long-lasting and easy to care for.
      Features of Perspiration Tester:
    1. Stainless Steel Frame - Corrosion-resistant body for durability and long-term use.
    2. Multi-Sample Capacity - Can hold up to 20 or more specimens for batch testing.
    3. Standardized Loading Weight- Applies uniform pressure (usually 12.5 kPa) across all samples.
    4. Removable Plates - Glass or acrylic plates ensure even contact and easy cleaning.
     
    1. Compact Design- Space-saving, bench-top model ideal for lab environments.
    2. Complies with Test Standards - Meets ISO 105 E04, AATCC 15, and related perspiration fastness standards.
    3. Ease of Operation - Simple loading, unloading, and incubation process.
    4. High-Temperature Resistance - Can be used inside incubators at 37°C or ovens as required.
      How to Use a Perspiration Tester:
    1. Prepare the Test Solution - Mix artificial acidic or alkaline perspiration as per standard (ISO or AATCC).
    2. Cut the Fabric Samples - Cut both the test fabric and adjacent white fabric (usually cotton) to standard size.
    3. Soak the Samples - Immerse the fabric sandwich (test + adjacent) in the test solution for 30 minutes.
    4. Remove Excess Liquid - Gently squeeze or blot to remove extra moisture—do not dry.
     
    1. Load in the Tester- Place each sandwich between glass or acrylic separator plates in the tester.
    2. Apply Pressure - Tighten the top plate or place the standard weight on top to apply uniform pressure.
    3. Incubate - Keep the loaded tester in an oven or incubator at 37°C for 4–16 hours (depending on the method).
    1. Accurate Sweat Simulation - Mimics real-life effects of acidic and alkaline perspiration on fabrics.
    2. Improves Product Quality - Ensures textiles retain color and don’t bleed or stain when worn.
    3. Supports Standard Compliance - Follows ISO and AATCC test standards for global market approval.
    4. Protects Brand Reputation- Reduces customer complaints due to dye transfer or fading.
     
    1. Simple and Repeatable- Provides consistent pressure and conditions for reliable results.
    2. Multi-Sample Testing- Tests multiple specimens at once, saving time in labs.
    3. Durable and Low Maintenance- Robust frame with minimal moving parts makes it long-lasting and easy to care for.
    1. Dry and Evaluate - Remove, air dry the samples, then assess color change and staining using a gray scale.
    2. Fabric samples are treated with synthetic perspiration solution (acidic or alkaline).
    3. They are sandwiched with adjacent fabric and placed between glass or acrylic plates.
    4. The assembly is loaded into the tester and pressed under specific pressure.
    5. it’s then incubated at 37°C (body temperature) for a fixed time (typically 4 or 16 hours).
    6. Afterward, color change and staining are evaluated using a gray scale.
      Perspiration Tester

      Perspiration Tester

    Add to cart
    Quick view
    Card Winding Machine
    Card Winding Machine
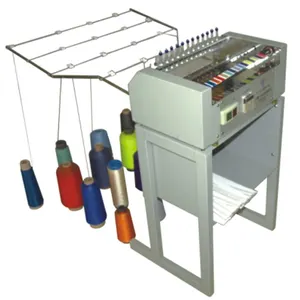
    Card winding machine

    Yarn Dyeing Machine & Equipment
    $0.00

    Card Winding Machine

    Card Winding Machine

    Card Winding Machine

      A Card Winding Machine is used in textile processing to wind yarn from hanks, bobbins, or cones onto cards or perforated boards, typically for dyeing or sampling purposes. It ensures uniform yarn distribution and tension, crucial for consistent dye penetration.   Purpose Card Winding Machine: To wind yarn onto flat cards or holders for lab dyeing, color matching, or textile sample display.   Applications Card Winding Machine: Yarn dyeing labs R&D and sample development Display or swatch card preparation Yarn shade catalog creation   Working Principle Card Winding Machine: The yarn is drawn from a source (cone or bobbin) and wound evenly onto a card. The machine controls the winding speed, spacing, and tension to avoid tangles or breaks.   Benefits of Card Winding Machine: Uniform Yarn Placement- Ensures even winding for consistent dyeing and presentation. Ideal for Sampling - Perfect for creating lab dye samples, color cards, and swatches. Time-Saving - Automates a manual process, increasing efficiency.   Low Yarn Waste - Allows controlled use of small yarn amounts for trials. Supports Various Yarn Types - Can handle cotton, polyester, blends, and fancy yarns.   Features of Card Winding Machine: Adjustable Winding Tension - Maintains constant tension to prevent yarn breakage. Speed Control - Variable winding speed for different yarn types and applications. Card Size Compatibility - Supports multiple card sizes and formats. Precision Traverse System- Ensures neat layer formation without overlapping. Compact Design - Table-top or stand-mounted; suitable for labs or sample rooms.   How to Use a Card Winding Machine: Prepare the Yarn Source - Place the yarn cone or bobbin on the yarn holder. - Thread the yarn through the tensioner and guide system. Insert the Card - Mount the empty card or board onto the winding platform/clamp securely.   Set Winding Parameters- Adjust winding speed, tension, and traverse width based on yarn type and card size. Start the Machine - Turn on the power and begin winding; monitor the yarn flow and tension. Monitor the Winding - Ensure yarn is winding evenly and smoothly across the card.   Stop the Machine - Once the desired coverage or length is reached, stop the machine. Remove the Card - Carefully take out the wound card and trim any loose yarn ends. Label or Store - Label for testing or sample purposes as needed.   Maintenance Tips for Card Winding Machine: Daily: ☐ Clean yarn guides and tensioners ☐ Wipe down the machine to remove dust or lint ☐ Check for smooth yarn feeding   Weekly: ☐ Lubricate moving parts if required ☐ Inspect tension device and traverse system for wear ☐ Test speed control and motor function   Monthly: ☐ Tighten all screws, knobs, and clamps ☐ Inspect electrical parts and connections ☐ Clean internal components if accessible   Safety Tips: ☐ Keep fingers away from moving yarn and parts during operation ☐ Do not exceed machine speed limits for delicate yarns ☐ Ensure proper grounding of the machine ☐ Always power off before cleaning or adjusting settings ☐ Wear snug clothing to avoid yarn entanglement  
    Product description
    Color Card Winding Machine applies to a number of brass wire, yarn,
    while according to technological requirements on winding type with quantitative,
    bound, for yarn user optional color, contrast and testing purposes.
    It is a professional new product designed to give a variety of sample cards.
    Specification
    Model FH-25
    Color card winding machine
    Voltage 220V 50HZ one phase
    Color White
    Dimensions L1100xW600xH800(mm)
    Paper color card size According to custom-made Piece Within 25 pieces
    Power 15w
    Weight 30kgs
    We could make special type according to the customers request.
    Card Winding Machine

    Card Winding Machine

    Add to cart
    Quick view
    Thread Cone Winding Machine
    Thread Cone Winding Machine

    Thread Cone Winding Machine

    Yarn Dyeing Machine & Equipment
    $0.00
    Thread Cone Winding Machine
    Thread Cone Winding Machine

    Thread Cone Winding Machine

      A Thread Cone Winding Machine is a textile winding device used to wind sewing thread or yarn uniformly onto cones. It prepares thread packages for use in sewing, embroidery, or further textile processing.   Purpose of Thread Cone Winding Machine: - Converts yarn from hanks, bobbins, or spools into cone form for better handling and usage in production.   Key Functions of Thread Cone Winding Machine: - Winding with controlled tension and speed - Forming cones with precise shape and density - Ensuring smooth yarn feeding without breaks   Applications of Thread Cone Winding Machine: - Sewing thread manufacturing - Embroidery thread preparation - Yarn rewinding in textile mills - Packaging of dyed yarns   Benefits of Thread Cone Winding Machine:
    1. Efficient Yarn Packaging - Speeds up the process of preparing thread for sewing or embroidery.
    2. Uniform Cone Formation - Ensures consistent cone shape and tension for smooth downstream use.
    3. Reduces Thread Breakage - Controlled tension and smooth guiding minimize thread damage.
    4. Time & Labor saving- Automates winding, reducing manual effort and increasing productivity.
     
    1. Improves Thread Quality - Removes loose fibers and irregularities during winding.
    2. Supports Multiple Yarn Types - Compatible with cotton, polyester, silk, and blended threads.
      Features of Thread Cone Winding Machine:
    1. Adjustable Winding Speed - Variable speed control for different thread types.
    2. Thread Tension Control System - Maintains consistent tension for smooth winding.
    3. Auto Stop Mechanism - Stops automatically when cone is full or thread breaks.
    4. Multiple Spindle Options - Single or multi-spindle designs for higher output.
     
    1. Traverse Mechanism - Ensures even layering of thread across the cone.
    2. Compact & Durable Build - Space-saving, long-lasting structure for industrial use.
      How to Use Thread Cone Winding Machine:
    1. Set Up the Machine - Turn on the power and check all safety covers and switches.
    2. Load the Yarn Source - Place the yarn hank, bobbin, or spool on the supply holder.
    3. Mount the Empty Cone - Fix an empty cone securely onto the spindle.
     
    1. Thread the Machine - Guide the thread through tension disks, guides, and eyelets as per the machine path.
    2. Adjust Settings - Set the desired winding speed and tension based on thread type.
    3. Start the Machine - Press the start button; the thread begins winding onto the cone.
    4. Monitor the Process - Ensure even winding and tension; adjust traverse if needed.
     
    1. Auto-Stop or Manual Stop - The machine will stop automatically if the cone is full or thread breaks.
    - You can also stop it manually once the cone reaches the desired size.
    1. Remove the Cone - Carefully remove the finished cone and load a new one if needed.
    2. Clean and Shut Down - Turn off the machine and clean any thread residue after use.
      Safety Tips for Thread Cone Winding Machine:
    1. Always Use Safety Guards - Ensure all protective covers are in place before operation.
    2. Avoid Loose Clothing - Prevent thread or moving parts from catching clothes or jewelry.
    3. Power Off Before Maintenance - Always turn off the machine before threading, cleaning, or adjustments.
     
    1. Check Thread Path - Use correct threading to prevent sudden breakage or tangling.
    2. Don’t Overload the Cone - Stop the machine once the cone is adequately filled to avoid jamming.
    3. Keep Area Clean - Remove lint and thread waste regularly to prevent fire hazards or machine faults.
      Basic Maintenance Steps:
    1. Daily Cleaning - Wipe dust and thread particles from guides, spindles, and tension parts.
    2. Lubrication - Oil moving parts (as per manual) weekly to reduce wear.
    3. Check Tension Settings - Inspect and calibrate tension mechanisms for consistent winding.
    4. Inspect Belts and Motors - Look for wear or looseness in drive belts and check motor sound regularly.
    5. Replace Worn Parts Promptly - Replace traverse mechanisms, springs, or tension disks if worn out.
        Lab Winding Machine is used in lab spinning procedure and lab cop dyeing. It is suitable for education, R&D, widely used in lab.Follows are features of lab cone winder: It can wind the spun yarn from bobbin plastic tube to cone tube. It is suitable for soft winding & hard winding. It supports uniform control for all the spindles and individual control for each spindle. The uniform control is through touch panel and the individual control is through microcontroller. Driven by brushless DC motor; The winding speed can be adjusted; Each spindle has auto-stop function when yarn breaks; Mini-type design, easy to clean, set and maintain.   Application Of Lab Cone Winding Machine Lab cone winding machine is used to twine yarn to the line pipe. It is very helpful for education and research institute etc. Particularly, for yarn dyeing, if the bobbin yarn is purchased from market, customer must use loose winding machine to wind the yarn. After the yarn become loose, it can be used for dyeing; after dyeing, if customer want to sell the bobbin yarn to market, tight winding machine must be used to make the bobbin yarn tight, then it can be sold to market. Our lab cone winding machine with normal four spindles having two positions for loose winding and the other two positions for tight winding is essential if customer need to wind the yarn.
    Thread Cone Winding Machine

    Thread Cone Winding Machine

    If you need more information about Cotton Cone Winding Machine ,please contact us.
    Add to cart
    Quick view
    • Address
      • House 05, Road 3/A, Sector 09, Uttara, Dhaka.
    • Phone
      • 01713741546, 01974741546, 01714634452, 01838488804
    • Email
      • maamtexbd@gmail.com, info.maamtex@gmail.com, mamun@maamtexbd.com, info@maamtexbd.com
    • USEFUL LINKS
      • Privacy Policy
      • Terms & Conditions
    • USEFUL LINKS
      • Home
      • Contact Us
      • About Us

    SOCIAL MEDIA:

    Copyright Reserved by Maamtexbd 2024 | Developed by Systemeye.net.
    • Menu
    • Categories
    • Electronics
    • Lab Scientific Item
    • Home
    • Products
      • Dyeing Lab Machine
      • Physical Testing & Fabric Testing Machine
      • Lab Equipment & Instrument
      • Wet & Dry Process Instrument
      • Yarn Dyeing Machine-Equipment
      • Washing-Drying Machine
    • About us
    • Contact us
    Shopping cart
    Close
    Chat Now