Maamtex bd | Professional distributor importer supplier & indenter
Professional distributor, importer, supplier & indenter
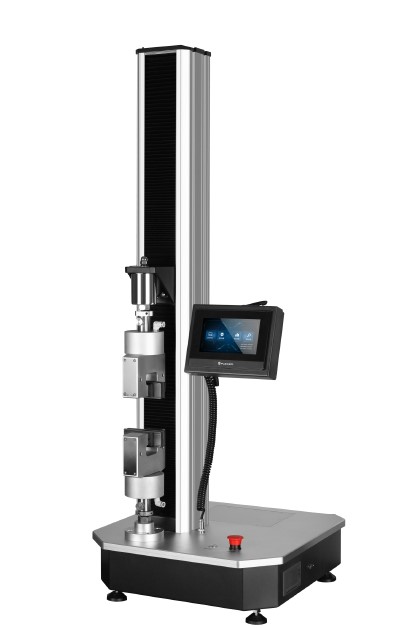
Bursting strength tester
Bursting strength tester

true burst
- Available with automatic test strip feeder Measurements are simple to make with the Mullen type Bursting Strength Tester. Fast automatic measurements Measurement starts automatically once a test piece has been placed in the measuring gap. The clamping foot descends, and a bursting strength measurement is made.
- Bursting pressure can reach up to 1.2MPa 5. The maximum burst and expansion degree can reach 70mm. 6. Strengthen the lighting system on the test surface. 7. The main aerodynamic force helps to clamp the sample system. 8. A variety of test areas are available, and the switching is easy.
- A variety of unit conversions between Chinese and English. 10. Reliable anti-pinch safety protection design. [Technical parameter]: 1. Test range: (0~1)Mpa (the range above 1Mpa needs to be customized) 2. The minimum graduation value: 0.0001Mpa 3. Pressurization mode: direct pressurization, timing pressurization, and expansion degree pressurization.
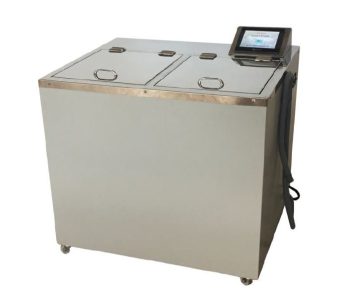
Color fastness to washing machine
COLOR FASTNESS TO WASHING MACHINE
Color fastness to washing machine refers to a fabric’s resistance to fading or bleeding when subjected to washing processes. This test measures how well the dye or colorant stays on the fabric when exposed to water, detergent, heat, and mechanical action—conditions typically found in household or industrial washing machines. Purpose of Color fastness to washing machine - To evaluate the durability of dyed or printed textiles during laundering.- Essential for determining fabric quality and suitability for end-use (e.g., clothing, upholstery). Test Method Usually based on international standards such as: - ISO 105-C06 - AATCC 61- IS 3361- AATCC 28/61/132/151/190, BS 1006 C01-C05, ISO 105 Part C01-C06/C08/D01, M&S C4/C5/C10A/P3B, FTMS 191-5610, NEXT TM2/3/5, GB/T 5711/3921 Procedure (Simplified)1. Sample Preparation: - A fabric specimen is stitched with undyed adjacent fabrics (usually cotton or wool).2. Washing: - Washed in a laboratory washing machine using standard detergent, water, and specific temperature/time settings (e.g., 40°C for 30 minutes).- Drying: - After washing, the sample is dried, typically air-dried or tumble-dried.4. Evaluation: - Color change and staining on adjacent fabrics are assessed using a gray scale (1 to 5 scale; 5 = no change, 1 = severe change). - Results may also be evaluated visually under standard lighting.
- Supports Brand Reputation - Reliable color fastness contributes to a premium product image and consistent performance.4. Compliance with Standards - Meets industry requirements (e.g., ISO, AATCC), crucial for export, certifications, and regulatory compliance.
- Improves Process Control- Helps identify dyeing or finishing process issues early, leading to better production control.6. Reduces Rework and Waste - Minimizes production losses due to color defects after washing.
- Essential for Specific End Uses - Critical for items subject to frequent washing (e.g., uniforms, baby clothes, hospital linens).8. Supports Material Selection - Guides textile manufacturers in choosing appropriate dyes and fabrics for specific applications.
- Assessment of Color Change and Staining- Evaluates both the fabric’s color retention and the staining of adjacent fabrics using grey scales (1 to 5 rating).4. Multi-Fiber Fabric Use - Tests include fabric stitched with adjacent test strips (cotton, wool, etc.) to assess color bleeding onto different fibers.
- Multiple Test Options - Includes domestic, accelerated, and industrial washing conditions depending on the end-use of the fabric.6. Temperature and Time Control - Precise control over wash temperature (e.g., 40°C, 60°C) and duration (e.g., 30 mins), simulating specific washing cycles.
- Detergent and Additive Use - Uses standardized detergent formulations with/without optical brighteners, and sometimes alkaline or oxidizing agents.8. Reproducible and Quantifiable - Provides repeatable results that can be objectively measured and documented.
- Applicability to All Textile Types - Suitable for dyed, printed, or coated fabrics across various fibers (cotton, polyester, blends, etc.).
- Rate of temperature rise: Maximum speed for 2ºC/min 7. Internal materials: Imported Stainless Steel 316L 8. Control panel: Touch screen
- Rack point control function helps to replace containers easily 10. Safety device: Safety door switch, over-temperature protector and dry heating protector 11. Heating media: Distilled water 12. Power supply: AC220V 50Hz 30A
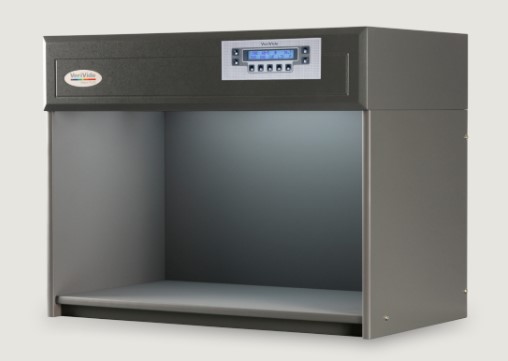
Color Matching Cabinet-Light Box
Color Matching Cabinet-Light Box

Color Matching Cabinet-Light Box
Controller For IR Dyeing Machine
Controller For IR Dyeing Machine
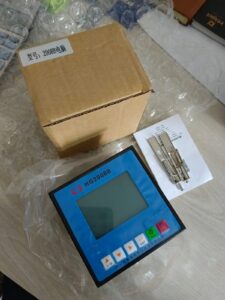
IR Dyeing machine controller
- Temperature Control:- Precisely regulates the infrared heaters to maintain uniform temperature across the dye bath. - Supports customizable heating curves (ramp-up, hold, and cool-down phases).
- Programmable Logic Control (PLC): - Allows operators to set and automate dyeing programs for different fabrics and dye types. - Supports multiple recipes or programs for different batches.
- Real-Time Monitoring and Feedback: - Monitors parameters like temperature, fabric rotation, bath circulation, and timing. - Provides real-time data and alarms for deviations.
- Touchscreen Interface / HMI (Human Machine Interface): - User-friendly interface for configuring and monitoring processes. - Multi-language support and graphical display of process curves.
- Data Logging and Traceability: - Records process data for quality control and traceability.
- Energy Efficiency Optimization: - Manages IR heater output to reduce energy usage. - Often includes features for auto shut-off or idle mode.
- Safety Features: - Includes emergency stop, over-temperature protection, and fault detection systems. 8. Connectivity: - Modern controllers may support Ethernet, Modbus, or other industrial communication protocols for integration into factory automation systems.
- Improved Dyeing Accuracy and Consistency
- Enhanced Energy Efficiency- Infrared heating is more energy-efficient than traditional heating methods.- The controller optimizes energy use by adjusting the IR output based on process needs, reducing overall energy consumption.
- Time Savings- Faster heating and cooling cycles due to infrared technology.- Automated processes reduce manual intervention and cycle times. 4. Better Process Control- Programmable dyeing cycles and precise control over each stage (heating, dyeing, rinsing, cooling).- Real-time monitoring and adjustments improve reliability.
- Reduced Water and Chemical Usage- More efficient dye penetration and fixation mean less water and fewer chemicals are needed for reprocessing or corrections.6. Lower Operational Costs
- Enhanced Safety Built-in alarms, emergency shut-off and automatic fault detection enhance operational safety.8. Data Logging and Traceability- Ability to record and review dyeing process data helps in quality control and troubleshooting.- Facilitates compliance with industry standards and audits.
- User-Friendly Operation- Modern touchscreen interfaces make it easier for operators to manage and monitor processes.- Multilingual support and visual feedback enhance usability.
Counting Balance-Weighing Scale
Counting Balance-Weighing Scale
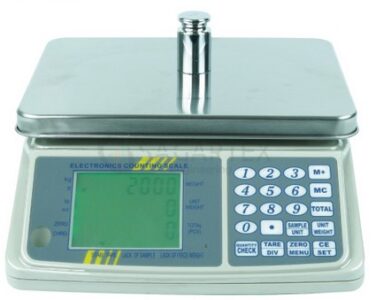
Counting Balance-Weighing Scale

Counting Balance-Weighing Scale
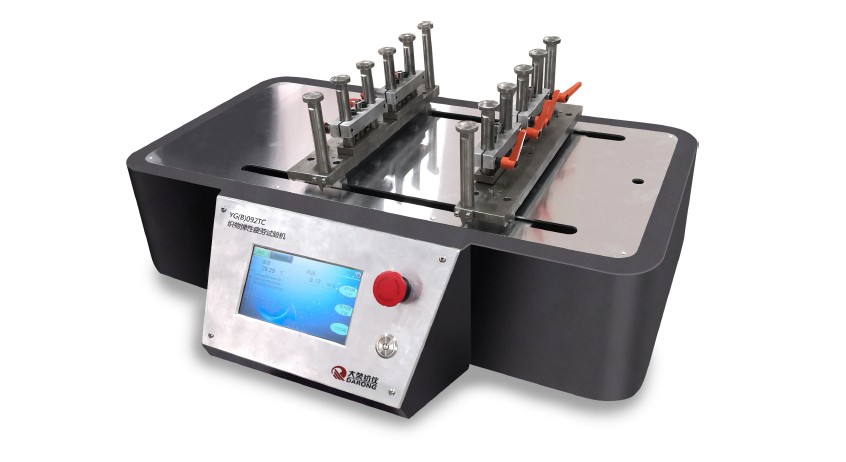
Fatigue tester for Elastic fabric
Fatigue Tester for Elastic Fabric

Fatigue tester for Elastic fabric
- Adjustable Stretch Range - Allows setting stretch levels (e.g., 0–100%) to simulate real-life fabric use.
- High-Cycle Capability - Supports up to millions of stretch-relax cycles for long-term fatigue analysis.
- Touch Screen Control - 7-inch color display for easy setup, monitoring, and data entry.
- Servo Motor Driven - Ensures precise and smooth linear motion during testing.
- Customizable Speed - Adjustable test speed (e.g., up to 40 cycles per minute) based on test requirements.
- Multi-Sample Testing - Some models allow testing multiple specimens simultaneously.
- Cycle Counter with Alarm - Built-in counter with programmable stop after preset cycles and auto-alert feature.
- Durable Construction - Robust metal frame suitable for continuous testing in lab environments.
- Standard Compliance - Designed to follow standards like GB/T 37635 for elastic fabric testing.
- Prepare the Sample
- Mount the Sample - Secure both ends of the fabric in the upper and lower clamps.
- Set Test Parameters
- Start the Test - Press start on the touch screen interface. - The machine will cyclically stretch and release the sample.
- Monitor Progress - Observe operation or let it run automatically.
- Remove and inspect - Take out the fabric and measure elongation, recovery, or visual defects.
- Record and Compare Results - Compare with initial measurements or standard performance criteria.

Fatigue tester for Elastic fabric
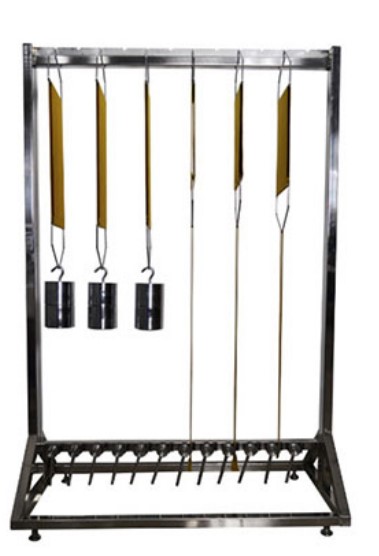
Stretch Recovery Tester Static Method
Stretch Recovery Tester Static Method

Stretch Recovery Tester
- A sample is stretched to a predetermined extension or force.
- The stretch is maintained for a set period.
- After removing the load, the recovery (return to original length) is measured after a fixed time.
- The fabric sample is clamped and stretched to a specific length or force.
- It’s held for a fixed duration (e.g., 1–5 minutes).
- The tension is released, and the sample is allowed to recover.
- The recovered length is measured after a set time.


Stretch Recovery Tester
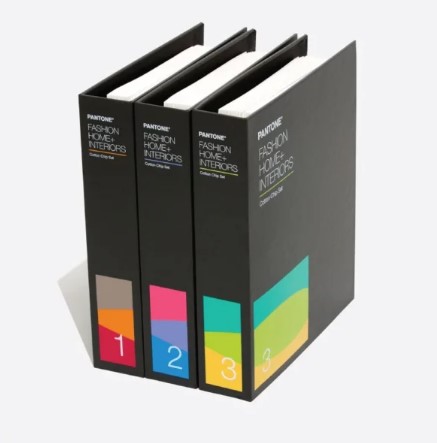
Pantone book
Pantone Book

Pantone Book
- Formula Guide (Solid Coated & Uncoated) – For spot color printing.
- Color Bridge – Shows Pantone spot colors alongside CMYK equivalents.
- Pantone Fashion, Home + Interiors (FHI) – For textiles, soft goods, and home decor.
- Pantone CMYK and Pastels & Neons Guides – For process printing and special effect colors.
- Formula Guide (Solid Coated & Uncoated)
- Color Bridge Guide (Coated & Uncoated)
- CMYK Guide (Coated & Uncoated)
- Pastels & Neons Guide
- Metallics Guide
- FHI Color Guide (TPG – Paper)
- FHI Cotton Passport & Cotton Planner (TCX – Textile)
- FHI Polyester Swatch Book
- Pantone SkinTone Guide
- Pantone Plastic Standard Chips

Pantone Book
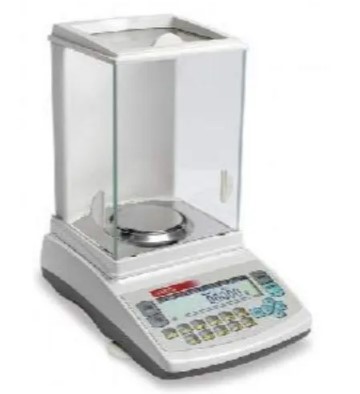
Digital precision balance
digital precision balance
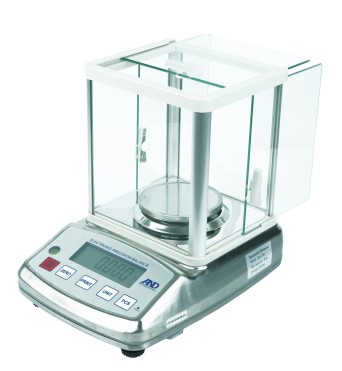
2/3/4/5 Digit Digital precision Balance
digital precision balance is a weight balance machine. It’s used to Low capacity balance. digital precision balance play an important role to accurate measurement. Digital precision balance is used to check weight paper, jewelry etc. It shows accurate result. We have the best collection of digital precision balance. MAAM TEX IS the best supplier of Precision Balance in Bangladesh
A Digital Precision Balance is a high-accuracy electronic weighing device used in laboratories, industries, and educational institutions for measuring mass with a high degree of precision. It is essential for tasks that require meticulous weight measurements, such as chemical analysis, formulation, and quality control. Key Features:- High Accuracy & Precision: - Typically offers readability from 0.1 g to 0.001 g (or even finer). - Ideal for weighing small amounts of material where accuracy is crucial.
- Digital Display: - Large, backlit LCD or LED display for easy reading. - Some models include touch screen interfaces.
- Tarring Function: - Allows you to subtract the weight of a container or packaging to get the net weight.
- Calibration: - Internal or external calibration to maintain accuracy over time. - Some advanced models have auto-calibration features.
- Weighing Units: - Supports multiple units like grams (g), milligrams (mg), carats (ct), and ounces (oz). Stable Platform: - Includes a draft shield to protect against air currents and vibrations, which can affect measurement accuracy.
- High Accuracy and Precision- Delivers extremely accurate weight measurements, often down to 0.001 g or better.- Crucial for experiments and applications where even slight variations can affect outcomes.
- User-Friendly Interface- Digital display makes readings easy to read and interpret.- Most models include intuitive controls for functions like tarring, unit conversion, and calibration.3. Speed and Efficiency- Provides instant, stable readings, saving time compared to manual or mechanical balances.- Streamlines lab workflows and enhances productivity.
- Versatile Applications- Suitable for various fields including chemistry, biology, pharmacology, food testing, and gemology.- Can handle diverse weighing tasks from solids to liquids and powders.
- Advanced Features- Tare Function: Subtracts the weight of containers automatically.- Multiple Weighing Units: Supports various measurement units.- Data Connectivity: Many models allow connection to computers or printers for data logging.
- Portability and Space Efficiency- Compact design fits easily in most laboratory setups.- Lightweight models are easy to move and store.
- Enhanced Safety and Reliability- Stable platform and draft shields reduce environmental interference.- Built-in calibration ensures ongoing accuracy.
Digital hot plate-magnetic stirrer
Digital hot plate-magnetic stirrer
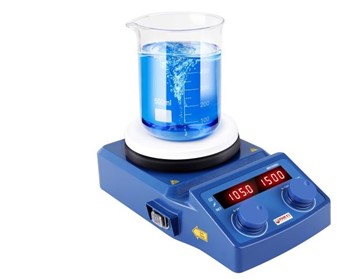
Digital hot plate-magnetic stirrer
- Magnetic Stirrer:
- Digital Display and Controls:
- Temperature Sensors: - Built-in or external probes (like a PT100 or thermocouple) for accurate temperature control.
- Precision and Control- Digital Interface: Allows accurate setting and monitoring of temperature and stirring speed.- Consistent Results: Ensures reproducibility in experiments and solution preparations.
- Efficient Mixing and Heating- Uniform Mixing: Magnetic stirring eliminates hotspots and ensures even distribution of solutes.- Simultaneous Operation: Ability to heat and stir at the same time improves efficiency.
- Safety Features- Overheat Protection: Prevents accidents by automatically shutting off at unsafe temperatures.- Sealed Surface: Reduces risk of contamination and easy to clean.
- Versatility
- Compact and User-Friendly- Takes up minimal bench space.- Simple to operate with user-friendly controls and displays.
- Durability- High-quality materials like ceramic or stainless steel tops resist corrosion and wear.
- Time-Saving Speeds up preparation of solutions and reactions compared to manual stirring and separate heating. Would you like these benefits presented in a slide format or for a product brochure?
Controller For IR Dyeing Machine
Controller For IR Dyeing Machine

IR Dyeing machine controller
- Temperature Control:- Precisely regulates the infrared heaters to maintain uniform temperature across the dye bath. - Supports customizable heating curves (ramp-up, hold, and cool-down phases).
- Programmable Logic Control (PLC): - Allows operators to set and automate dyeing programs for different fabrics and dye types. - Supports multiple recipes or programs for different batches.
- Real-Time Monitoring and Feedback: - Monitors parameters like temperature, fabric rotation, bath circulation, and timing. - Provides real-time data and alarms for deviations.
- Touchscreen Interface / HMI (Human Machine Interface): - User-friendly interface for configuring and monitoring processes. - Multi-language support and graphical display of process curves.
- Data Logging and Traceability: - Records process data for quality control and traceability.
- Energy Efficiency Optimization: - Manages IR heater output to reduce energy usage. - Often includes features for auto shut-off or idle mode.
- Safety Features: - Includes emergency stop, over-temperature protection, and fault detection systems. 8. Connectivity: - Modern controllers may support Ethernet, Modbus, or other industrial communication protocols for integration into factory automation systems.
- Improved Dyeing Accuracy and Consistency
- Enhanced Energy Efficiency- Infrared heating is more energy-efficient than traditional heating methods.- The controller optimizes energy use by adjusting the IR output based on process needs, reducing overall energy consumption.
- Time Savings- Faster heating and cooling cycles due to infrared technology.- Automated processes reduce manual intervention and cycle times. 4. Better Process Control- Programmable dyeing cycles and precise control over each stage (heating, dyeing, rinsing, cooling).- Real-time monitoring and adjustments improve reliability.
- Reduced Water and Chemical Usage- More efficient dye penetration and fixation mean less water and fewer chemicals are needed for reprocessing or corrections.6. Lower Operational Costs
- Enhanced Safety Built-in alarms, emergency shut-off and automatic fault detection enhance operational safety.8. Data Logging and Traceability- Ability to record and review dyeing process data helps in quality control and troubleshooting.- Facilitates compliance with industry standards and audits.
- User-Friendly Operation- Modern touchscreen interfaces make it easier for operators to manage and monitor processes.- Multilingual support and visual feedback enhance usability.
VeriVide Colour Assessment Cabinets
VeriVide Colour Assessment Cabinets
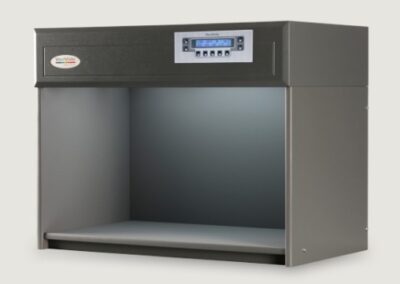 VeriVide offers high-quality Colour Assessment Cabinets (CACs) such as the CAC 60-4, CAC 60-5, and CAC 120-4&5. These cabinets, originating from the UK, are reliable tools for visual evaluation in quality assurance, meeting national, international, and retailer standards. They effectively mitigate issues related to color assessment.VeriVide Colour Assessment Cabinets
High-quality visual evaluation tool for quality assurance. Adhering to national, international and retailer standards.Colour Assessment Cabinet's (CACs) reduce problems associated with assessing products or samples in different environments,be though geological or seasonal, offering a cost-effective method to ensure visual accuracy and product quality.
Color Light Box Enhance color precision with VeriVide's cutting-edge Colour Assessment
Cabinets. These cabinets are meticulously designed to ensure accurate color evaluation in various industries. Invest in VeriVide Colour Assessment Cabinets to elevate your color assessment process.
Enhance Color Precision with VeriVide's Cutting-Edge Assessment Cabinets, which meet or surpass ISO 3664 and BS 950 Part 1 international standards. The cabinets are adaptable to user requirements, with lamp options to choose different light sources. Available in 60, 120, and 150cm widths, VeriVide Colour Assessment Cabinets provide a flexible solution for accurate color assessment.
Incorporate user-friendly features like servicing indicator, auto sequence, warm-up, power save and data storage.4 or 5 light source options Versions available for colour fastness testing and particulate testing both adhering to global standardsEnsure that you are using the best equipment available as they provide the best fluorescent D65 daylight simulator, with the highest Colour
Rendering Index (CRI), available. VeriVide Colour Assessment Cabinets products are known as light boxes, viewing booths, colour cabinets and others, depending on which industry or country they are serving in. They are used within a wide array of industry sectors throughout the world including textile and apparel, graphics, automotive, ceramics, cosmetics, pharmacology (CAC Particulate),
food, footwear, packaging and printing.Download the Datasheet below for more information or click 'VeriVide CAC Datasheet Here' to get in touch with colour experts.
VeriVide CAC Datasheet Here Features of VeriVide Colour Assessment Cabinets
• CAC 60, CAC 120 and CAC 150 accommodate 60, 120 and 150cm tubes respectively
- Either 4 or 5 light sources available for each model including D65, D50, 840P15, F and UV - see Lamp Options.• Internal finishes in Munsell N5, Munsell N7 or Grey 5574 • Diffuser and/or dimmer options available Dimensions of VeriVide Colour Assessment Cabinets CAC 60-4 Dimensions (mm) Width Height Depth Overall 710 545 420
Color Matching Cabinet-Light Box
Color Matching Cabinet-Light Box

Color Matching Cabinet-Light Box
Counting Balance-Weighing Scale
Counting Balance-Weighing Scale

Counting Balance-Weighing Scale

Counting Balance-Weighing Scale
Digital Temperature Humidity Meter
Digital Temperature Humidity Meter
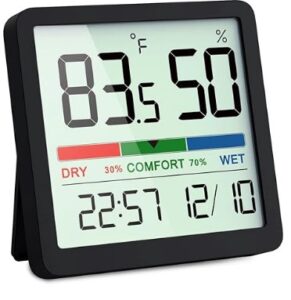
Digital Temperature Humidity Meter
Fatigue tester for Elastic fabric
Fatigue Tester for Elastic Fabric

Fatigue tester for Elastic fabric
- Adjustable Stretch Range - Allows setting stretch levels (e.g., 0–100%) to simulate real-life fabric use.
- High-Cycle Capability - Supports up to millions of stretch-relax cycles for long-term fatigue analysis.
- Touch Screen Control - 7-inch color display for easy setup, monitoring, and data entry.
- Servo Motor Driven - Ensures precise and smooth linear motion during testing.
- Customizable Speed - Adjustable test speed (e.g., up to 40 cycles per minute) based on test requirements.
- Multi-Sample Testing - Some models allow testing multiple specimens simultaneously.
- Cycle Counter with Alarm - Built-in counter with programmable stop after preset cycles and auto-alert feature.
- Durable Construction - Robust metal frame suitable for continuous testing in lab environments.
- Standard Compliance - Designed to follow standards like GB/T 37635 for elastic fabric testing.
- Prepare the Sample
- Mount the Sample - Secure both ends of the fabric in the upper and lower clamps.
- Set Test Parameters
- Start the Test - Press start on the touch screen interface. - The machine will cyclically stretch and release the sample.
- Monitor Progress - Observe operation or let it run automatically.
- Remove and inspect - Take out the fabric and measure elongation, recovery, or visual defects.
- Record and Compare Results - Compare with initial measurements or standard performance criteria.

Fatigue tester for Elastic fabric
Stretch Recovery Tester Static Method
Stretch Recovery Tester Static Method

Stretch Recovery Tester
- A sample is stretched to a predetermined extension or force.
- The stretch is maintained for a set period.
- After removing the load, the recovery (return to original length) is measured after a fixed time.
- The fabric sample is clamped and stretched to a specific length or force.
- It’s held for a fixed duration (e.g., 1–5 minutes).
- The tension is released, and the sample is allowed to recover.
- The recovered length is measured after a set time.


Stretch Recovery Tester
VeriVide Colour Assessment Cabinets
VeriVide Colour Assessment Cabinets
 VeriVide offers high-quality Colour Assessment Cabinets (CACs) such as the CAC 60-4, CAC 60-5, and CAC 120-4&5. These cabinets, originating from the UK, are reliable tools for visual evaluation in quality assurance, meeting national, international, and retailer standards. They effectively mitigate issues related to color assessment.VeriVide Colour Assessment Cabinets
High-quality visual evaluation tool for quality assurance. Adhering to national, international and retailer standards.Colour Assessment Cabinet's (CACs) reduce problems associated with assessing products or samples in different environments,be though geological or seasonal, offering a cost-effective method to ensure visual accuracy and product quality.
Color Light Box Enhance color precision with VeriVide's cutting-edge Colour Assessment
Cabinets. These cabinets are meticulously designed to ensure accurate color evaluation in various industries. Invest in VeriVide Colour Assessment Cabinets to elevate your color assessment process.
Enhance Color Precision with VeriVide's Cutting-Edge Assessment Cabinets, which meet or surpass ISO 3664 and BS 950 Part 1 international standards. The cabinets are adaptable to user requirements, with lamp options to choose different light sources. Available in 60, 120, and 150cm widths, VeriVide Colour Assessment Cabinets provide a flexible solution for accurate color assessment.
Incorporate user-friendly features like servicing indicator, auto sequence, warm-up, power save and data storage.4 or 5 light source options Versions available for colour fastness testing and particulate testing both adhering to global standardsEnsure that you are using the best equipment available as they provide the best fluorescent D65 daylight simulator, with the highest Colour
Rendering Index (CRI), available. VeriVide Colour Assessment Cabinets products are known as light boxes, viewing booths, colour cabinets and others, depending on which industry or country they are serving in. They are used within a wide array of industry sectors throughout the world including textile and apparel, graphics, automotive, ceramics, cosmetics, pharmacology (CAC Particulate),
food, footwear, packaging and printing.Download the Datasheet below for more information or click 'VeriVide CAC Datasheet Here' to get in touch with colour experts.
VeriVide CAC Datasheet Here Features of VeriVide Colour Assessment Cabinets
• CAC 60, CAC 120 and CAC 150 accommodate 60, 120 and 150cm tubes respectively
- Either 4 or 5 light sources available for each model including D65, D50, 840P15, F and UV - see Lamp Options.• Internal finishes in Munsell N5, Munsell N7 or Grey 5574 • Diffuser and/or dimmer options available Dimensions of VeriVide Colour Assessment Cabinets CAC 60-4 Dimensions (mm) Width Height Depth Overall 710 545 420
Color Matching Cabinet-Light Box
Color Matching Cabinet-Light Box

Color Matching Cabinet-Light Box
Counting Balance-Weighing Scale
Counting Balance-Weighing Scale

Counting Balance-Weighing Scale

Counting Balance-Weighing Scale
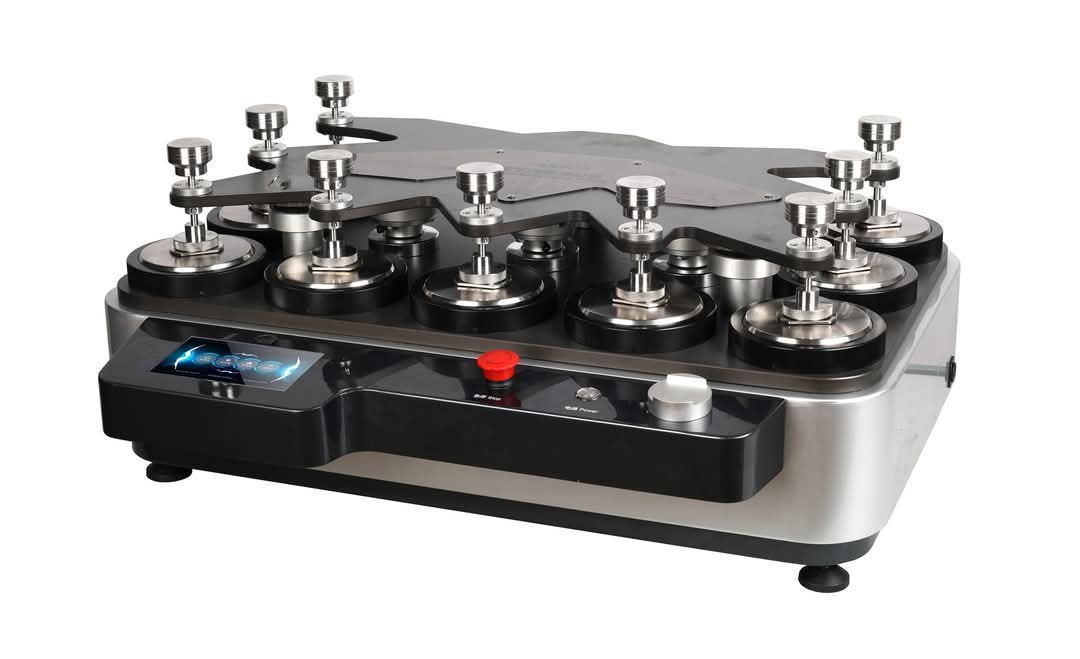
Martindale abrasion tester Updated
Martindale abrasion tester updated
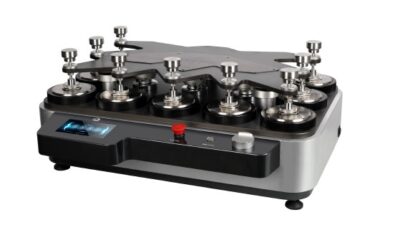
Latest Update 1 A+
- Clothing sample weight hammer:397±2g Furniture decoration sample weight hammer:597±2g C. Stainless steel discs:260±1g
- Effective friction diameter of grinding block: Type A 198g(3kpa) friction head 28.8-0.084mm Type B 155g(1.52N) friction head 90-0.10mm 6. Relative velocity of gripper and grinding table:50 + 2R / MI (20-70r / min adjustable) 7. Sampling hammer quality:2385±10g 8. Shape size:870×580×300mm 9. power supply:AC220V 50Hz 500W 10.Weight:73KG.
- [Standard accessories] Items and specifications Qty Notes Main machine 1Power cable 1A type 198g Friction head 9 B type 155g(1.52N) Friction head 9 597g Hammer 9 397g Hammer 9, 666666666 260g Stainless steel disc 9, 2385g Holding hammer 1,B Friction head felt 18 ¢90mm Steel ball 6, Rubber ring 18, Inner Hexagonal Wrench 1
- Sampler 1, Fuse 2 3A, Standard felt 18, Weight:750±50g/m2, Thickness:2.5±0.5mm, Standard foam lining 40, Density:0.03g/cm3,Thickness:3mm,Standard abrasive 9 Circular shear template Each φ140mm、φ38mm,Small screw knife 1, Bottom foot 4
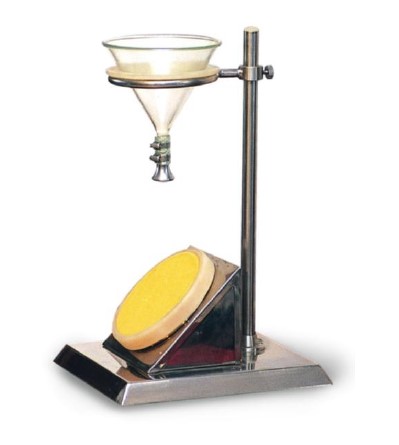
Spray Rating Tester
Spray Rating Tester

Spray Rating Tester
- Quick and Simple Evaluation - Offers a fast way to assess fabric water repellency without complex setup.
- Standardized Testing- Complies with AATCC 22 and ISO 4920, ensuring globally accepted results.
- Cost-Effective- Low maintenance and no power requirement make it economical for routine lab use.
- Improves Fabric Performance - Helps manufacturers develop or improve water-resistant textiles.
- Non-Destructive Test - Does not damage the fabric, allowing for additional tests on the same sample.
- Visual Grading- Easy to interpret using a standard spray rating chart (0 to 100 scale).
- Supports Quality Control - Detects finish degradation or variation in water-repellent treatments.
- Portable and Compact- Lightweight design allows easy use in various lab or field settings.
- Standardized Spray Nozzle - Delivers consistent water spray per AATCC and ISO specifications.
- 45° Specimen Mounting Angle - Ensures uniform test setup for accurate and repeatable results.
- Stainless Steel or Aluminum Frame - Corrosion-resistant and durable for long-term use with water exposure.
- Water Reservoir and Funnel System - Provides precise water volume (usually 250 ml) for each test.
- Graduated Spray Stand- Fixed height (150 mm above specimen) for controlled spray impact.
- Detachable Specimen Holder- Easy loading and removal of fabric samples.
- Compact and Lightweight Design - Portable and convenient for both lab and field testing.
- No Electricity Required - Fully manual operation increases reliability and reduces operating costs.
- Prepare the Sample - Cut fabric to standard size (usually 180 × 180 mm). - Condition the sample if required (21°C, 65% RH for 24 hours).
- Mount the Fabric - Place the fabric on the specimen holder at a 45° angle.
- Fill the Reservoir - Pour 250 ml of distilled water into the upper funnel.
- Start the Test - Release the water through the nozzle; it sprays over the fabric for about 25–30 seconds.
- Inspect the Fabric - After spraying, visually assess the water beading or penetration on the surface.
- Rate the Sample - Compare the fabric’s wetting pattern with the standard spray rating chart: - 100 = No sticking/wetting - 90–50 = Partial wetting - 0 = Complete wetting
- Record the Rating - Document the spray rating for quality control or reporting.
 Spray Reting Tester
[Scope of application]:
Used for the determination of moisture resistance (wetting grade) of various fabrics
which have been or have not been treated with water resistance or water repellency.
[related standards]:
GB/T4745 ISO4920 AATCC22 JISL1092 etc.
[technical parameters]:
1. Glass funnel:150 x 150 (capacity 500ml)
2. Specimen placement angle:The level is 45 degrees.
3. Distance from nozzle to sample center:150mm
4. Specimen diameter:Ф150mm
5. Size of water receiving pan:500×400×30mm
6. Matching measuring cups:500ml
7, size 500 x 400 x 500mm
8. Instrument weight:5Kg
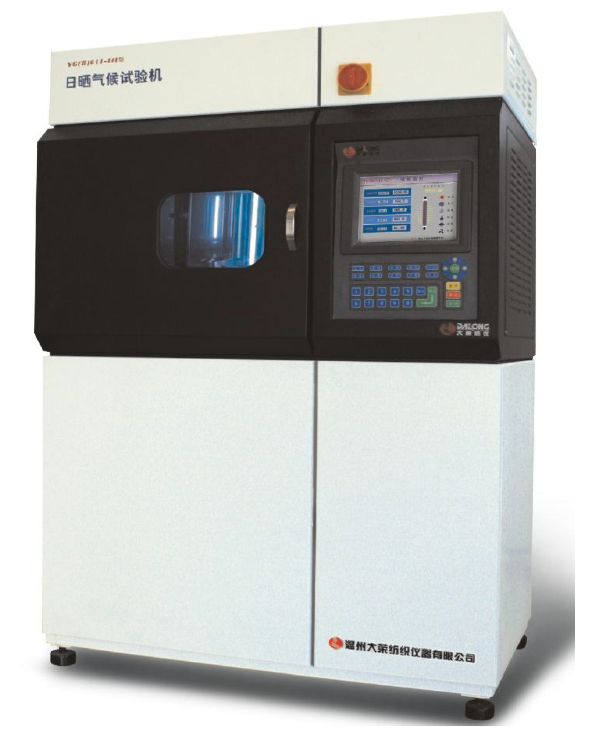
 Xenon Arc Light Fastness Tester
SALE PRODUCTS
Color Matching Cabinet-Light Box
Color Matching Cabinet-Light Box

Color Matching Cabinet-Light Box
Stretch Recovery Tester Static Method
Stretch Recovery Tester Static Method

Stretch Recovery Tester
- A sample is stretched to a predetermined extension or force.
- The stretch is maintained for a set period.
- After removing the load, the recovery (return to original length) is measured after a fixed time.
- The fabric sample is clamped and stretched to a specific length or force.
- It’s held for a fixed duration (e.g., 1–5 minutes).
- The tension is released, and the sample is allowed to recover.
- The recovered length is measured after a set time.


Stretch Recovery Tester
Fabric air permeability tester
Fabric Air Permeability Tester
Fabric Air Permeability Tester is a lab instrument used to measure how easily air passes through a fabric. It quantifies the air permeability, which is crucial for evaluating breathability, comfort, and functional performance in textiles. Purpose Fabric Air Permeability Tester: It determines the rate of airflow through a fabric sample under a set air pressure, typically reported in units like cm³/cm²/s or L/m²/s. Working Principle: The tester creates a pressure difference across the fabric sample and measures the volume of air flowing through it. Higher air permeability means the fabric is more breathable. Main Components of Fabric Air Permeability Tester: - Test Head / Clamp: Holds the fabric securely without leakage. - Pressure Regulator: Maintains a constant air pressure during testing. - Flow Meter or Digital Sensor: Measures the actual airflow rate through the fabric. - Display Unit: Shows readings of air permeability instantly. Applications of Fabric Air Permeability Tester: - Performance textiles (sportswear, PPE) - Technical fabrics (filters, tents, airbags) - Medical textiles (masks, gowns) - Nonwovens and industrial materials Benefits of Fabric Air Permeability Tester:- Accurate Breathability Measurement - Precisely measures how breathable a fabric is, essential for comfort and performance.
- Supports Quality Control - Ensures consistent air permeability in fabric batches, critical for products like PPE, sportswear, and filters.
- Enhances Product Design - Helps in selecting or engineering fabrics with the right airflow properties for specific uses.
- Standard Compliance - Conforms to international testing standards (e.g., ASTM D737, ISO 9237), ensuring global credibility.
- Quick and Reliable Testing - Provides rapid results, increasing lab efficiency and production decision-making speed.
- Wide Material Compatibility - Suitable for woven, nonwoven, knitted fabrics, and even paper or coated materials.
- Improves Functional Performance - Helps optimize products for ventilation, moisture control, and thermal comfort.
- Reduces Product Failure - Identifies underperforming fabrics early, minimizing risks in high-performance applications.
- Digital Display - Shows air permeability readings clearly in units like L/m²/s or cm³/cm²/s.
- Precise Test Head/Clamp - Provides an airtight seal to prevent air leakage and ensure accurate results.
- Adjustable Pressure Settings - Allows testing under various pressure drops (e.g., 10–2500 Pa), depending on fabric type.
- Automatic Airflow Measurement - Built-in sensors or flow meters capture airflow rate automatically for quick analysis.
- Multiple Test Area Sizes - Interchangeable test plates to match different sample sizes and standard requirements.
- Data Logging and Export - Some models include USB or software connectivity for storing and exporting test results.
- Standard Compliance - Conforms to ASTM D737, ISO 9237, BS 5636, DIN 53887, etc.
- Robust Construction - Built with corrosion-resistant materials and durable components for long-term lab use.
- Low Maintenance - Simple cleaning and calibration process for reliable performance.
- Compact and User-Friendly Design - Ideal for lab benches and easy operation with minimal training.
- Prepare the Sample - Cut the fabric sample to the required size (usually circular, e.g., 20 cm²).
- Mount the Sample - Place the fabric securely in the test clamp or holder, ensuring no wrinkles or gaps.
- Set Test Parameters - Adjust the air pressure drop according to the fabric type or standard (e.g., 100 Pa).
- Start the Test - Turn on the air supply and start the airflow through the fabric.
- Read the Measurement - The digital display will show the air permeability value in the selected units.
- Record the Results - Note the readings or export data if the device supports it.
- Repeat if needed - Test multiple samples or areas for accuracy and average the results.
- Clean and Maintain - After testing, clean the clamp and ensure the device is calibrated regularly.
 r Permeability Tester
Appliance Range
It is used to TEST the air permeability of various textile fabrics, including industrial fabrics, nonwoven fabrics and other textile products and other breathable materials.
Related Standards
GB / T 5453, GB / T 13764, ISO 9237, ISO 5636, ASTM D737, etc.
Instrument characteristics
1. Automatic sample clamping, automatic nozzle replacement, and quick test.
2. Microcomputer processing, the test results are displayed directly, without manual table calculation;
3. Built-in continuous test mode, the test unit can be switched as needed.
4. Chinese LCD menu operation, configure computer interface.
Technical parameter
1. Range of sample pressure difference: 1 ~ 4000Pa
2. Measurable air permeability: 1 ~ 40,000mm / s
3. Measurement error: ≤ ± 2%
4. Measurable fabric thickness: ≤8mm
5. Test area: 5cm2; 20cm2; 50cm2; 100cm2
Ф50mm (≈19.6cm2)
Ф70mm (≈38.5cm2)
6. Nozzles: 11 in total (automatic replacement of digital setting)
CODE 00 01 02 03 04 05 06 07 08 09 10
DIAφ(mm)
0.8 1.2 2 3 4 6 8 10 12 16 20
7.Data Capacity:≤200 times tests
8.Power Supply:AC220V 50Hz 2KW
9.Weight:80Kg
10.Shape:1250×700×1250mm
 Spray Rating Tester
Spray Rating Tester

Spray Rating Tester
- Quick and Simple Evaluation - Offers a fast way to assess fabric water repellency without complex setup.
- Standardized Testing- Complies with AATCC 22 and ISO 4920, ensuring globally accepted results.
- Cost-Effective- Low maintenance and no power requirement make it economical for routine lab use.
- Improves Fabric Performance - Helps manufacturers develop or improve water-resistant textiles.
- Non-Destructive Test - Does not damage the fabric, allowing for additional tests on the same sample.
- Visual Grading- Easy to interpret using a standard spray rating chart (0 to 100 scale).
- Supports Quality Control - Detects finish degradation or variation in water-repellent treatments.
- Portable and Compact- Lightweight design allows easy use in various lab or field settings.
- Standardized Spray Nozzle - Delivers consistent water spray per AATCC and ISO specifications.
- 45° Specimen Mounting Angle - Ensures uniform test setup for accurate and repeatable results.
- Stainless Steel or Aluminum Frame - Corrosion-resistant and durable for long-term use with water exposure.
- Water Reservoir and Funnel System - Provides precise water volume (usually 250 ml) for each test.
- Graduated Spray Stand- Fixed height (150 mm above specimen) for controlled spray impact.
- Detachable Specimen Holder- Easy loading and removal of fabric samples.
- Compact and Lightweight Design - Portable and convenient for both lab and field testing.
- No Electricity Required - Fully manual operation increases reliability and reduces operating costs.
- Prepare the Sample - Cut fabric to standard size (usually 180 × 180 mm). - Condition the sample if required (21°C, 65% RH for 24 hours).
- Mount the Fabric - Place the fabric on the specimen holder at a 45° angle.
- Fill the Reservoir - Pour 250 ml of distilled water into the upper funnel.
- Start the Test - Release the water through the nozzle; it sprays over the fabric for about 25–30 seconds.
- Inspect the Fabric - After spraying, visually assess the water beading or penetration on the surface.
- Rate the Sample - Compare the fabric’s wetting pattern with the standard spray rating chart: - 100 = No sticking/wetting - 90–50 = Partial wetting - 0 = Complete wetting
- Record the Rating - Document the spray rating for quality control or reporting.
 Spray Reting Tester
[Scope of application]:
Used for the determination of moisture resistance (wetting grade) of various fabrics
which have been or have not been treated with water resistance or water repellency.
[related standards]:
GB/T4745 ISO4920 AATCC22 JISL1092 etc.
[technical parameters]:
1. Glass funnel:150 x 150 (capacity 500ml)
2. Specimen placement angle:The level is 45 degrees.
3. Distance from nozzle to sample center:150mm
4. Specimen diameter:Ф150mm
5. Size of water receiving pan:500×400×30mm
6. Matching measuring cups:500ml
7, size 500 x 400 x 500mm
8. Instrument weight:5Kg
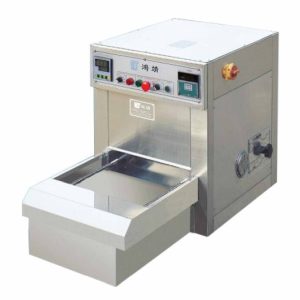
 Laboratory mini stenter Dryer
Laboratory mini stenter Dryer
A Laboratory Mini Stenter Dryer is a compact, lab-scale machine designed to simulate the drying and heat-setting processes used in textile finishing. It mimics the function of industrial stenter machines but on a much smaller scale, making it ideal for testing fabric behavior, shrinkage, and finish quality under controlled conditions. Key Features:- Controlled Heating System
- Adjustable Fabric Width
- Variable Speed Conveyor - Allows control over fabric dwell time for drying or heat-setting.
- Compact and Bench-Top Design - Space-saving design ideal for textile labs and R&D units.
- Digital Controls - Easy-to-use digital interface for setting temperature, conveyor speed, and process time.
- Transparent Viewing Window - Allows operators to monitor fabric movement and drying visually.
- Low Energy Consumption - Designed for lab use, consuming less power than industrial models.
- Accurate Simulation of Production - Mimics industrial stenter conditions on a lab scale, ideal for pre-production testing and R&D.
- Cost-Effective Testing - Enables testing and fabric finishing without the high cost or space requirements of full-scale machines.
- Energy Efficient - Consumes less power compared to large stenters, making it economical for small-scale or frequent use.
- Precise Control - Offers accurate control of temperature, speed, and fabric tension, ensuring consistent results.
- Space-Saving Design - Compact and bench-top friendly, perfect for laboratories with limited space.
- Multiple Applications - Useful for drying, heat-setting, shrinkage testing, and evaluating chemical finishes.
- Faster Development Cycles - Speeds up new product development by allowing rapid sample testing and adjustments.
- Improved Fabric Quality - Helps optimize finishing parameters for better dimensional stability, hand feel, and appearance.
- Safe and User-Friendly- Designed with lab safety in mind, including temperature safety controls and easy operation.
- Compact Bench-Top Design - Ideal for laboratory use with limited space requirements.
- Adjustable Temperature Control - Precise heating (usually up to 220–250°C) with digital controllers for accurate processing.
- Variable Conveyor Speed- Allows adjustment of fabric dwell time for different drying or heat-setting needs.
- Width Adjustment Mechanism - Equipped with clips or pins to stretch and fix fabric width-wise, simulating industrial stenter conditions.
- Transparent Viewing Window - Enables visual monitoring of fabric movement and drying inside the chamber.
- Digital Display Panel- Easy-to-use interface for setting and monitoring temperature, speed, and time.
- Stainless Steel Construction- Durable and corrosion-resistant for long-term use at high temperatures.
- Uniform Heat Distribution- Ensures consistent fabric treatment across the width.
- Safety Features- Over-temperature protection and insulated body for operator safety.
- Versatile Applications - Suitable for drying, heat-setting, shrinkage testing, and chemical finish evaluations.
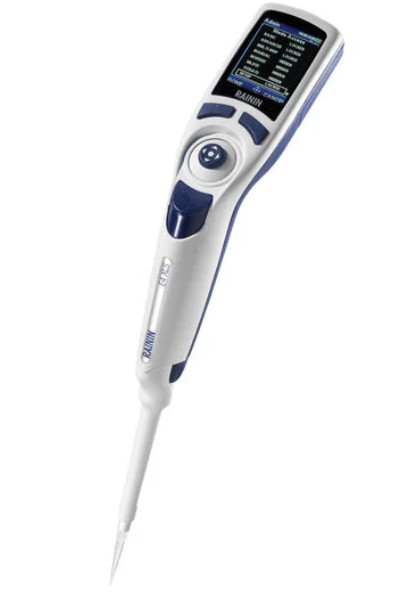
Rainin Digital Pipette
Rainin Digital Pipette
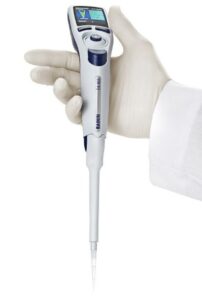
Digital Pipette
- Digital Volume Setting
- High Accuracy and Precision
- Ergonomic Design
- Easy Calibration and Maintenance
- Durable and Chemically Resistant - Built with high-quality materials that resist damage from chemicals and frequent use.
- Models and Volume Ranges - Available in single-channel and multi-channel versions.
- LTS (LiteTouch System) - Many Rainin pipettes use the LTS tip system which reduces tip ejection force and ensures a consistent seal.
- Compliance and Traceability - Some digital models offer data storage or integration with lab information systems for traceability.
- High Accuracy and Precision - Ensures reliable and reproducible results, essential for sensitive experiments.
- Digital Volume Control - Reduces human error with easy and precise volume setting via digital interface.
- Ergonomic Design- Minimizes hand strain and fatigue during prolonged use; ideal for repetitive pipetting tasks.
- LiteTouch System (LTS) - Eases tip attachment and ejection, reducing risk of RSI (Repetitive Strain Injury) and improving comfort.
- Versatile Volume Range - Available in multiple models to handle volumes from microliters to milliliters.
- Durable and Reliable - Built with high-quality materials for long life and resistance to chemicals and frequent use.
- Easy Maintenance and Calibration - Simplified calibration and cleaning ensure long-term performance and compliance.
- Data Integrity and Traceability -Some models store data, supporting audit trails and regulatory compliance.
- Enhanced Productivity - Quick setup, easy operation, and consistent performance speed up lab workflows.
- Digital Volume Adjustment - Precise and easy-to-read digital display for accurate volume setting.
- High Precision and Accuracy- Delivers consistent results, meeting ISO and GLP/GMP standards.
- Ergonomic Design- Lightweight, balanced with low plunger and tip ejection force to reduce fatigue.
- LiteTouch Tip Ejection System (LTS) - Reduces tip attachment/ejection force, improving comfort and consistency.
- Durable Construction - Built with high-quality, chemically resistant materials for long-term use.
- Wide Volume Range - Available in multiple models from 0.1 µL to 10 mL.
- Single-Channel and Multi-Channel Options - Suitable for various applications including high-throughput assays.
- Autoclavable Components- Some parts can be autoclaved for sterilization and contamination control.
- Easy Calibration and Maintenance - User-friendly calibration settings with accessible parts for cleaning.
- Optional Electronic Models - Some versions include programmable features, multiple modes (e.g., reverse pipetting), and memory storage.
Perspiration Tester
Perspiration Tester

Perspiration Tester
- Fabric samples are treated with synthetic perspiration solution (acidic or alkaline).
- They are sandwiched with adjacent fabric and placed between glass or acrylic plates.
- The assembly is loaded into the tester and pressed under specific pressure.
- it’s then incubated at 37°C (body temperature) for a fixed time (typically 4 or 16 hours).
- Afterward, color change and staining are evaluated using a gray scale.
- Accurate Sweat Simulation - Mimics real-life effects of acidic and alkaline perspiration on fabrics.
- Improves Product Quality - Ensures textiles retain color and don’t bleed or stain when worn.
- Supports Standard Compliance - Follows ISO and AATCC test standards for global market approval.
- Protects Brand Reputation- Reduces customer complaints due to dye transfer or fading.
- Simple and Repeatable- Provides consistent pressure and conditions for reliable results.
- Multi-Sample Testing- Tests multiple specimens at once, saving time in labs.
- Durable and Low Maintenance- Robust frame with minimal moving parts makes it long-lasting and easy to care for.
- Stainless Steel Frame - Corrosion-resistant body for durability and long-term use.
- Multi-Sample Capacity - Can hold up to 20 or more specimens for batch testing.
- Standardized Loading Weight- Applies uniform pressure (usually 12.5 kPa) across all samples.
- Removable Plates - Glass or acrylic plates ensure even contact and easy cleaning.
- Compact Design- Space-saving, bench-top model ideal for lab environments.
- Complies with Test Standards - Meets ISO 105 E04, AATCC 15, and related perspiration fastness standards.
- Ease of Operation - Simple loading, unloading, and incubation process.
- High-Temperature Resistance - Can be used inside incubators at 37°C or ovens as required.
- Prepare the Test Solution - Mix artificial acidic or alkaline perspiration as per standard (ISO or AATCC).
- Cut the Fabric Samples - Cut both the test fabric and adjacent white fabric (usually cotton) to standard size.
- Soak the Samples - Immerse the fabric sandwich (test + adjacent) in the test solution for 30 minutes.
- Remove Excess Liquid - Gently squeeze or blot to remove extra moisture—do not dry.
- Load in the Tester- Place each sandwich between glass or acrylic separator plates in the tester.
- Apply Pressure - Tighten the top plate or place the standard weight on top to apply uniform pressure.
- Incubate - Keep the loaded tester in an oven or incubator at 37°C for 4–16 hours (depending on the method).
- Accurate Sweat Simulation - Mimics real-life effects of acidic and alkaline perspiration on fabrics.
- Improves Product Quality - Ensures textiles retain color and don’t bleed or stain when worn.
- Supports Standard Compliance - Follows ISO and AATCC test standards for global market approval.
- Protects Brand Reputation- Reduces customer complaints due to dye transfer or fading.
- Simple and Repeatable- Provides consistent pressure and conditions for reliable results.
- Multi-Sample Testing- Tests multiple specimens at once, saving time in labs.
- Durable and Low Maintenance- Robust frame with minimal moving parts makes it long-lasting and easy to care for.
- Dry and Evaluate - Remove, air dry the samples, then assess color change and staining using a gray scale.
- Fabric samples are treated with synthetic perspiration solution (acidic or alkaline).
- They are sandwiched with adjacent fabric and placed between glass or acrylic plates.
- The assembly is loaded into the tester and pressed under specific pressure.
- it’s then incubated at 37°C (body temperature) for a fixed time (typically 4 or 16 hours).
- Afterward, color change and staining are evaluated using a gray scale.

Perspiration Tester
VeriVide Colour Assessment Cabinets
VeriVide Colour Assessment Cabinets
 VeriVide offers high-quality Colour Assessment Cabinets (CACs) such as the CAC 60-4, CAC 60-5, and CAC 120-4&5. These cabinets, originating from the UK, are reliable tools for visual evaluation in quality assurance, meeting national, international, and retailer standards. They effectively mitigate issues related to color assessment.VeriVide Colour Assessment Cabinets
High-quality visual evaluation tool for quality assurance. Adhering to national, international and retailer standards.Colour Assessment Cabinet's (CACs) reduce problems associated with assessing products or samples in different environments,be though geological or seasonal, offering a cost-effective method to ensure visual accuracy and product quality.
Color Light Box Enhance color precision with VeriVide's cutting-edge Colour Assessment
Cabinets. These cabinets are meticulously designed to ensure accurate color evaluation in various industries. Invest in VeriVide Colour Assessment Cabinets to elevate your color assessment process.
Enhance Color Precision with VeriVide's Cutting-Edge Assessment Cabinets, which meet or surpass ISO 3664 and BS 950 Part 1 international standards. The cabinets are adaptable to user requirements, with lamp options to choose different light sources. Available in 60, 120, and 150cm widths, VeriVide Colour Assessment Cabinets provide a flexible solution for accurate color assessment.
Incorporate user-friendly features like servicing indicator, auto sequence, warm-up, power save and data storage.4 or 5 light source options Versions available for colour fastness testing and particulate testing both adhering to global standardsEnsure that you are using the best equipment available as they provide the best fluorescent D65 daylight simulator, with the highest Colour
Rendering Index (CRI), available. VeriVide Colour Assessment Cabinets products are known as light boxes, viewing booths, colour cabinets and others, depending on which industry or country they are serving in. They are used within a wide array of industry sectors throughout the world including textile and apparel, graphics, automotive, ceramics, cosmetics, pharmacology (CAC Particulate),
food, footwear, packaging and printing.Download the Datasheet below for more information or click 'VeriVide CAC Datasheet Here' to get in touch with colour experts.
VeriVide CAC Datasheet Here Features of VeriVide Colour Assessment Cabinets
• CAC 60, CAC 120 and CAC 150 accommodate 60, 120 and 150cm tubes respectively
- Either 4 or 5 light sources available for each model including D65, D50, 840P15, F and UV - see Lamp Options.• Internal finishes in Munsell N5, Munsell N7 or Grey 5574 • Diffuser and/or dimmer options available Dimensions of VeriVide Colour Assessment Cabinets CAC 60-4 Dimensions (mm) Width Height Depth Overall 710 545 420
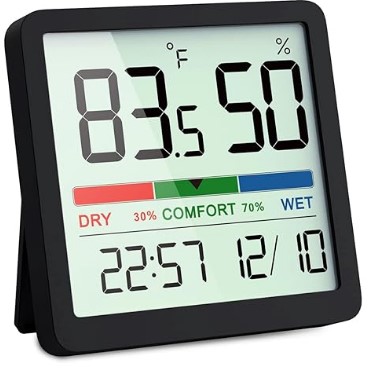
Digital Temperature Humidity Meter
Digital Temperature Humidity Meter

Digital Temperature Humidity Meter
Hydraulic GSM Cutter
Hydraulic GSM Cutter
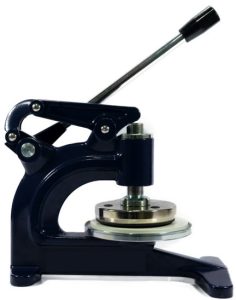
Hydraulic GSM Cutter
- High Cutting Precision - Ensures consistent and accurate fabric sample size for reliable GSM results.
- Effortless Operation- Hydraulic action reduces manual effort and operator fatigue.
- Ideal for Thick or Multi-Layer Fabrics - Cuts through dense or multiple fabric layers cleanly.
- Time-Saving - Speeds up the sample preparation process, especially for high-volume testing.
- Improves Test Accuracy - Uniform samples help eliminate errors in GSM calculation.
- Durable and Long-Lasting - Robust construction ensures stability and extended service life.
- Safety Enhancement - Reduces risk of injury compared to manual rotary cutters.
- Consistent Pressure Application - Hydraulic mechanism maintains steady force for each cut.
- Hydraulic Press Mechanism - Applies consistent and strong pressure for clean, even cuts.
- Standard Cutting Die (100 cm²) - Produces fabric samples suitable for GSM testing with standard area.
- Heavy-Duty Construction - Built with robust metal frame for long-term lab or industrial use.
- Sharp Stainless Steel Blades - Durable and replaceable blades ensure smooth, precise cuts.
- Cutting Pad Included - Comes with a rubber or nylon base to protect blades and ensure clean edges.
- Simple Lever or Button Operation - Easy to use with minimal training required.
- Non-slip Base - Provides stability during operation for safe, accurate cutting.
- Supports Various Fabric Types
- Place the Cutting Pad - Lay the rubber or nylon cutting pad on a flat surface.
- Position the Fabric - Place the fabric sample flat and smooth on the cutting pad.
- Align the Cutter - Position the GSM cutter die over the desired area of the fabric.
- Activate Hydraulic Press - Pull the lever or press the button to apply hydraulic pressure and cut the sample.
- Remove the Sample - Lift the cutter and carefully take out the circular fabric piece (usually 100 cm²).
- Weigh the Sample - Place the cut sample on a precision balance or GSM scale to determine weight.
- Calculate GSM - Multiply the sample weight (in grams) by 100 to get GSM.

Hydraulic GSM Cutter
Counting Balance-Weighing Scale
Counting Balance-Weighing Scale

Counting Balance-Weighing Scale

Counting Balance-Weighing Scale
Digital hot plate-magnetic stirrer
Digital hot plate-magnetic stirrer

Digital hot plate-magnetic stirrer
- Magnetic Stirrer:
- Digital Display and Controls:
- Temperature Sensors: - Built-in or external probes (like a PT100 or thermocouple) for accurate temperature control.
- Precision and Control- Digital Interface: Allows accurate setting and monitoring of temperature and stirring speed.- Consistent Results: Ensures reproducibility in experiments and solution preparations.
- Efficient Mixing and Heating- Uniform Mixing: Magnetic stirring eliminates hotspots and ensures even distribution of solutes.- Simultaneous Operation: Ability to heat and stir at the same time improves efficiency.
- Safety Features- Overheat Protection: Prevents accidents by automatically shutting off at unsafe temperatures.- Sealed Surface: Reduces risk of contamination and easy to clean.
- Versatility
- Compact and User-Friendly- Takes up minimal bench space.- Simple to operate with user-friendly controls and displays.
- Durability- High-quality materials like ceramic or stainless steel tops resist corrosion and wear.
- Time-Saving Speeds up preparation of solutions and reactions compared to manual stirring and separate heating. Would you like these benefits presented in a slide format or for a product brochure?
Controller For IR Dyeing Machine
Controller For IR Dyeing Machine

IR Dyeing machine controller
- Temperature Control:- Precisely regulates the infrared heaters to maintain uniform temperature across the dye bath. - Supports customizable heating curves (ramp-up, hold, and cool-down phases).
- Programmable Logic Control (PLC): - Allows operators to set and automate dyeing programs for different fabrics and dye types. - Supports multiple recipes or programs for different batches.
- Real-Time Monitoring and Feedback: - Monitors parameters like temperature, fabric rotation, bath circulation, and timing. - Provides real-time data and alarms for deviations.
- Touchscreen Interface / HMI (Human Machine Interface): - User-friendly interface for configuring and monitoring processes. - Multi-language support and graphical display of process curves.
- Data Logging and Traceability: - Records process data for quality control and traceability.
- Energy Efficiency Optimization: - Manages IR heater output to reduce energy usage. - Often includes features for auto shut-off or idle mode.
- Safety Features: - Includes emergency stop, over-temperature protection, and fault detection systems. 8. Connectivity: - Modern controllers may support Ethernet, Modbus, or other industrial communication protocols for integration into factory automation systems.
- Improved Dyeing Accuracy and Consistency
- Enhanced Energy Efficiency- Infrared heating is more energy-efficient than traditional heating methods.- The controller optimizes energy use by adjusting the IR output based on process needs, reducing overall energy consumption.
- Time Savings- Faster heating and cooling cycles due to infrared technology.- Automated processes reduce manual intervention and cycle times. 4. Better Process Control- Programmable dyeing cycles and precise control over each stage (heating, dyeing, rinsing, cooling).- Real-time monitoring and adjustments improve reliability.
- Reduced Water and Chemical Usage- More efficient dye penetration and fixation mean less water and fewer chemicals are needed for reprocessing or corrections.6. Lower Operational Costs
- Enhanced Safety Built-in alarms, emergency shut-off and automatic fault detection enhance operational safety.8. Data Logging and Traceability- Ability to record and review dyeing process data helps in quality control and troubleshooting.- Facilitates compliance with industry standards and audits.
- User-Friendly Operation- Modern touchscreen interfaces make it easier for operators to manage and monitor processes.- Multilingual support and visual feedback enhance usability.
Valuable Clients
Maamtexbd | Professional distributor importer supplier & indenter The most complete line of textile testing, Lab, Testing, Garments, spinning mills, Knit Woven & Dyeing, Washing, Instruments, whether you need to meet
















Maamtexbd | Professional distributor importer supplier & indenter
MAAM TEX is one of the most reliable Textile Lab Machinery Supplier in Bangladesh. Known for offering a wide range of advanced and modern textile machinery, MAAM TEX ensures that manufacturers access the best equipment for their needs.
This guide provides a detailed over view of Textile Lab Machinery suppliers in Bangladesh, highlighting the features, applications, and explaining why MAAM TEX is the best choice for these products.


 Products
 Martindale abrasion tester Updated


