
 Products
 Martindale abrasion tester Updated

0%
Digital Yarn Twist Tester
$0.00
Digital Yarn Twist Tester

Digital Yarn Twist Tester
A Digital Yarn Twist Tester is a laboratory device used to measure the number of twists (turns) per unit length in a yarn. It’s crucial for evaluating yarn quality, strength, elasticity, and uniformity. The digital version offers precise, automated readings for both S-twist and Z-twist yarns.
Purpose Digital Yarn Twist Tester:
To determine twist per inch (TPI) or twist per meter (TPM) in single and plied yarns using direct untwist or untwist-retwist methods.
Applications Digital Yarn Twist Tester:
Quality control in spinning mills
Yarn standard testing (cotton, polyester, blends)
R&D in textile manufacturing
Working Principle Digital Yarn Twist Tester:
One end of the yarn is clamped, and the other is rotated to remove or measure twists.
The tester counts and displays twist digitally based on length and rotation.
Benefits of Digital Yarn Twist Tester:
High Accuracy – Digital readout ensures precise twist measurements.
Quick Testing – Faster than manual methods, increasing lab efficiency.
Versatile Application – Suitable for single, doubled, or plied yarns.
Reduces Human Error – Automated counting improves repeatability and consistency.
Supports Both S & Z Twist – Measures both twist directions accurately.
User-Friendly Operation – Intuitive controls and clear display simplify use.
Features of Digital Yarn Twist Tester:
Digital Display – Shows real-time twist count and length.
Motorized Rotation- Smooth, adjustable rotation speed for controlled untwisting.
Dual Clamp System – Holds yarn securely to prevent slippage.
Length Measurement Scale – Built-in ruler or encoder for precise yarn length setup.
Auto Stop Function – Automatically stops when yarn is fully untwisted.
Selectable Units – Twist readings available in TPI or TPM.
How to Use Digital Yarn Twist Tester:
Prepare the Yarn Sample
– Cut a yarn length (e.g., 250 mm or 10 inches) as per testing standard.
– Make sure it’s free from knots or damage.
Mount the Yarn – Fix one end in the stationary clamp and the other in the rotating clamp.
– Ensure the yarn is straight and under slight tension.
Set the Gauge Length – Adjust the length scale or input it digitally, depending on the machine.
Select Twist Direction – Choose S or Z direction based on the yarn’s twist.
Start the Test – Activate the motor to untwist (or untwist-retwist, if applicable). – The display shows the number of rotations. Read the Twist Value – The twist (TPI/TPM) appears automatically based on the set length.
Stop and Unload – Once reading is complete, stop the machine and remove the yarn.
Record the Result – Note the reading for documentation or further analysis.
Maintenance Tips for Digital Yarn Twist Tester:
Daily:
☐ Wipe down the machine and clamps to remove dust or fibers
☐ Check for yarn residue on rotating parts
☐ Ensure display and buttons are responsive
Weekly:
☐ Lubricate rotating spindle lightly (if required)
☐ Inspect clamps for wear or misalignment
☐ Test motor rotation for smooth operation
☐ Check twist direction selector switch
Monthly:
☐ Calibrate digital display if twist readings drift
☐ Inspect electrical wiring and connectors
☐ Tighten any loose screws or panel parts
Safety Tips:
Avoid Loose Clothing: Prevent getting caught in the rotating spindle
Use Proper Yarn Tension: Overstretching may snap the yarn or damage clamps
Handle With Care: Avoid rough handling of the digital panel or twist arm
Power Off When Not in Use: Prevents accidental operation
Follow Manual: Refer to user guide for specific calibration or cleaning procedures
Digital Yarn Twist Tester – Maintenance & Safety Checklist
Daily Maintenance:
☐ Clean clamps and body surface
☐ Remove lint or yarn fragments
☐ Verify display & control buttons function properly
Weekly Maintenance:
☐ Lightly lubricate spindle if required
☐ Inspect clamp alignment and grip
☐ Test motor for smooth, silent operation
☐ Check twist direction switch
Monthly Maintenance:
☐ Calibrate twist reading accuracy
☐ Inspect cables and connectors
☐ Tighten loose hardware
☐ Run full test to ensure system performance
Safety Checklist:
☐ Keep hands clear of rotating parts during testing
☐ Avoid loose clothing or jewelry
☐ Do not overstretch or over tension yarn
☐ Power off when cleaning or not in use
☐ Follow the machine’s manual for calibration and service
Basic Troubleshooting Guide – Digital Yarn Twist Tester
Issue: No Power / Display Not Turning On
– Check power cable and socket
– Inspect fuse or main switch
– Ensure emergency stop isn’t engaged
Issue: Twist Count Seems Inaccurate
– Recalibrate the machine
– Verify yarn length input is correct
– Check for slippage in clamps
Issue: Motor Not Rotating
– Ensure motor switch is ON
– Inspect motor connection and wiring
– Test rotation manually to check for blockage
Issue: Display Freezes or Buttons Unresponsive
– Restart the machine
– Check control panel for dust or moisture
– Contact support if issue persists
Issue: Auto-Stop Not Working
– Ensure length and twist direction are set
– Check sensor alignment or damage
– Reboot and re-run test
Scope of application
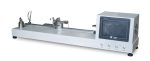
It is used for testing the twist, twist irregularity and twist shrinkage of all kinds of yarns.
[Related standards]
GB/T2543.1/2 FZ/T10001 ISO2061 ASTM D1422 JIS L1095 etc.
Technical parameters
1. Work mode:Computer program control, data processing, printout results
2. Test methods:
A, Average twisting slip elongation
B, Average maximum twisting elongation.
C, Direct counting method D, twisting twisting A method
E, Twisting twisting B method f and three times twisting twisting method
3. Sample length:10、25、50、100、200、250、500mm
4. Twist test range:1~1998 twist /10cm, 1~1998 twist /m
5. The extent of twist removal:Maximum 50mm
6. Maximum twist measurement.20mm
7. Speed:600~3000r/min
8. Pre tension:0.5~171.5cN
Digital Yarn Twist Tester
9. Size:920×170×220mm
10. Power supply:Ac220V 50Hz 25W
11. Weight:16kg
Shipping & Delivery
Related products
Cone yarn Dyeing machine
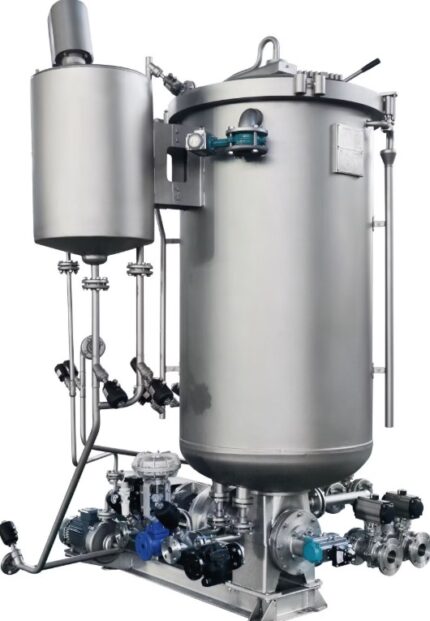
Cone Yarn Dyeing Machine

Cone Yarn Dyeing Machine
- Computer system: Foshan HuaGao Chinese English computer, equipped with LG PLC.
- Electromagnetic valve: Ningbo Jiaerling
- Frequency converter: Use Made in China frequency converters.
- Pump: self-made high head and large flow centrifugal water pump.
- Main pump motor: Anhui Wannan Motor.
- Master cylinder liquid level: Use 4-20mA analog signal output.
- Level of deputy temporary worker: use foam water level gauge. (American Mike)
- Temperature detection and display: digital temperature display instrument, dual temperature measuring probes.
- The safety system has a triple cylinder head safety interlock mechanism, and the main cylinder is equipped with a stainless
- steel safety valve.
- Heat exchanger: external spacer heating.
- Feeding system: Quantitative feeding based on the process curve.
- Circulation system: The main pump flows internally and externally, which is automatically controlled by a computer or manually controlled by a relay.
- Valves: Y valves are used for heating, stainless steel Y valves are used for single inlet and single row, and other Y valves are produced by joint ventures.
- Temperature control: on-off temperature control, controlled by a computer, with automatic heating, cooling, and insulation functions.
- Dyeing method: air cushion type.
- Opening method: manual opening.
- Surface treatment: polishing inside and outside the cylinder.
- Cage: Each dyeing machine is equipped with butterfly blades and self-locking locks.
- Body plate: high-quality stainless steel. (S31603)
- Bath ratio: 1:5-1:6
- Chemical material system: including heating and water adding functions, including overflow type salt melting device.
- Overflow cleaning: The cleaning port is installed on the upper part of the cylinder port, and the bottom of the cylinder is filled with water, while the cylinder is drained for easy cleaning.
- Commutation method: Novel "U" type commutation.
- Random accessories: Each model comes with one set of mechanical seals, pot mouth rings, and reversing seals for the main and auxiliary pumps.
Cone Yarn Dyeing Machine
Spray Rating Tester
Spray Rating Tester

Spray Rating Tester
- Quick and Simple Evaluation - Offers a fast way to assess fabric water repellency without complex setup.
- Standardized Testing- Complies with AATCC 22 and ISO 4920, ensuring globally accepted results.
- Cost-Effective- Low maintenance and no power requirement make it economical for routine lab use.
- Improves Fabric Performance - Helps manufacturers develop or improve water-resistant textiles.
- Non-Destructive Test - Does not damage the fabric, allowing for additional tests on the same sample.
- Visual Grading- Easy to interpret using a standard spray rating chart (0 to 100 scale).
- Supports Quality Control - Detects finish degradation or variation in water-repellent treatments.
- Portable and Compact- Lightweight design allows easy use in various lab or field settings.
- Standardized Spray Nozzle - Delivers consistent water spray per AATCC and ISO specifications.
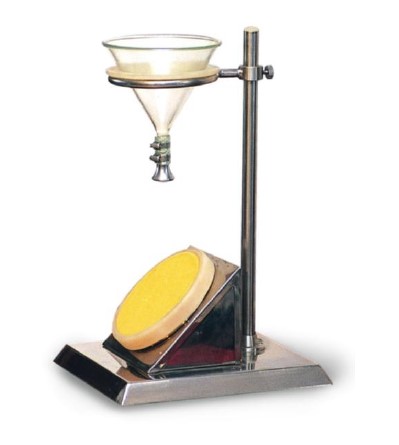
- 45° Specimen Mounting Angle - Ensures uniform test setup for accurate and repeatable results.
- Stainless Steel or Aluminum Frame - Corrosion-resistant and durable for long-term use with water exposure.
- Water Reservoir and Funnel System - Provides precise water volume (usually 250 ml) for each test.
- Graduated Spray Stand- Fixed height (150 mm above specimen) for controlled spray impact.
- Detachable Specimen Holder- Easy loading and removal of fabric samples.
- Compact and Lightweight Design - Portable and convenient for both lab and field testing.
- No Electricity Required - Fully manual operation increases reliability and reduces operating costs.
- Prepare the Sample - Cut fabric to standard size (usually 180 × 180 mm). - Condition the sample if required (21°C, 65% RH for 24 hours).
- Mount the Fabric - Place the fabric on the specimen holder at a 45° angle.
- Fill the Reservoir - Pour 250 ml of distilled water into the upper funnel.
- Start the Test - Release the water through the nozzle; it sprays over the fabric for about 25–30 seconds.
- Inspect the Fabric - After spraying, visually assess the water beading or penetration on the surface.
- Rate the Sample - Compare the fabric’s wetting pattern with the standard spray rating chart: - 100 = No sticking/wetting - 90–50 = Partial wetting - 0 = Complete wetting
- Record the Rating - Document the spray rating for quality control or reporting.
 Spray Reting Tester
[Scope of application]:
Used for the determination of moisture resistance (wetting grade) of various fabrics
which have been or have not been treated with water resistance or water repellency.
[related standards]:
GB/T4745 ISO4920 AATCC22 JISL1092 etc.
[technical parameters]:
1. Glass funnel:150 x 150 (capacity 500ml)
2. Specimen placement angle:The level is 45 degrees.
3. Distance from nozzle to sample center:150mm
4. Specimen diameter:Ф150mm
5. Size of water receiving pan:500×400×30mm
6. Matching measuring cups:500ml
7, size 500 x 400 x 500mm
8. Instrument weight:5Kg
Spray Reting Tester
[Scope of application]:
Used for the determination of moisture resistance (wetting grade) of various fabrics
which have been or have not been treated with water resistance or water repellency.
[related standards]:
GB/T4745 ISO4920 AATCC22 JISL1092 etc.
[technical parameters]:
1. Glass funnel:150 x 150 (capacity 500ml)
2. Specimen placement angle:The level is 45 degrees.
3. Distance from nozzle to sample center:150mm
4. Specimen diameter:Ф150mm
5. Size of water receiving pan:500×400×30mm
6. Matching measuring cups:500ml
7, size 500 x 400 x 500mm
8. Instrument weight:5Kg 

Digital Bench top PH Meter
Digital Bench top PH Meter
Digital Bench top PH Meter
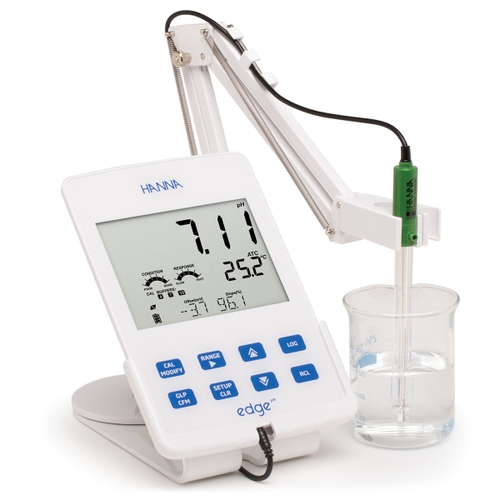
Brand: Hanna Model: HI2002 Country of Manufacture: Romania Origin: USA
Digital Bench top PH Meter
Single parameter of Digital Bench top PH Meter features user-friendly tablet design with bench, portable or wall mount options for ultimate flexibility. Switch from portable to bench in the same procedure or clear the surface for easier working and hang on the wall. Digital Bench top PH Meter Range -2.00 to 16.00pH; pH Digital smart electrode compatible Accuracy: ±0.01 pH edge® pH is dedicated to testing pH. Using Hanna's latest innovation in technology and design, edge® can be adapted to suit your working method. Select from hand held, wall mount or bench top - or switch between them all. edge® is happy any which way. Simply plug in the electrode, then play. Measurement is simpler, quicker and more accurate than ever. Results are fast and reliable. Combining high precision technology with the user-friendly dimensions and format of a small digital tablet, edge® is breaking new ground in electrochemistry. This is a must-have meter for your laboratory.| pH Range | basic mode: -2.00 to 16.00 pH; standard mode: -2.000 to 16.000 pH | |
| Resolution | basic mode: 0.01 pH; standard mode: 0.001 pH | |
| Accuracy (@25°C) | basic mode: ±0.01 pH; standard mode: ±0.002 pH | |
| Calibration | basic mode: automatic, up to three points calibration, 5 standard buffers available; standard mode: automatic, up to five point calibration, 7 standard buffers available and two custom buffers | |
| Temperature Compensation | automatic, -5.0 to 100.0°C (using integral temperature sensor) | |
| Electrode Diagnostics | standard mode: probe condition, response time and out of calibration range | |
| mV pH Range | ±1000 mV | |
| Resolution | 0.1 mV | |
| Accuracy (@25°C) | ±0.2 mV | |
| ORP Range | ±2000 mV | |
| Resolution | 0.1 mV | |
| Accuracy (@25°C) | ±0.2 mV | |
| Temperature Range | -20.0 to 120.0°C | |
| Resolution | 0.1°C | |
| Accuracy | ±0.5°C | |
| Additional Specifications: | ||
| Probe | HI-11310 digital glass body pH electrode with 3.5mm connector and 1m cable | |
| Logging | up to 1000 (400 for basic mode) records organised in: manual log-on demand (max. 200 logs), manual log-on-stability (max. 200 logs), interval logging (max. 600 samples; 100 lots) | |
| Connectivity | 1 USB port for storage; 1 micro USB port for charging and PC connectivity | |
| Environment | 0 to 50°C; RH max 95% non-condensing | |
| Power Supply | 5 VDC adapter (included) | |
| Dimensions | 2020 x 140 x 12 mm | |
| Weight | 250 g |
- High Accuracy and Resolution
- Digital Display - Large, clear LCD or LED screen shows pH readings, temperature, and sometimes mV or ion concentration. - Some models include a backlit display for better visibility.
- Electrode System - Uses a pH-sensitive electrode (usually glass) connected to a reference electrode. Electrodes are often replaceable and require regular calibration and maintenance.
- Temperature Compensation - Automatic or manual temperature compensation to correct pH readings based on sample temperature. - Integrated temperature sensors or separate probes are used.
- Calibration Functions - Supports 2-point, 3-point, or multi-point calibration using standard buffer solutions. - Auto-recognition of calibration buffers in advanced models.
- Data Storage and Connectivity - Internal memory for storing results. - USB or RS232 ports for data export to PCs or printers; some models support wireless connectivity.
- Sturdy Design - Benchtop models are larger and more stable than portable meters. - Often come with a durable casing and electrode arm for hands-free operation.
- High Accuracy and Precision
- User-Friendly Interface- Digital displays (LCD/LED) make readings easy to see and interpret.- Many models offer intuitive controls and guided calibration, simplifying operation.
- Advanced Calibration Features- Supports multi-point calibration for improved accuracy across a wide pH range.- Some models automatically recognize buffer solutions, reducing user error.
- Temperature Compensation- Automatic temperature compensation (ATC) corrects readings based on sample temperature, ensuring accuracy.
- Stable and Durable Design- Benchtop units are more robust and stable than handheld devices, reducing the risk of spills or tipping.- Often include electrode holders or arms for secure, hands-free measurements.
- Data Management and Connectivity- Built-in memory for storing measurement data.USB, RS232, or wireless connectivity for exporting data to computers or laboratory information systems (LIS).
- Multi-Functionality- Some models also measure ORP (oxidation-reduction potential), ion concentration, or conductivity.- Suitable for a variety of testing needs beyond just pH.
- Ideal for Long-Term Use- Designed for prolonged and repeated use in laboratory environments.- Replaceable electrodes and parts extend the meter’s usable life.
- Compliance and Documentation- Data logging features support documentation and compliance with regulatory standards in regulated industries (e.g., pharma, food, environmental testing).

Fully Automatic Radio Frequency Dryer
Fully Automatic Radio Frequency Dryer
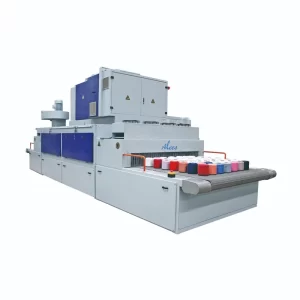
Fully Automatic Radio Frequency Dryer
Fully Automatic Radio Frequency Dryer

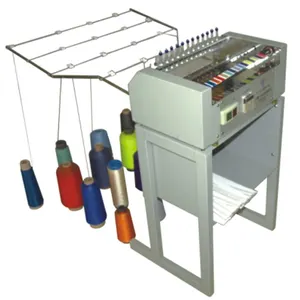
Thread Cone Winding Machine
Thread Cone Winding Machine

Thread Cone Winding Machine
- Efficient Yarn Packaging - Speeds up the process of preparing thread for sewing or embroidery.
- Uniform Cone Formation - Ensures consistent cone shape and tension for smooth downstream use.
- Reduces Thread Breakage - Controlled tension and smooth guiding minimize thread damage.
- Time & Labor saving- Automates winding, reducing manual effort and increasing productivity.
- Improves Thread Quality - Removes loose fibers and irregularities during winding.
- Supports Multiple Yarn Types - Compatible with cotton, polyester, silk, and blended threads.
- Adjustable Winding Speed - Variable speed control for different thread types.
- Thread Tension Control System - Maintains consistent tension for smooth winding.
- Auto Stop Mechanism - Stops automatically when cone is full or thread breaks.
- Multiple Spindle Options - Single or multi-spindle designs for higher output.
- Traverse Mechanism - Ensures even layering of thread across the cone.
- Compact & Durable Build - Space-saving, long-lasting structure for industrial use.
- Set Up the Machine - Turn on the power and check all safety covers and switches.
- Load the Yarn Source - Place the yarn hank, bobbin, or spool on the supply holder.
- Mount the Empty Cone - Fix an empty cone securely onto the spindle.
- Thread the Machine - Guide the thread through tension disks, guides, and eyelets as per the machine path.
- Adjust Settings - Set the desired winding speed and tension based on thread type.
- Start the Machine - Press the start button; the thread begins winding onto the cone.
- Monitor the Process - Ensure even winding and tension; adjust traverse if needed.
- Auto-Stop or Manual Stop - The machine will stop automatically if the cone is full or thread breaks.
- Remove the Cone - Carefully remove the finished cone and load a new one if needed.
- Clean and Shut Down - Turn off the machine and clean any thread residue after use.
- Always Use Safety Guards - Ensure all protective covers are in place before operation.
- Avoid Loose Clothing - Prevent thread or moving parts from catching clothes or jewelry.
- Power Off Before Maintenance - Always turn off the machine before threading, cleaning, or adjustments.
- Check Thread Path - Use correct threading to prevent sudden breakage or tangling.
- Don’t Overload the Cone - Stop the machine once the cone is adequately filled to avoid jamming.
- Keep Area Clean - Remove lint and thread waste regularly to prevent fire hazards or machine faults.
- Daily Cleaning - Wipe dust and thread particles from guides, spindles, and tension parts.
- Lubrication - Oil moving parts (as per manual) weekly to reduce wear.
- Check Tension Settings - Inspect and calibrate tension mechanisms for consistent winding.
- Inspect Belts and Motors - Look for wear or looseness in drive belts and check motor sound regularly.
- Replace Worn Parts Promptly - Replace traverse mechanisms, springs, or tension disks if worn out.
Thread Cone Winding Machine
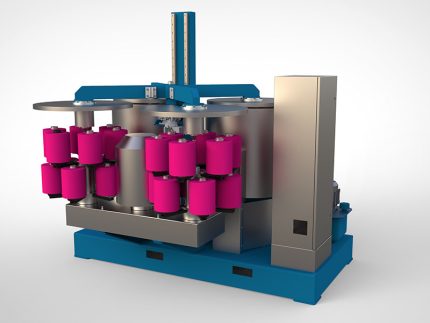
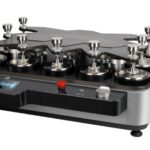
Automatic Bobbin Hydro extractor
Automatic Bobbin Hydro extractor

Automatic Bobbin Hydro extractor
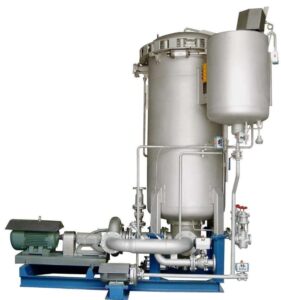
- Computer system: Foshan HuaGao Chinese English computer, equipped with LG PLC.
- Electromagnetic valve: Ningbo Jiaerling
- Frequency converter: Use Made in China frequency converters.
- Pump: self-made high head and large flow centrifugal water pump.
- Main pump motor: Anhui Wannan Motor.
- Master cylinder liquid level: Use 4-20mA analog signal output.
- Level of deputy temporary worker: use foam water level gauge. (American Mike)
- Temperature detection and display: digital temperature display instrument, dual temperature measuring probes.
- The safety system has a triple cylinder head safety interlock mechanism, and the main cylinder is equipped with a stainless
- steel safety valve.
- Heat exchanger: external spacer heating.
- Feeding system: Quantitative feeding based on the process curve.
- Circulation system: The main pump flows internally and externally, which is automatically controlled by a computer or manually controlled by a relay.
- Valves: Y valves are used for heating, stainless steel Y valves are used for single inlet and single row, and other Y valves are produced by joint ventures.
- Temperature control: on-off temperature control, controlled by a computer, with automatic heating, cooling, and insulation functions.
- Dyeing method: air cushion type.
- Opening method: manual opening.
- Surface treatment: polishing inside and outside the cylinder.
- Cage: Each dyeing machine is equipped with butterfly blades and self-locking locks.
- Body plate: high-quality stainless steel. (S31603)
- Bath ratio: 1:5-1:6
- Chemical material system: including heating and water adding functions, including overflow type salt melting device.
- Overflow cleaning: The cleaning port is installed on the upper part of the cylinder port, and the bottom of the cylinder is filled with water, while the cylinder is drained for easy cleaning.
- Commutation method: Novel "U" type commutation.
- Random accessories: Each model comes with one set of mechanical seals, pot mouth rings, and reversing seals for the main and auxiliary pumps.
Automatic Bobbin Hydro extractor

Fabric Stiffness Tester
Fabric Stiffness Tester

Fabric Stiffness Tester
- Accurate Measurement of Flexibility - Provides reliable data on fabric stiffness, essential for quality control and product development.
- Improves Product Comfort - Helps assess how soft or rigid a fabric will feel in clothing or furnishings.
- Supports Material Selection - Aids designers and engineers in choosing the right fabric for specific applications based on stiffness.
- Quality Assurance - Detects fabric inconsistencies or defects that affect handling or drape.
- Standards Compliance - Enables testing as per international standards like ASTM D1388 and ISO 9073-7 for global product approval.
- Quick and Simple Operation - Delivers fast results with minimal operator training or preparation.
- Applicable to Multiple Materials - Suitable for woven, nonwoven, knitted fabrics, paper, and films.
- Enhances R&D Accuracy - Supports consistent material testing during product innovation and textile finishing.
- Graduated Measurement Scale - Precise scale to measure overhang length for accurate stiffness calculation.
- Flat Test Platform - Smooth, level surface ensures consistent and reliable fabric movement.
- Standard Deflection Angle Guide - Built-in 41.5° angle reference for consistent stiffness testing (per ASTM/ISO).
- Manual or Motorized Models - Available in both types for simple or automated operation depending on lab needs.
- Compact Design - Space-saving unit ideal for textile labs and quality control rooms.
- Sample Holder or Clamp - Ensures correct alignment and smooth feeding of fabric strips during testing.
- Durable Construction - Made of corrosion-resistant materials like stainless steel or aluminum for long-term use.
- Compliance with Standards - Supports methods like ASTM D1388, ISO 9073-7 for stiffness testing of fabrics.
- Lightweight and Portable - Easy to move and use in various lab settings.
- Low Maintenance - Simple mechanical parts require minimal servicing.
- Prepare the Sample - Cut the fabric into a rectangular strip (e.g., 25 mm × 200 mm), as per standard.
- Place the Sample - Lay the fabric strip flat on the test platform with one end aligned at the zero mark.
- Slide the Fabric - Gently push the fabric forward so it slowly overhangs the platform.
- Watch for Deflection - Stop sliding when the free end of the fabric bends down to the reference angle (typically 41.5°).
- Read the Bending Length - Measure the overhang distance from the scale. This is the bending length (C).
- Calculate Flexural Rigidity
- Repeat for Accuracy - Test both warp and weft directions and average the results for better accuracy.
 Scope of application
It is used to measure the stiffness of cotton,
wool, silk, linen, chemical fibers and other woven fabrics,
knitted fabrics, general nonwovens, coated fabrics, etc.
It is also suitable for measuring the stiffness of paper,
leather, film and other flexible materials.
Relevant Standards
GB/T 18318, ASTM D 1388, IS09073-7, BS EN22313 etc.
[Instrument Characteristics]
1. Infrared photoelectric invisible inclined plane
detection system replaces the traditional tangible inclined plane,
realizes non-contact detection, and overcomes the problem that
the measurement accuracy is affected by
the sample torsion lifted by the inclined plane.
2. The inclination adjustable mechanism of instrument
measurement to meet different test requirements.
3. Stepping motor drive, accurate measurement, smooth operation;
4. The color touch screen display can show the extended length,
bending length, bending stiffness of the sample, the warp average,
the weft average and the total average of the above values respectively.
5. Printing of Chinese report forms for thermal printers.
Technical parameters
1. Test methods: The two method (A method: Weft test, B method: Forward and backward test)
2. Measurement angle:41.5 degree, 43 degree and 45 degree adjustable
3. Extend the length range:5-220 mm (special requirements can be made at the time of ordering)
4. Length resolution:0.01mm
5. Measurement accuracy:±0.1mm
6. Specimen specifications:250×25mm
7. Work platform specifications:250×50mm
8. Specification of sample pressing plate:250×25mm
9. Pushing speed of press plate:3 mm/s; 4 mm/s; 5 mm/s
10. Display output: Touch screen display
11. Print Output: Chinese Report
12. Data Processing Volume: A total of 15 groups, each group less than 20 trials
13. Printer: Thermal printer
14, power supply:AC220V 50Hz
15. Host volume:570mm×360mm×490mm
16. Host weight:20kg
Scope of application
It is used to measure the stiffness of cotton,
wool, silk, linen, chemical fibers and other woven fabrics,
knitted fabrics, general nonwovens, coated fabrics, etc.
It is also suitable for measuring the stiffness of paper,
leather, film and other flexible materials.
Relevant Standards
GB/T 18318, ASTM D 1388, IS09073-7, BS EN22313 etc.
[Instrument Characteristics]
1. Infrared photoelectric invisible inclined plane
detection system replaces the traditional tangible inclined plane,
realizes non-contact detection, and overcomes the problem that
the measurement accuracy is affected by
the sample torsion lifted by the inclined plane.
2. The inclination adjustable mechanism of instrument
measurement to meet different test requirements.
3. Stepping motor drive, accurate measurement, smooth operation;
4. The color touch screen display can show the extended length,
bending length, bending stiffness of the sample, the warp average,
the weft average and the total average of the above values respectively.
5. Printing of Chinese report forms for thermal printers.
Technical parameters
1. Test methods: The two method (A method: Weft test, B method: Forward and backward test)
2. Measurement angle:41.5 degree, 43 degree and 45 degree adjustable
3. Extend the length range:5-220 mm (special requirements can be made at the time of ordering)
4. Length resolution:0.01mm
5. Measurement accuracy:±0.1mm
6. Specimen specifications:250×25mm
7. Work platform specifications:250×50mm
8. Specification of sample pressing plate:250×25mm
9. Pushing speed of press plate:3 mm/s; 4 mm/s; 5 mm/s
10. Display output: Touch screen display
11. Print Output: Chinese Report
12. Data Processing Volume: A total of 15 groups, each group less than 20 trials
13. Printer: Thermal printer
14, power supply:AC220V 50Hz
15. Host volume:570mm×360mm×490mm
16. Host weight:20kg 
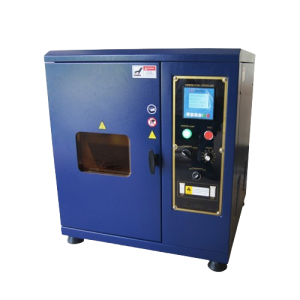
Sample Cone Yarn Dyeing machine
Sample Cone Yarn Dyeing Machine

Sample Cone Yarn Dyeing Machine
- Computer system: Foshan HuaGao Chinese English computer, equipped with LG PLC.
- Electromagnetic valve: Ningbo Jiaerling
- Frequency converter: Use Made in China frequency converters.
- Pump: self-made high head and large flow centrifugal water pump.
- Main pump motor: Anhui Wannan Motor.
- Master cylinder liquid level: Use 4-20mA analog signal output.
- Level of deputy temporary worker: use foam water level gauge. (American Mike)
- Temperature detection and display: digital temperature display instrument, dual temperature measuring probes.
- The safety system has a triple cylinder head safety interlock mechanism, and the main cylinder is equipped with a stainless
- steel safety valve.
- Heat exchanger: external spacer heating.
- Feeding system: Quantitative feeding based on the process curve.
- Circulation system: The main pump flows internally and externally, which is automatically controlled by a computer or manually controlled by a relay.
- Valves: Y valves are used for heating, stainless steel Y valves are used for single inlet and single row, and other Y valves are produced by joint ventures.
- Temperature control: on-off temperature control, controlled by a computer, with automatic heating, cooling, and insulation functions.
- Dyeing method: air cushion type.
- Opening method: manual opening.
- Surface treatment: polishing inside and outside the cylinder.
- Cage: Each dyeing machine is equipped with butterfly blades and self-locking locks.
- Body plate: high-quality stainless steel. (S31603)
- Bath ratio: 1:5-1:6
- Chemical material system: including heating and water adding functions, including overflow type salt melting device.
- Overflow cleaning: The cleaning port is installed on the upper part of the cylinder port, and the bottom of the cylinder is filled with water, while the cylinder is drained for easy cleaning.
- Commutation method: Novel "U" type commutation.
- Random accessories: Each model comes with one set of mechanical seals, pot mouth rings, and reversing seals for the main and auxiliary pumps.
Sample Cone Yarn Dyeing Machine