About us
Select category
  • Select category
  • Dyeing Lab Machine
  • Lab Equipment & Instrument
  • Physical Testing & Fabric Testing
  • Yarn Dyeing Machine & Equipment
1 item $0.00
Menu
About us
1 item $0.00
  • Home
  • Products
    • Dyeing Lab Machine
      • Products
        • IR Dyeing Machine Dunlin IR Dyeing Machine Dunlin
        • Digital Ph meter
        • Color fastness to washing machine
        • Rainin Digital Pipette
        • HTHP Glycerin bath dyeing machine
        • Laboratory mini stenter Dryer
        • Laboratory tenter
        • Laboretory hydro Extractor
        • Laboretory Padder
        • Oscillation type Dyeing Machine
        • Orbital Shaker Machine
        • Steam Soaping machine

      IR Dyeing Machine Dunlin

      View More
    • Physical Testing & Fabric Testing Machine
      • Products
        • Tensile Strength tester
        • Martindale abrasion tester
        • Martindale abrasion tester updated Martindale abrasion tester Updated
        • Digital Elmendorf tearing tester
        • Bursting strength tester
        • ICI pilling & Snagging test machine
        • Fabric Stiffness Tester
        • Color Fastness to washing machine
        • Fabric air permeability tester
        • Fabric drape tester
        • Fabric flame retardant tester
        • fabric moisture permeability tester
      • Products
        • Stretch Recovery Tester Static Method
        • Xenon Arc Light Fastness Tester
        • Fastness rotary friction tester
        • Fiber oil fast extractor
        • Fabric flame retardant tester
        • Random Tumble Pilling Tester
        • Spray Rating Tester
        • Fatigue tester for Elastic fabric
    • Lab Equipment & Instrument
      • Products
        • Counting Balance /Weighing Scale
        • controller for Ir Dyeing Machine
        • Analog Thickness gauge
        • color matching cabinet/Light box
        • VeriVide Colour Assessment Cabinets
        • Digital hotplate magnetic stirrer
        • Digital Temperature Humidity meter
        • Digital Ink Rubbing Tester
        • Digital paper dot meter Densitometer
        • Digital Bench top PH Meter
        • Digital precision balance
        • Digital thickness gauge
      • Products
        • Pantone book
        • Hydraulic GSM Cutter
        • Gray scale
        • GSM Cutter & Balance
        • Hand needle detector
      • Products
        • Perspiration Tester
        • Textile moisture meter tem aqua boy
        • VeriVide D65 Tube Light
        • Yarn Tension Meter
    • Wet & Dry Process Instrument
      • Products
        • Bosch tumble dryer
        • Bosch-Washing-Machine-WAJ2018SGC-4
        • Capillary effect tester
        • Color fastness to wash
        • Color fastness to sublimation & heating
        • Durawash print Durability tester
        • Formaldehyde tester for textiles
        • Ozone Exposure chamber
        • Pilling assessment viewer
        • Whirlpool washer & Dryer
      Textile Machinery Supplier in Bangladesh

      MAAM TEX

      Lab Machine Supplier in Bangladesh, Testing machine supplier in Bangladesh, Dyeing Machine supplier in Bangladesh, Lab Machine Supplier in Dhaka, yarn Dyeing machine supplier in Bangladesh, Lab Dispensing Machine supplier in Bangladesh, soft winding machine supplier in Bangladesh, Hard winding machine supplier in Bangladesh, IR Dyeing machine supplier in Bangladesh, Lab machine Price in Bangladesh, 

    • Yarn Dyeing Machine-Equipment
      • Products
        • Cone yarn Dyeing machine
        • Automatic Bobbin Hydroextractor
        • Card winding machine for yarn
        • Sample Cone Yarn Dyeing machine
        • Digital yarn twist Tester
        • Electronic wrap reel
        • Fully Automatic Radio Frequency Dryer
        • Thread Cone Winding Machine
        • High speed hard winding machine
        • High speed Soft cone winding machine
        • Yarn evenness tester
      • Products
        • Yarn evenness tester
    • Washing-Drying Machine
      • Products
        • Automatic washing project
  • About us
  • Contact us
“Analog Thickness Gauge” has been added to your cart. View cart
Digital Ink Rubbing Tester
360 product view
    0%
    Click to enlarge
    Digital Ink Rubbing Tester
    Digital Ink Rubbing Tester
    Home Lab Equipment & Instrument Digital Ink Rubbing Tester
    Perspiration Tester
    Perspiration Tester $0.00
    Back to products
    Cone Yarn Dyeing Machine
    Cone yarn Dyeing machine $0.00

    Digital Ink Rubbing Tester

    $0.00

    Digital Ink Rubbing Tester

    Digital Ink Rubbing Tester

    Digital Ink Rubbing Tester


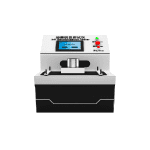
    A Digital Ink Rubbing Tester is a laboratory device used to evaluate the abrasion resistance and print durability of printed materials such as paper, packaging, labels, and printed films. It simulates the rubbing action between printed surfaces to test how well ink or coating adheres under friction.


    Purpose of Digital Ink Rubbing Tester:

    – Measures how much ink or print wears off when rubbed against another surface.

    – Helps assess print quality, especially for packaging, labels, and publications.


    ⚙️ Key Features of Digital Ink Rubbing Tester:

    – Digital Control Panel: For setting rubbing speed, stroke length, and number of cycles.

    – Adjustable Load: Pressure can be adjusted to simulate real-use friction.

    – Counter Display: Shows the number of rubbing cycles completed.

    – Sample Holders: Secure the test samples and rubbing medium in place.

    – Automatic Stop: Machine stops automatically after the set number of cycles.


    Applications of Digital Ink Rubbing Tester:

    – Used in printing, packaging, and paper industries.

    – Commonly tests materials like labels, corrugated boxes, printed cartons, and laminates.


    ✅ Benefits of Digital Ink Rubbing Tester:

    – Ensures print durability under handling or shipping.

    – Supports quality control in production.

    – Helps in selecting better ink or coating formulations.


    ✅ 1. Ensures Print Durability

    – Tests how well ink or coating resists wear from friction, ensuring quality under real-world handling and shipping.

    ✅ 2. Improves Quality Control

    – Detects weak adhesion or poor ink quality early in the production process, reducing rework and returns.


    ✅ 3. Precise and Repeatable Testing

    – Digital settings allow accurate control of speed, pressure, and cycle count for consistent test conditions.

    ✅ 4. Saves Time and Labor

    – Automates the rubbing process with pre-set cycles, reducing manual effort and improving efficiency.

    ✅ 5. Versatile Application

    – Suitable for a wide range of printed materials: labels, packaging, paper, film, and coated surfaces.


    ✅ 6. Supports Product Development

    – Helps in testing and selecting the best inks, coatings, and substrates for specific use cases.

    ✅ 7. Meets Industry Standards

    – Often compatible with standards like ASTM D5264, ensuring credibility in test results.


    key features of a Digital Ink Rubbing Tester:

    ⚙️ 1. Digital Control Panel

    – Allows precise setting of rubbing speed, stroke length, and cycle count.

    2. LCD/LED Display

    – Shows real-time data like number of cycles, test duration, and operational status.


    3. Adjustable Load

    – Enables setting different pressure levels to simulate various handling conditions.

    4. Automatic Cycle Operation

    – Runs pre-set rubbing cycles and stops automatically after completion.

    5. Sample Holders/Fixtures

    – Securely holds test specimens and rubbing surfaces for accurate testing.


    ️ 6. User-Friendly Interface

    – Intuitive buttons and digital readouts for easy operation and test setup.

    7. Compatible with Industry Standards

    – Supports test methods like ASTM D5264 and TAPPI T830.

    8. Compact & Durable Design

    – Small footprint with a sturdy build for long-term use in lab environments.


    Here’s a simple step-by-step guide to using a Digital Ink Rubbing Tester:

    ✅ 1. Prepare the Samples

    – Cut the printed material to fit the sample holder.

    – Cut a rub surface (usually plain or standardized paper) for rubbing contact.

    ✅ 2. Mount the Samples

    – Place the printed sample on the base platform.

    – Secure the rubbing medium in the moving head or upper fixture.


    ✅ 3. Set Test Parameters

    – Use the digital control panel to input:

    – Number of cycles

    – Rubbing speed

    – Stroke length

    – Load/pressure (if adjustable)


    ✅ 4. Start the Test

    – Press the Start button.

    – The machine will perform rubbing action based on your settings.

    ✅ 5. Observe the Results

    – After completion, inspect the printed surface for ink wear, smudging, or fading.

    – Record results manually or digitally if the tester supports logging.


    ✅ 6. Clean and Reset

    – Remove samples, clean the fixtures, and turn off the device after use.

    Digital Ink Rubbing Tester

    Digital Ink Rubbing Tester


    Category: Lab Equipment & Instrument Tags: Digital Ink Rubbing Tester, Digital Ink Rubbing Tester for Lab, Digital Ink Rubbing Tester for Paper, Digital Ink Rubbing Tester for Printing, Digital Ink Rubbing Tester price in Bangladesh, Paper Ink Rubbing Tester Brand: DUNLIN
    Share:
    • Shipping & Delivery
    Shipping & Delivery

    Related products

    Controller For IR Dyeing Machine
    Color Matching Cabinet -light Box

    Controller For IR Dyeing Machine

    Dyeing Lab Machine, Lab Equipment & Instrument
    $0.00
    Controller For IR Dyeing Machine
    Controller For IR Dyeing Machine
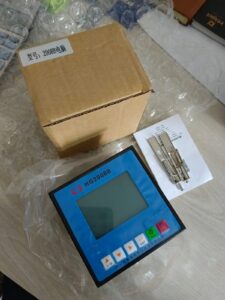
    IR Dyeing machine controller

    Controller For IR Dyeing Machine offers exceptional quality .purchasing of our controller provides cost efficiencies, and customization options enabling you to meet your specific requirements comfortably. Collaborate with program A Controller for IR Dyeing Machine is a specialized control system designed to manage and automate the dyeing process in textile manufacturing, particularly using infrared heating technology. These controllers are crucial for achieving consistent dye quality, reducing energy consumption, and optimizing the dyeing process.   Key Features of an Controller For IR Dyeing Machine :
    1. Temperature Control:- Precisely regulates the infrared heaters to maintain uniform temperature across the dye bath. - Supports customizable heating curves (ramp-up, hold, and cool-down phases).
    2. Programmable Logic Control (PLC): - Allows operators to set and automate dyeing programs for different fabrics and dye types. - Supports multiple recipes or programs for different batches.
     
    1. Real-Time Monitoring and Feedback: - Monitors parameters like temperature, fabric rotation, bath circulation, and timing. - Provides real-time data and alarms for deviations.
    2. Touchscreen Interface / HMI (Human Machine Interface): - User-friendly interface for configuring and monitoring processes. - Multi-language support and graphical display of process curves.
     
    1. Data Logging and Traceability: - Records process data for quality control and traceability.
    2. Energy Efficiency Optimization: - Manages IR heater output to reduce energy usage. - Often includes features for auto shut-off or idle mode.
     
    1. Safety Features: - Includes emergency stop, over-temperature protection, and fault detection systems. 8. Connectivity: - Modern controllers may support Ethernet, Modbus, or other industrial communication protocols for integration into factory automation systems.
      Using A Controller For IR Dyeing Machine provides several benefits, especially in textile manufacturing where precision and efficiency are critical. Here are the key advantages:
    1. Improved Dyeing Accuracy and Consistency
    - Maintains precise temperature control and timing, ensuring uniform dye uptake across the fabric. - Reduces color variation between batches.  
    1. Enhanced Energy Efficiency- Infrared heating is more energy-efficient than traditional heating methods.- The controller optimizes energy use by adjusting the IR output based on process needs, reducing overall energy consumption.
     
    1. Time Savings- Faster heating and cooling cycles due to infrared technology.- Automated processes reduce manual intervention and cycle times. 4. Better Process Control- Programmable dyeing cycles and precise control over each stage (heating, dyeing, rinsing, cooling).- Real-time monitoring and adjustments improve reliability.
     
    1. Reduced Water and Chemical Usage- More efficient dye penetration and fixation mean less water and fewer chemicals are needed for reprocessing or corrections.6. Lower Operational Costs
    - Energy savings, reduced rework, and lower labor input contribute to cost efficiency. - Minimizes fabric damage, reducing material waste.  
    1. Enhanced Safety Built-in alarms, emergency shut-off and automatic fault detection enhance operational safety.8. Data Logging and Traceability- Ability to record and review dyeing process data helps in quality control and troubleshooting.- Facilitates compliance with industry standards and audits.
     
    1. User-Friendly Operation- Modern touchscreen interfaces make it easier for operators to manage and monitor processes.- Multilingual support and visual feedback enhance usability.
     
    Add to cart
    Quick view
    Perspiration Tester
    Perspiration Tester

    Perspiration Tester

    Lab Equipment & Instrument
    $0.00

    Perspiration Tester

    Perspiration Tester

    Perspiration Tester

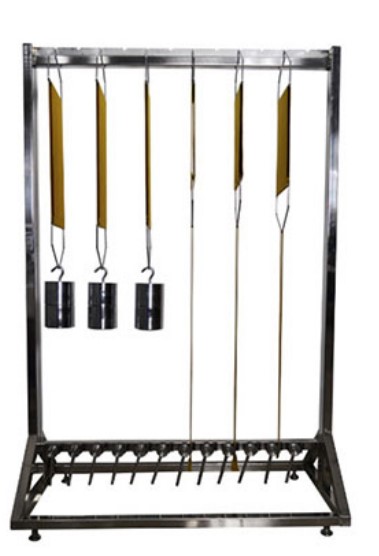
      A Perspiration Tester is a lab device used to evaluate the colorfastness of textiles to artificial perspiration (sweat). It simulates the effects of human sweat—both acidic and alkaline—on dyed or printed fabrics under controlled temperature and pressure.   Purpose of Perspiration Tester: - To test how fabrics react to body sweat and determine whether dyes bleed, fade, or transfer onto adjacent materials.   Working Principle:
    1. Fabric samples are treated with synthetic perspiration solution (acidic or alkaline).
    2. They are sandwiched with adjacent fabric and placed between glass or acrylic plates.
    3. The assembly is loaded into the tester and pressed under specific pressure.
    4. it’s then incubated at 37°C (body temperature) for a fixed time (typically 4 or 16 hours).
    5. Afterward, color change and staining are evaluated using a gray scale.
      Applications of Perspiration Tester: - Garment and sportswear testing - Quality control in textile processing - Compliance with standards like ISO 105 E04, AATCC 15   Benefits of Perspiration Tester:
    1. Accurate Sweat Simulation - Mimics real-life effects of acidic and alkaline perspiration on fabrics.
    2. Improves Product Quality - Ensures textiles retain color and don’t bleed or stain when worn.
    3. Supports Standard Compliance - Follows ISO and AATCC test standards for global market approval.
    4. Protects Brand Reputation- Reduces customer complaints due to dye transfer or fading.
     
    1. Simple and Repeatable- Provides consistent pressure and conditions for reliable results.
    2. Multi-Sample Testing- Tests multiple specimens at once, saving time in labs.
    3. Durable and Low Maintenance- Robust frame with minimal moving parts makes it long-lasting and easy to care for.
      Features of Perspiration Tester:
    1. Stainless Steel Frame - Corrosion-resistant body for durability and long-term use.
    2. Multi-Sample Capacity - Can hold up to 20 or more specimens for batch testing.
    3. Standardized Loading Weight- Applies uniform pressure (usually 12.5 kPa) across all samples.
    4. Removable Plates - Glass or acrylic plates ensure even contact and easy cleaning.
     
    1. Compact Design- Space-saving, bench-top model ideal for lab environments.
    2. Complies with Test Standards - Meets ISO 105 E04, AATCC 15, and related perspiration fastness standards.
    3. Ease of Operation - Simple loading, unloading, and incubation process.
    4. High-Temperature Resistance - Can be used inside incubators at 37°C or ovens as required.
      How to Use a Perspiration Tester:
    1. Prepare the Test Solution - Mix artificial acidic or alkaline perspiration as per standard (ISO or AATCC).
    2. Cut the Fabric Samples - Cut both the test fabric and adjacent white fabric (usually cotton) to standard size.
    3. Soak the Samples - Immerse the fabric sandwich (test + adjacent) in the test solution for 30 minutes.
    4. Remove Excess Liquid - Gently squeeze or blot to remove extra moisture—do not dry.
     
    1. Load in the Tester- Place each sandwich between glass or acrylic separator plates in the tester.
    2. Apply Pressure - Tighten the top plate or place the standard weight on top to apply uniform pressure.
    3. Incubate - Keep the loaded tester in an oven or incubator at 37°C for 4–16 hours (depending on the method).
    1. Accurate Sweat Simulation - Mimics real-life effects of acidic and alkaline perspiration on fabrics.
    2. Improves Product Quality - Ensures textiles retain color and don’t bleed or stain when worn.
    3. Supports Standard Compliance - Follows ISO and AATCC test standards for global market approval.
    4. Protects Brand Reputation- Reduces customer complaints due to dye transfer or fading.
     
    1. Simple and Repeatable- Provides consistent pressure and conditions for reliable results.
    2. Multi-Sample Testing- Tests multiple specimens at once, saving time in labs.
    3. Durable and Low Maintenance- Robust frame with minimal moving parts makes it long-lasting and easy to care for.
    1. Dry and Evaluate - Remove, air dry the samples, then assess color change and staining using a gray scale.
    2. Fabric samples are treated with synthetic perspiration solution (acidic or alkaline).
    3. They are sandwiched with adjacent fabric and placed between glass or acrylic plates.
    4. The assembly is loaded into the tester and pressed under specific pressure.
    5. it’s then incubated at 37°C (body temperature) for a fixed time (typically 4 or 16 hours).
    6. Afterward, color change and staining are evaluated using a gray scale.
      Perspiration Tester

      Perspiration Tester

    Add to cart
    Quick view
    Digital paper dot meter Densitometer

    Digital Paper Dot Meter Densitometer
    Lab Equipment & Instrument
    $0.00
    Digital Paper Dot Meter Densitometer
    Digital Paper Dot Meter Densitometer

    Digital Paper Dot Meter Densitometer

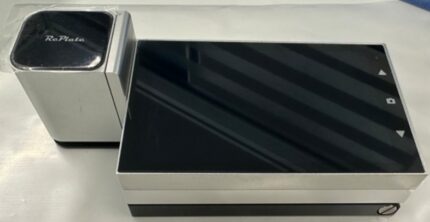
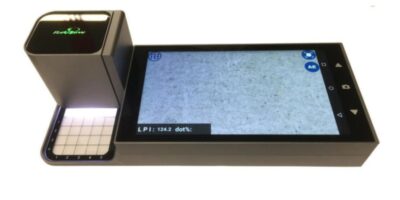
      Dot mainly expresses hue and gradation in printing industry. They are foundation of copy and color reproduction of printed products. Dot, tiniest unit to adsorb ink in offset print, reflects hue, gradation and tone of source products in printed. Changes of dots results in problems of printed products including sharpness, gradation, hue, contrast, tone of printing ink, ink density and black overprint. The advanced dot measurement technology is used for detecting and controlling plate and quality of dot. It supports all kinds of screening technologies used at present including amplitude screening, frequency modulation screening, specialized screening and hybrid screening technology.   A Digital Paper Dot Meter Densitometer is a precision instrument designed to measure the optical density and dot characteristics of printed materials, particularly in the printing and packaging industries. It plays a crucial role in quality control by ensuring color consistency, accurate dot reproduction, and overall print fidelity.   Purpose and Applications of Digital Paper Dot Meter Densitometer This device is primarily used to: - Measure Optical Density: Assess the darkness or lightness of printed areas to ensure consistent ink application. - Evaluate Dot Gain: Determine the increase in dot size during printing, which affects image sharpness and color accuracy. - Analyze Dot Area and Enlargement: Quantify the percentage of area covered by dots and any unintended expansion. - Assess Overprint and Contrast: Examine how different ink layers interact and the contrast between printed elements. - Monitor Tone Error and Gray Balance: Ensure accurate reproduction of tones and neutral grays.     These measurements are vital for maintaining high-quality standards in offset printing, flexography, gravure, and other printing processes. ⚙️ Key Features Modern digital densitometers, such as the YD5010 PLUS Spectro-Densitometer, offer advanced functionalities: - Measurement Geometry: 45°/0° configuration for accurate color and density readings. - Light Sources: Combined LED and UV light for versatile measurement conditions. - Spectral Range: 400–700 nm with a 10 nm interval, covering the visible spectrum. - Detector: 256-element double array CMOS sensor for high-resolution data capture. - Density Standards: Compliant with ISO Status A, E, I, T for standardized measurements.   - Color Spaces: Supports CIE LAB, XYZ, Yxy, LCh for comprehensive color analysis. - Observer Angles: Selectable 2° and 10° angles for different viewing conditions. - Measurement Modes: Single and average measurements (2–99 readings) for flexibility. - Data Storage: Capacity to store over 10,000 measurement records. - Display: 3.5-inch TFT color LCD with capacitive touch for intuitive operation. - Power Supply: Rechargeable Li-ion battery supporting up to 5,000 measurements per charge. These features enable precise monitoring and control of printing processes, ensuring high-quality output. Measurement Capabilities of Digital Paper Dot Meter Densitometer Digital densitometers provide a range of measurement functions: - Density Value and Difference: Quantify the optical density and compare variations across samples. - Dot Area and Enlargement: Calculate the percentage of area covered by ink dots and any growth during printing.   - Overprint Analysis: Evaluate how different ink layers interact when overprinted. - Printing Characteristics: Assess parameters like contrast, tone error, and gray balance. - Color Difference (ΔE): Measure the deviation between intended and actual colors using formulas like ΔE*ab, ΔE*94, and ΔE*00.These measurements are essential for maintaining color accuracy and consistency in printed materials.   Usage and Operation of Digital Paper Dot Meter Densitometer Using a digital paper dot meter densitometer typically involves:
    1. Calibration: Performing white and black calibration using provided standards to ensure measurement accuracy.
     
    1. Sample Placement: Positioning the printed sample under the measurement aperture.
    2. Measurement: Initiating the measurement process via the touch screen or connected software.
    3. Data Analysis: Reviewing the displayed results and, if necessary, transferring data to a computer for further analysis.Regular calibration and maintenance are recommended to maintain the device's accuracy and longevity.
      Industry Applications of Digital Paper Dot Meter Densitometer Digital paper dot meter densitometers are widely used in: - Printing and Packaging: Ensuring consistent color reproduction and print quality. - Ink Manufacturing: Testing ink properties and performance. - Paper Production: Assessing paper's suitability for various printing processes. - Quality Control Laboratories: Conducting standardized tests to comply with industry regulations.   By providing accurate and reliable measurements, these devices help maintain high standards across the printing and packaging industries.   Benefits of Digital Paper Dot Meter Densitometer:
    1. Accurate Dot Analysis - Precisely measures dot gain, dot area, and enlargement for high-quality printing.
    2. Consistent Print Quality - Helps maintain uniform color density and contrast across print runs.
    3. Time-Saving - Quick digital readings eliminate the need for manual inspection and reduce errors.
    4. Multi-Parameter Testing - Measures density, color difference (ΔE), tone error, and gray balance in one device.
     
    1. Supports Industry Standards - Complies with ISO and other standards for print quality control.
    2. User-Friendly Interface - Touchscreen and onboard storage make it easy to operate and manage test data.
    3. Portable and Rechargeable - Battery-powered with thousands of readings per charge—ideal for field and lab use.
    4. Enhances Process Control - Enables precise adjustments during printing to reduce waste and reprints.
      Features of Digital Paper Dot Meter Densitometer:
    1. High-Resolution CMOS Sensor - Ensures precise optical density and color measurements.
    2. Measurement Geometry: 45°/0° - Ideal for accurate reflection density readings on printed materials.
    3. Multiple Light Sources - Includes visible and UV LEDs for versatile testing conditions.
    4. Touchscreen Display - 3.5-inch color LCD with intuitive controls for easy operation.
     
    1. Multi-Function Measurement - Measures dot area, dot gain, density difference, tone error, and gray balance.
    2. Large Data Storage - Stores over 10,000 measurements for tracking and reporting.
    3. Rechargeable Battery - Long-lasting lithium battery supports up to 5,000 readings per charge.
    4. USB and Bluetooth Connectivity - Allows data transfer and remote operation via PC or mobile apps.
     
    1. Standard Compliance - Supports ISO Status A, E, I, T and CIE color spaces like LAB, LCh, XYZ.
    2. Multiple Observer Angles - Select between 2° and 10° for different visual perception simulations.
      How to Use Digital Paper Dot Meter Densitometer:
    1. Power On - Turn on the device using the power button.
    2. Calibrate - Perform black and white calibration using the provided standard tiles to ensure accuracy.
    3. Select Measurement Mode - Choose desired mode: density, dot area, dot gain, ΔE, contrast, or gray balance.
     
    1. Place Sample - Position the printed paper sample under the measurement aperture.
    2. Take Measurement - Press the measure button or tap the screen. The device will scan and display results instantly.
    3. Analyze Results - View data on the touchscreen. You can switch between values like density, dot area, and color difference.
    4. Save or Export Data - Store results in internal memory or transfer via USB/Bluetooth if needed.
    5. Power Off and Store - Turn off after use. Keep in a dust-free area to protect sensors.
      Performance characteristics: 1.Android OS with HD 720 capacitive touching screen, storage of shooting and measured data and wireless network transmission. 2.Real time HD shooting of micro image dots for reveal reduction quality of dots in detail. 3.Measurement APP is equipped with advanced image processing technology that ensures precise measure data, and eight measuring instruments for satisfying measurement of not only daily dot ratio and  screening lines, but also measuring of length, angle and area of dots and lines.   4.Electronic precise focusing with step motor to coordinate lens for a sharply clear focusing. 5.Convenient data storage through built-in one-button shoot Magnification 5-200, Screen 720 P HD LCD touchable screen Operation system Android 5.0, Digital zoom 2, Image format BMP, Net weight 300g, Set weight 500g Image size 1280*720, Lighting White light LTD*8pcs, Measuring time 1 s Repeatability ±0.02 D(density),± 1%(dot area), Interface Micro USB 2.0, HDMI   Storage 16GB, ROM 2GB Battery capability 3200mAh Battery type Rechargeable lithium battery Network WIFI Dimension 185*70*55 mm Sensor CMSO 1.3 megapixel
    Digital Paper Dot Meter Densitometer

    Digital Paper Dot Meter Densitometer

     
    Add to cart
    Quick view
    Digital Thickness Gauge

    Digital thickness gauge

    Lab Equipment & Instrument
    $0.00
    Digital Thickness Gauge

    Digital Thickness Gauge

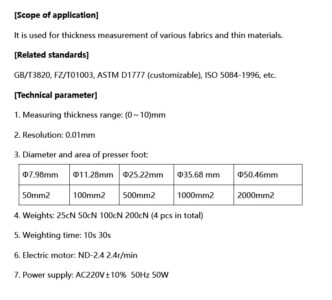
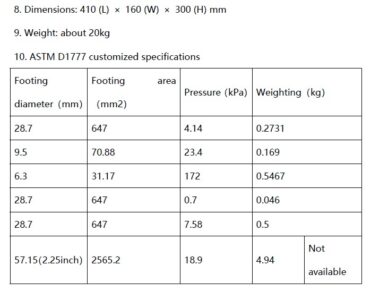
      A Digital Thickness Gauge is a precision instrument used to measure the thickness of materials like fabric, paper, plastic, rubber, leather, and films. It displays readings digitally, offering greater accuracy, consistency, and ease of use compared to analog gauges. Purpose of Digital Thickness Gauge: - To measure material thickness accurately for quality control and specification compliance. - Commonly used in textile, paper, packaging, plastic, and leather industries.   Working Principle of Digital Thickness Gauge: - A flat presser foot is lowered onto the material placed on an anvil. - The displacement between the anvil and foot is measured using a digital sensor. - The value is displayed instantly on an LCD screen.   Key Features of Digital Thickness Gauge: - Digital LCD Display – Clear, instant readings. - High Accuracy & Resolution – Typically ±0.01 mm or better. - Spring-Loaded Presser Foot – Applies uniform pressure. - Zero Setting & Data Hold – For quick reference and repeatability. - Unit Conversion – Switch between mm/inch. - Battery Operated – Portable and convenient.   Applications of Digital Thickness Gauge: - Fabric and textile labs - Plastic film and paper mills - Leather and rubber product inspection - Research & development   Benefits of Digital Thickness Gauge:
    1. High Accuracy - Offers precise measurements, often up to ±0.01 mm, reducing human error.
    2. Quick Readout - Instant digital display of results speeds up testing and data collection.
    3. Easy to Use - Simple operation with one-button zeroing and unit conversion.
    4. Consistent Pressure Application - Spring-loaded foot ensures uniform pressure for repeatable results.
     
    1. Multi-Material Testing - Suitable for textiles, paper, film, rubber, leather, and nonwovens.
    2. Portable and Lightweight- Ideal for both lab and field use with battery-powered operation.
    3. Data Hold Function - Locks the measurement on-screen for easy recording.
    4. Improves Quality Control - Helps manufacturers maintain product thickness standards.
      Features of Digital Thickness Gauge:
    1. Digital LCD Display - Provides clear, instant thickness readings in mm or inches.
    2. High Resolution & Accuracy - Typically measures with 0.01 mm precision.
    3. Spring-Loaded Presser Foot - Applies consistent pressure on samples for reliable results.
    4. Zero Setting Function- Allows quick reset before each measurement.
    5. Unit Conversion Button - Easily switch between metric (mm) and imperial (inch) units.
    6. Data Hold Function - Freezes the displayed value for easy recording.
    7. Portable Design - Compact and battery-operated for on-site or lab use.
    8. Durable Construction - Made from stainless steel or hardened materials for long life.
     
    1. Auto Power-Off - Saves battery by shutting off when idle.
    2. Variety of Anvil & Foot Sizes - Customizable based on testing standards or material types.
      How to Use Digital Thickness Gauge:
    1. Power On the Device - Press the power button to turn on the gauge.
    2. Zero the Gauge - Close the anvil and presser foot fully. Press the "ZERO" button to reset the display to 0.00 mm.
    3. Select Unit (if needed) - Use the unit button to toggle between mm and inches.
    4. Place the Sample - Open the presser foot and insert the material between the foot and anvil.
    5. Apply Pressure - Gently release the presser foot to let it rest on the sample using its spring force.
     
    1. Read the Measurement- Read the thickness displayed on the LCD screen.
    2. Hold or Record the Data - Use the "HOLD" button (if available) to lock the reading for recording.
    3. Remove the Sample- Lift the presser foot and take out the material.
    4. Power Off - Turn off the device or let it auto shut-off.
    5. Features of Digital Thickness Gauge:
      1. Digital LCD Display - Provides clear, instant thickness readings in mm or inches.
      2. High Resolution & Accuracy - Typically measures with 0.01 mm precision.
      3. Spring-Loaded Presser Foot - Applies consistent pressure on samples for reliable results.
      4. Zero Setting Function- Allows quick reset before each measurement.
      5. Unit Conversion Button - Easily switch between metric (mm) and imperial (inch) units.
      6. Data Hold Function - Freezes the displayed value for easy recording.
      7. Portable Design - Compact and battery-operated for on-site or lab use.
      8. Durable Construction - Made from stainless steel or hardened materials for long life.
      Digital Thickness Gauge
    Digital Thickness Gauge --
    Add to cart
    Quick view
    Rainin Digital Pipette
    Rainin Digital Pipette
    Rainin Digital Pipette

    Dyeing Lab Machine, Lab Equipment & Instrument
    $0.00

     Rainin Digital Pipette

    Rainin Digital Pipette

    Digital Pipette

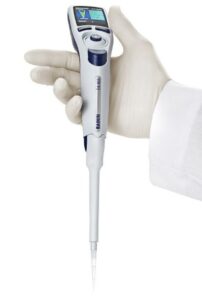
      Rainin Digital Pipette E4-XLS Electronic Pipette,   The Rainin Digital Pipette is a high-precision liquid handling instrument used in laboratories for accurate and reproducible measurement and transfer of small liquid volumes. Manufactured by Rainin Instruments (a Mettler Toledo company), these pipettes are known for their ergonomic design, reliability, and advanced digital controls.   Features of Rainin Digital Pipette:
    1. Digital Volume Setting
    - Allows for precise and repeatable volume adjustments via a digital display or dial. - Reduces user error compared to manual pipettes.
    1. High Accuracy and Precision
    - Offers minimal variability in volume delivery, making it ideal for sensitive assays and experiments.  
    1. Ergonomic Design
    - Lightweight and comfortable to use over long periods, reducing hand strain (good for repetitive tasks). - Often features a finger hook and low pipetting force.
    1. Easy Calibration and Maintenance
    - Includes software or manual options for calibration. - Designed for easy disassembly and cleaning.
    1. Durable and Chemically Resistant - Built with high-quality materials that resist damage from chemicals and frequent use.
    2. Models and Volume Ranges - Available in single-channel and multi-channel versions.
    Covers a wide volume range from 0.1 µL to 10 mL depending on the model.  
    1. LTS (LiteTouch System) - Many Rainin pipettes use the LTS tip system which reduces tip ejection force and ensures a consistent seal.
    2. Compliance and Traceability - Some digital models offer data storage or integration with lab information systems for traceability.
    Applications - Molecular biology - Microbiology - Clinical diagnostics - Pharmaceutical and chemical research   Benefits of Rainin Digital Pipette:
    1. High Accuracy and Precision - Ensures reliable and reproducible results, essential for sensitive experiments.
    2. Digital Volume Control - Reduces human error with easy and precise volume setting via digital interface.
     
    1. Ergonomic Design- Minimizes hand strain and fatigue during prolonged use; ideal for repetitive pipetting tasks.
    2. LiteTouch System (LTS) - Eases tip attachment and ejection, reducing risk of RSI (Repetitive Strain Injury) and improving comfort.
     
    1. Versatile Volume Range - Available in multiple models to handle volumes from microliters to milliliters.
    2. Durable and Reliable - Built with high-quality materials for long life and resistance to chemicals and frequent use.
     
    1. Easy Maintenance and Calibration - Simplified calibration and cleaning ensure long-term performance and compliance.
    2. Data Integrity and Traceability -Some models store data, supporting audit trails and regulatory compliance.
    3. Enhanced Productivity - Quick setup, easy operation, and consistent performance speed up lab workflows.
      Features of Rainin Digital Pipette:
    1. Digital Volume Adjustment - Precise and easy-to-read digital display for accurate volume setting.
    2. High Precision and Accuracy- Delivers consistent results, meeting ISO and GLP/GMP standards.
    3. Ergonomic Design- Lightweight, balanced with low plunger and tip ejection force to reduce fatigue.
     
    1. LiteTouch Tip Ejection System (LTS) - Reduces tip attachment/ejection force, improving comfort and consistency.
    2. Durable Construction - Built with high-quality, chemically resistant materials for long-term use.
    3. Wide Volume Range - Available in multiple models from 0.1 µL to 10 mL.
    4. Single-Channel and Multi-Channel Options - Suitable for various applications including high-throughput assays.
    5. Autoclavable Components- Some parts can be autoclaved for sterilization and contamination control.
     
    1. Easy Calibration and Maintenance - User-friendly calibration settings with accessible parts for cleaning.
    2. Optional Electronic Models - Some versions include programmable features, multiple modes (e.g., reverse pipetting), and memory storage.
    Rainin Digital Pipette dealer In Bangladesh, Digital Pipette Importer in Bangladesh, Digital Pipette in Bangladesh, Digital Pipette Machine in Bd, Digital Pipette In Uttara, Digital Pipette Price in Bangladesh, Digital Pipette Supplier in Bangladesh, Digital Pipette in Bangladesh,  
    Add to cart
    Quick view
    Digital hot plate-magnetic stirrer
    Color Matching Cabinet -light Box

    Digital hot plate-magnetic stirrer

    Dyeing Lab Machine, Lab Equipment & Instrument
    $0.00

    Digital hot plate-magnetic stirrer

    Digital hot plate-magnetic stirrer
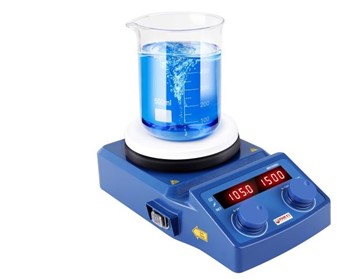
    Digital hot plate-magnetic stirrer

      A digital hot plate-magnetic stirrer is a laboratory device that combines two essential functions: heating and stirring. It is widely used in chemistry, biology, and physics laboratories for preparing solutions, mixing chemicals, and conducting experiments that require controlled heating and stirring. Model : (DL-300) Brand : DUNLIN Origin : TAIWAN Set-up plate Dimensions : Ø 135 mm Motor type : DC Motor Speed range : 0-1500 rpm Display : 5 Inch LED Display Heating temperature range : Room Temp. 0-280°C Temperature display : 5 Inch LED Display Temperature display accuracy : ±0.1 Protection class according to DIN EN 60529 : IP42 Power Supply : 200-240V 3A Dimensions ( W x D x H ) : ( 255 x 152 x 80 ) mm Key Components of Digital hot plate-magnetic stirrer: Hot Plate (Heating Element): - Provides a flat surface that heats up electrically. - Controlled via a digital interface for setting precise temperatures. - Often features over-temperature protection for safety.
    1. Magnetic Stirrer:
    - Uses a rotating magnetic field to spin a magnetic stir bar placed in the liquid. - Ensures even mixing of the solution without manual stirring. - Speed can be adjusted digitally.  
    1. Digital Display and Controls:
    - Allows precise setting of temperature and stirring speed. - Typically includes an LCD or LED screen. - Some models have programmable settings and timers.  
    1. Temperature Sensors:   - Built-in or external probes (like a PT100 or thermocouple) for accurate temperature control.
      Features of Digital hot plate-magnetic stirrer: - Temperature Range: Usually ranges from ambient to 300°C or higher. - Stirring Speed: Typically ranges from 100 to 1500 RPM. Material: The top plate is often made from ceramic, aluminum, or stainless steel to ensure durability and chemical resistance.   Applications Digital hot plate-magnetic stirrer: - Dissolving solids in liquids. - Heating samples while stirring to ensure uniform temperature distribution. - Conducting chemical reactions that need constant stirring and controlled heat. - Biological and pharmaceutical sample preparation.     Benefits of using a Digital Hot Plate & Magnetic Stirrer in laboratory and industrial settings:
    1. Precision and Control- Digital Interface: Allows accurate setting and monitoring of temperature and stirring speed.- Consistent Results: Ensures reproducibility in experiments and solution preparations.
     
    1. Efficient Mixing and Heating- Uniform Mixing: Magnetic stirring eliminates hotspots and ensures even distribution of solutes.- Simultaneous Operation: Ability to heat and stir at the same time improves efficiency.
     
    1. Safety Features- Overheat Protection: Prevents accidents by automatically shutting off at unsafe temperatures.- Sealed Surface: Reduces risk of contamination and easy to clean.
     
    1. Versatility
    - Suitable for a wide range of applications including chemical synthesis, biological experiments, and pharmaceutical processes.- Compatible with various types of containers and volumes.  
    1. Compact and User-Friendly- Takes up minimal bench space.- Simple to operate with user-friendly controls and displays.
    2. Durability- High-quality materials like ceramic or stainless steel tops resist corrosion and wear.
    3. Time-Saving Speeds up preparation of solutions and reactions compared to manual stirring and separate heating. Would you like these benefits presented in a slide format or for a product brochure?
    Add to cart
    Quick view
    Hydraulic GSM Cutter
    Hydraulic GSM Cutter
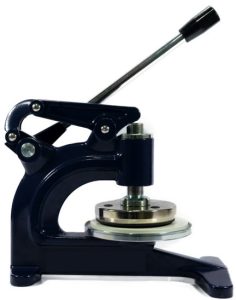
    Hydraulic GSM Cutter

    Lab Equipment & Instrument, Physical Testing & Fabric Testing
    $0.00

    Hydraulic GSM Cutter

    Hydraulic GSM Cutter

    Hydraulic GSM Cutter

      A Hydraulic GSM Cutter is a precision instrument used to cut circular fabric samples for GSM (Grams per Square Meter) testing. It uses hydraulic pressure to ensure clean, uniform cuts through multiple fabric layers, making it ideal for high-throughput or thicker materials.   Purpose of Hydraulic GSM Cutter: - To prepare accurate circular samples (usually 100 cm² area) for determining fabric weight in GSM. - Used widely in textile testing labs for quality control and consistency.   Working Principle of Hydraulic GSM Cutter: - Fabric is placed on a cutting pad. - The cutter, equipped with a sharp circular blade, is hydraulically pressed down on the fabric. - The cut sample is then weighed to calculate GSM using a formula or GSM scale.   Applications of Hydraulic GSM Cutter: - Suitable for woven, knitted, and nonwoven fabrics. - Used in textile mills, labs, and R&D centers.   Benefits of Hydraulic GSM Cutter:
    1. High Cutting Precision - Ensures consistent and accurate fabric sample size for reliable GSM results.
    2. Effortless Operation- Hydraulic action reduces manual effort and operator fatigue.
    3. Ideal for Thick or Multi-Layer Fabrics - Cuts through dense or multiple fabric layers cleanly.
     
    1. Time-Saving - Speeds up the sample preparation process, especially for high-volume testing.
    2. Improves Test Accuracy - Uniform samples help eliminate errors in GSM calculation.
    3. Durable and Long-Lasting - Robust construction ensures stability and extended service life.
     
    1. Safety Enhancement - Reduces risk of injury compared to manual rotary cutters.
    2. Consistent Pressure Application - Hydraulic mechanism maintains steady force for each cut.
      Features of Hydraulic GSM Cutter:
    1. Hydraulic Press Mechanism - Applies consistent and strong pressure for clean, even cuts.
    2. Standard Cutting Die (100 cm²) - Produces fabric samples suitable for GSM testing with standard area.
    3. Heavy-Duty Construction - Built with robust metal frame for long-term lab or industrial use.
     
    1. Sharp Stainless Steel Blades - Durable and replaceable blades ensure smooth, precise cuts.
    2. Cutting Pad Included - Comes with a rubber or nylon base to protect blades and ensure clean edges.
    3. Simple Lever or Button Operation - Easy to use with minimal training required.
    4. Non-slip Base - Provides stability during operation for safe, accurate cutting.
    5. Supports Various Fabric Types
    - Suitable for woven, knitted, nonwoven, technical textiles, and coated fabrics.   How to Use Hydraulic GSM Cutter:
    1. Place the Cutting Pad - Lay the rubber or nylon cutting pad on a flat surface.
    2. Position the Fabric - Place the fabric sample flat and smooth on the cutting pad.
    3. Align the Cutter - Position the GSM cutter die over the desired area of the fabric.
    4. Activate Hydraulic Press - Pull the lever or press the button to apply hydraulic pressure and cut the sample.
     
    1. Remove the Sample - Lift the cutter and carefully take out the circular fabric piece (usually 100 cm²).
    2. Weigh the Sample - Place the cut sample on a precision balance or GSM scale to determine weight.
    3. Calculate GSM - Multiply the sample weight (in grams) by 100 to get GSM.
      GSM Formula (Grams per Square Meter): GSM is used to measure the weight of fabric and indicates its thickness and quality. Formula: GSM = (Sample Weight in grams × 10000) / Sample Area in cm² For standard cutters that cut 100 cm² samples: GSM = Sample Weight (in grams) × 100   Example: - If a 100 cm² fabric sample weighs 1.5 grams: GSM = 1.5 × 100 = 150 GSM
    Hydraulic GSM Cutter

    Hydraulic GSM Cutter

    Add to cart
    Quick view
    Digital Temperature Humidity Meter

    Digital Temperature Humidity Meter
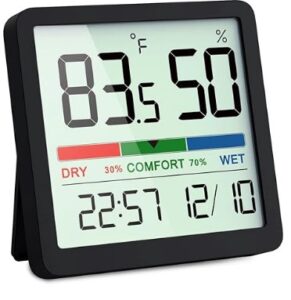
    Lab Equipment & Instrument, Physical Testing & Fabric Testing
    $0.00
    Digital Temperature Humidity Meter

    Digital Temperature Humidity Meter

      A Digital Temperature Humidity Meter, also known as a digital hygrometer, is an electronic device used to measure and display the relative humidity (RH) of the air, often along with temperature. It's commonly used in laboratories, industrial settings, storage areas, and homes to monitor moisture levels.   Key Features of Digital Temperature Humidity Meter: - Digital Display: Shows humidity (in % RH) and often temperature (in °C/°F). - Sensor-Based Measurement: Uses capacitive or resistive sensors for accurate readings. - Compact & Portable: Available in handheld or wall-mountable forms. - Data Logging (in some models): Records humidity levels over time for analysis. - Min/Max Readings: Displays historical high and low humidity values.   Common Applications of Digital Temperature Humidity Meter: - Laboratories: Maintaining stable humidity for experiments or sample storage. - Warehouses: Monitoring conditions for sensitive goods (e.g., electronics, paper, pharmaceuticals). - HVAC Systems: Ensuring proper climate control. - Homes: Preventing mold growth or overly dry conditions.   Benefits of Digital Temperature Humidity Meter: - Accurate and quick readings - Easy to use and read - Helps in maintaining comfort, safety, and product integrity Would you like recommendations for models or guidance on calibration? Benefits of Digital Humidity meter Here are the key benefits of using a Digital Humidity Meter:   ✅ 1. Accurate Humidity Monitoring - Provides precise relative humidity (%RH) readings, essential for sensitive environments. ✅ 2. Fast and Real-Time Results - Displays immediate data, allowing for quick adjustments to environmental conditions. ✅ 3. Dual Measurement - Many models also measure temperature, offering a more complete picture of ambient conditions.   ✅ 4. Easy to Use - Simple digital interface with clear display, suitable for both professionals and non-technical users. ✅ 5. Compact and Portable - Lightweight design makes it ideal for field use, indoor monitoring, or mounting on walls. ✅ 6. Prevents Damage - Helps avoid moisture-related issues like mold, corrosion, static buildup, and product degradation.   ✅ 7. Supports Quality Control - Essential for labs, warehouses, and manufacturing environments to maintain product integrity. ✅ 8. Data Logging (Optional) How to use Digital Humidity meter Here are the key features of a Digital Humidity Meter: 1. Digital Display - Shows real-time humidity (%) and often temperature (°C/°F). - Some include backlit screens for easy viewing.   2. High Accuracy Sensors - Uses capacitive or resistive sensors for accurate and stable humidity readings. 3. Min/Max & Hold Functions - Displays minimum, maximum, and current readings. - "Hold" function freezes the current reading for review.   4. Data Logging (in advanced models) - Records humidity data over time for monitoring trends. 5. Portable or Wall-Mountable - Available as handheld, desktop, or wall-mounted units for different environments.   6. Battery or USB Powered - Operates on standard batteries or via USB power for flexibility. 7. Optional External Probes - Some models support external humidity/temperature sensors for remote monitoring. 8. Calibration Option - Allows manual or automatic calibration to maintain accuracy.   Here’s a quick step-by-step guide on how to use a Digital Temperature Humidity Meter: ✅ 1. Power On the Device - Insert batteries (if portable) or plug it in (if wall-mounted). - Press the power button to turn it on. ✅ 2. Place It Properly - Set the meter in an open, well-ventilated area. - Avoid placing near windows, vents, or direct heat sources for accurate readings.   ✅ 3. Wait for Stabilization - Allow the device a few seconds to stabilize and show accurate humidity and temperature readings. ✅ 4. Read the Display - Humidity will be shown as % RH (Relative Humidity). - Most models also display temperature in °C or °F.   ✅ 5. Use Additional Features (if available) - Press buttons to view Min/Max, Data Log, or switch units. - Some advanced models may have Bluetooth or USB for data transfer. ✅ 6. Maintain the Device - Clean sensor area gently if dusty. - Calibrate periodically if required (check manual).  
    Add to cart
    Quick view
    • Address
      • House 05, Road 3/A, Sector 09, Uttara, Dhaka.
    • Phone
      • 01713741546, 01974741546, 01714634452, 01838488804
    • Email
      • maamtexbd@gmail.com, info.maamtex@gmail.com, mamun@maamtexbd.com, info@maamtexbd.com
    • USEFUL LINKS
      • Privacy Policy
      • Terms & Conditions
    • USEFUL LINKS
      • Home
      • Contact Us
      • About Us

    SOCIAL MEDIA:

    Copyright Reserved by Maamtexbd 2024 | Developed by Systemeye.net.
    • Menu
    • Categories
    • Electronics
    • Lab Scientific Item
    • Home
    • Products
      • Dyeing Lab Machine
      • Physical Testing & Fabric Testing Machine
      • Lab Equipment & Instrument
      • Wet & Dry Process Instrument
      • Yarn Dyeing Machine-Equipment
      • Washing-Drying Machine
    • About us
    • Contact us
    Shopping cart
    Close
    Chat Now