Counting Balance-Weighing Scale
$0.00
Counting Balance-Weighing Scale

Counting Balance-Weighing Scale
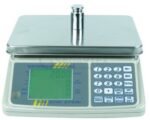
A Counting Balance-Weighing Scale (or Counting Weighing Scale) is a precision electronic scale designed to weigh items and simultaneously count them based on individual piece weight. It’s commonly used in industries for inventory management, packaging, and quality control.
Purpose of Counting Balance-Weighing Scale:
To quickly and accurately count small items like buttons, beads, screws, or pills by weight.
Eliminates manual counting, especially for large quantities.
Working Principle of Counting Balance-Weighing Scale:
Weigh a sample quantity of items to determine the average weight of one piece.
Place a bulk quantity on the scale.
The scale divides the total weight by the unit weight to calculate the total item count.
Applications of Counting Balance-Weighing Scale:
Textile accessories (buttons, rivets)
Hardware (nuts, bolts, washers)
Electronics (resistors, chips)
Pharmaceuticals (tablets, capsules)
Benefits of Counting Balance-Weighing Scale:
Fast and Accurate Counting – Saves time by quickly counting large quantities of small items.
Reduces Human Error- Eliminates mistakes common in manual counting.
Improves Productivity – Speeds up packing, inventory, and quality control processes.
Versatile Use – Suitable for various industries: textiles, hardware, pharmaceuticals, electronics.
Cost-Efficient- Reduces labor costs and improves operational efficiency.
Compact and Portable – Easy to move and use in different workstations.
Dual Functionality – Can be used for both counting and standard weighing.
Memory and Tare Functions – Stores unit weights and allows container weight deduction.
Features of Counting Balance-Weighing Scale:
High Precision Sensors- Ensures accurate weight and count, even for tiny components.
Digital Display- Separate displays for total weight, unit weight, and piece count.
Tare Function – Allows deduction of container weight for net measurements.
Memory Function – Stores frequently used unit weights for fast recall.
Multiple Units Support- Measures in grams, kilograms, pounds, etc.
Sample Size Selection- Users can set sample sizes (e.g., 10, 20, 50 pcs) to calculate piece weight.
Overload Protection- Prevents damage from excessive weight.
Auto Calibration – Maintains long-term accuracy with internal or external calibration options.
Sturdy Platform- Stainless steel pan with anti-slip design for stable weighing.
Battery and AC Operation- Can run on rechargeable batteries or power adapter.
How to Use Counting Balance-Weighing Scale:
Turn On the Scale – Power it on and wait for the display to stabilize at zero.
Tare the Container – Place an empty container on the pan and press the “TARE” button to zero out its weight. Set Sample Size – Place a known quantity (e.g., 10 or 20 pcs) of identical items on the scale.
– Enter the sample quantity using the keypad.
Confirm Unit Weight – The scale calculates and stores the average unit weight automatically.
Add Bulk Items – Add the rest of the items into the container. – The display will show the total count based on the stored unit weight. Record Results – Note down the total piece count and remove the items. Turn Off After Use – Power off the scale to save battery or electricity.
Counting Balance /Weighing Scale
Model : DS610C
Brand : DIGISCALE
Origin : Germany
Capacity : 3 kg
Division : 0.1g
Min Weight : 0.5g
Grade : Class 3
Platter : 280 × 215mm
Battery : Rechargeable Battery with AC Adaptor
Display : Double Large LCD Display
Warranty : One Year Service Warranty
SPECIFICATION
Build With 5 Measuring Units: kg, g, lb, oz, PCS Count
Platter : 280 × 215mm
Quality : Heavy Duty Premium Quality
Product Net / Gross Weight : 3080g / 3130g
Battery : Rechargeable Battery with AC Adaptor
Battery Capacity: 6V 4.5Ah / 20 HR
Adaptor Power Input : AC 220V-240V / 50Hz
Adaptor Power Output : 10V DC/ 500mA
Display : Double Large LCD Display
Color : White-Gray
Keyboard : 20 Members Key
Operating Temperature : 0-40°C (32-104°F)
FEATURES
Auto Zero Tracking
Automatic Overload Display
Grade Class 3
Auto Backlight
Double LCD Display
Low Battery Indication
Rechargeable Battery with Adaptor
Save Electricity
Advantage
Piece Counting Functionality: The DS603C Counting Weighing Scale is prepared with an precise piece checking highlight, perfect for stock administration, generation lines, and quality control assignments. This guarantees you can tally things like screws, jolts, or other little components efficiently.
High-Precision Digital Scale Display: The advanced scale show gives clear and precise readings, making it simple to screen weight and amount. Its shinning and natural interface guarantees ease of use in diverse lighting conditions.
Digital Scale Calibration: To keep up exactness, the DS610C weighing scale calibration prepare is direct, guaranteeing the scale remains dependable over time. Normal weight scale calibration ensures reliable execution, indeed with overwhelming use.
Durable and Reliable Build: The DS610C advanced weight scale is created with strong materials to withstand visit utilize in requesting situations, such as stockrooms and fabricating facilities.
Versatility: As a weighing and tallying scale, it combines the benefits of weight estimation and piece tallying in one gadget. This makes it appropriate for a wide extend of applications, from retail to mechanical uses.
Categories: Digital Scale and Balance, Piece Counting Scale, Table Top Scale

Counting Balance-Weighing Scale
Related products
Color Matching Cabinet-Light Box
Color Matching Cabinet-Light Box

Color Matching Cabinet-Light Box
Fabric air permeability tester
Fabric Air Permeability Tester
Fabric Air Permeability Tester is a lab instrument used to measure how easily air passes through a fabric. It quantifies the air permeability, which is crucial for evaluating breathability, comfort, and functional performance in textiles. Purpose Fabric Air Permeability Tester: It determines the rate of airflow through a fabric sample under a set air pressure, typically reported in units like cm³/cm²/s or L/m²/s. Working Principle: The tester creates a pressure difference across the fabric sample and measures the volume of air flowing through it. Higher air permeability means the fabric is more breathable. Main Components of Fabric Air Permeability Tester: - Test Head / Clamp: Holds the fabric securely without leakage. - Pressure Regulator: Maintains a constant air pressure during testing. - Flow Meter or Digital Sensor: Measures the actual airflow rate through the fabric. - Display Unit: Shows readings of air permeability instantly. Applications of Fabric Air Permeability Tester: - Performance textiles (sportswear, PPE) - Technical fabrics (filters, tents, airbags) - Medical textiles (masks, gowns) - Nonwovens and industrial materials Benefits of Fabric Air Permeability Tester:- Accurate Breathability Measurement - Precisely measures how breathable a fabric is, essential for comfort and performance.
- Supports Quality Control - Ensures consistent air permeability in fabric batches, critical for products like PPE, sportswear, and filters.
- Enhances Product Design - Helps in selecting or engineering fabrics with the right airflow properties for specific uses.
- Standard Compliance - Conforms to international testing standards (e.g., ASTM D737, ISO 9237), ensuring global credibility.
- Quick and Reliable Testing - Provides rapid results, increasing lab efficiency and production decision-making speed.
- Wide Material Compatibility - Suitable for woven, nonwoven, knitted fabrics, and even paper or coated materials.
- Improves Functional Performance - Helps optimize products for ventilation, moisture control, and thermal comfort.
- Reduces Product Failure - Identifies underperforming fabrics early, minimizing risks in high-performance applications.
- Digital Display - Shows air permeability readings clearly in units like L/m²/s or cm³/cm²/s.
- Precise Test Head/Clamp - Provides an airtight seal to prevent air leakage and ensure accurate results.
- Adjustable Pressure Settings - Allows testing under various pressure drops (e.g., 10–2500 Pa), depending on fabric type.
- Automatic Airflow Measurement - Built-in sensors or flow meters capture airflow rate automatically for quick analysis.
- Multiple Test Area Sizes - Interchangeable test plates to match different sample sizes and standard requirements.
- Data Logging and Export - Some models include USB or software connectivity for storing and exporting test results.
- Standard Compliance - Conforms to ASTM D737, ISO 9237, BS 5636, DIN 53887, etc.
- Robust Construction - Built with corrosion-resistant materials and durable components for long-term lab use.
- Low Maintenance - Simple cleaning and calibration process for reliable performance.
- Compact and User-Friendly Design - Ideal for lab benches and easy operation with minimal training.
- Prepare the Sample - Cut the fabric sample to the required size (usually circular, e.g., 20 cm²).
- Mount the Sample - Place the fabric securely in the test clamp or holder, ensuring no wrinkles or gaps.
- Set Test Parameters - Adjust the air pressure drop according to the fabric type or standard (e.g., 100 Pa).
- Start the Test - Turn on the air supply and start the airflow through the fabric.
- Read the Measurement - The digital display will show the air permeability value in the selected units.
- Record the Results - Note the readings or export data if the device supports it.
- Repeat if needed - Test multiple samples or areas for accuracy and average the results.
- Clean and Maintain - After testing, clean the clamp and ensure the device is calibrated regularly.
 r Permeability Tester
Appliance Range
It is used to TEST the air permeability of various textile fabrics, including industrial fabrics, nonwoven fabrics and other textile products and other breathable materials.
Related Standards
GB / T 5453, GB / T 13764, ISO 9237, ISO 5636, ASTM D737, etc.
Instrument characteristics
1. Automatic sample clamping, automatic nozzle replacement, and quick test.
2. Microcomputer processing, the test results are displayed directly, without manual table calculation;
3. Built-in continuous test mode, the test unit can be switched as needed.
4. Chinese LCD menu operation, configure computer interface.
Technical parameter
1. Range of sample pressure difference: 1 ~ 4000Pa
2. Measurable air permeability: 1 ~ 40,000mm / s
3. Measurement error: ≤ ± 2%
4. Measurable fabric thickness: ≤8mm
5. Test area: 5cm2; 20cm2; 50cm2; 100cm2
Ф50mm (≈19.6cm2)
Ф70mm (≈38.5cm2)
6. Nozzles: 11 in total (automatic replacement of digital setting)
CODE 00 01 02 03 04 05 06 07 08 09 10
DIAφ(mm)
0.8 1.2 2 3 4 6 8 10 12 16 20
7.Data Capacity:≤200 times tests
8.Power Supply:AC220V 50Hz 2KW
9.Weight:80Kg
10.Shape:1250×700×1250mm
 Stretch Recovery Tester Static Method
Stretch Recovery Tester Static Method

Stretch Recovery Tester
- A sample is stretched to a predetermined extension or force.
- The stretch is maintained for a set period.
- After removing the load, the recovery (return to original length) is measured after a fixed time.
- The fabric sample is clamped and stretched to a specific length or force.
- It’s held for a fixed duration (e.g., 1–5 minutes).
- The tension is released, and the sample is allowed to recover.
- The recovered length is measured after a set time.


Stretch Recovery Tester
Fastness Rotary Friction Tester
Fastness Rotary Friction Tester
A Fastness Rotary Friction Tester, also known as a Rotary Crock meter, is a specialized instrument used to evaluate the color fastness of textiles and materials when subjected to rotational rubbing. This test simulates the wear and friction that fabrics experience during use, helping manufacturers assess the durability of dyes and finishes. Purpose of Fastness Rotary Friction Tester The primary function of the Fastness Rotary Friction Tester is to determine how well a fabric's color withstands rubbing, both in dry and wet conditions. This is crucial for ensuring the longevity and appearance of textiles in real-world applications, such as clothing, upholstery, and footwear. Working Principle of Fastness Rotary Friction Tester The tester operates by applying a specified pressure to a fabric sample using a standardized rubbing finger covered with a test cloth. The rubbing finger performs a set number of rotational movements (typically 1.125 turns clockwise followed by 1.125 turns counterclockwise) over the fabric surface. After the test, the degree of color transfer to the test cloth and any changes in the fabric's appearance are evaluated against standardized gray scales. Common Testing Standards - AATCC 116: Colorfastness to Crocking: Rotary Vertical Crock meter Method. ISO 105 X16: Textiles—Tests for color fastness—Part X16: Color fastness to rubbing—small areas. - SATRA TM8: Color fastness to rubbing. Key Specifications of Fastness Rotary Friction Tester - Rubbing Head Diameter: Typically 16 mm. - Applied Pressure: Approximately 1134 grams (11.1 N). - Rotation: 1.125 turns clockwise followed by 1.125 turns counterclockwise. - Sample Size: Commonly 60 mm × 60 mm. - Test Cloth: Standardized white cotton cloth, either dry or wetted depending on the test condition. Benefits of Fastness Rotary Friction Tester - Realistic Simulation: Mimics the actual wear and friction fabrics undergo during use. - Versatility: Applicable to a wide range of materials, including textiles, leather, and printed fabrics. - Quality Assurance: Ensures products meet industry standards for color durability. - Standard Compliance: Aligns with international testing standards, facilitating global trade and quality benchmarks. Applications Fastness Rotary Friction Tester - Textile Industry: Assessing the color durability of garments, upholstery, and other fabric products. - Footwear Manufacturing: Testing the colorfastness of shoe uppers and linings. - Automotive Interiors: Evaluating the wear resistance of seat covers and other interior fabrics. Quality Control Laboratories: Routine testing to ensure product consistency and compliance with standards. Benefits of Fastness Rotary Friction Tester:- Accurate Colorfastness Evaluation- Provides precise assessment of how well fabric resists color loss and staining from rubbing.
- Simulates Real-World Wear - Recreates rotational friction found in actual use (e.g., seat covers, apparel wear points).
- Supports Wet & Dry Testing - Can test under both dry and wet conditions for comprehensive results.
- Standardized Testing - Complies with global standards (AATCC 116, ISO 105 X16), ensuring reliable and comparable results.
- Time-Saving & Efficient - Quick to set up and run, allowing for high-throughput testing in labs.
- Versatile Use- Suitable for textiles, leather, coated fabrics, and printed surfaces.
- Improves Quality Control - Identifies potential durability issues early in the production process.
- Enhances Product Performance - Helps in developing fabrics with better resistance to rubbing and abrasion.
- Rotary Rubbing Mechanism - Simulates 1.125 clockwise and 1.125 counterclockwise turns for realistic friction.
- Standardized Rubbing Head - Fixed diameter (typically 16 mm) with specified pressure (≈1134 g) for consistent results.
- Dry and Wet Testing Capability - Can perform tests using dry or wet rubbing cloths.
- Sample Holder- Secure and easy-to-use fixture for holding fabric samples in place.
- Test Cloth Mounting Arm- Quick attachment for standardized white rubbing cloths.
- Simple Operation - Manual or motorized operation depending on model; easy to handle for lab technicians.
- Compliance with Standards - Follows AATCC 116, ISO 105 X16, and SATRA TM8 protocols.
- Prepare the Sample - Cut a fabric piece (typically 60 × 60 mm) and condition it per standard requirements.
- Mount the Fabric - Secure the fabric sample on the sample holder or base plate of the tester.
- Attach Rubbing Cloth - Place a standard white test cloth (dry or wetted as required) over the rubbing head.
- Apply Pressure - Lower the rubbing head onto the fabric. Standard weight is about 1134 g.
- Start the Test - Operate the tester: the head performs 1.125 turns clockwise, then 1.125 turns counterclockwise.- Number of cycles (typically 10 or 20) is set based on the test standard.
- Remove and Inspect - After testing, remove the rubbing cloth and assess any color transfer using a gray scale.
- Evaluate Fabric Surface - Check the fabric for visible changes, fading, or wear.
- Record Results - Grade both staining and fabric change per standard gray scale ratings.
 It is used to change the color fastness of the textile,
printing and dyeing, printing and other products after a specific track friction.
[Related standards]
GB / T29865 AATCC116 ISO105-X16, etc.
[Instrument characteristics]:
1.Single-chip control, speed can be set freely
2.Imported motor, linear guide, low noise, suitable for long time work
3. Liquid crystal display, film panel
4. Freely set the number of friction, can count up and down,
and automatically stop the alarm when the set value is reached
[Technical Parameters]:
1. Friction head diameter: 16mm 25mm
2. Vertical pressure: 11.1N
3. Working mode: 405 ° clockwise and 405 ° counterclockwise
4. Speed range: constant 60 rpm, LCD display, thin mold panel
5. Counting range: 0-99999 times
6. Power supply: AC 220V 50Hz 80W
7. Weight: 20KG
8. Volume: L420mm × W260mm × H430mm
 Fabric Stiffness Tester
Fabric Stiffness Tester
Fabric Stiffness Tester is a lab instrument used to measure the stiffness or flexural rigidity of fabric materials. It evaluates how resistant a fabric is to bending, which influences its drape, comfort, and handling characteristics. Purpose of Fabric Stiffness Tester: To determine the stiffness of textiles by measuring the bending length and calculating flexural rigidity, often using methods like the Cantilever Test (as per ASTM D1388 or ISO 9073-7). Working Principle of Fabric Stiffness Tester: A fabric strip is slid over a horizontal platform until its free end bends under its own weight to a specific angle (usually 41.5°). The length at which this occurs is used to calculate bending length and stiffness. Main Components of Fabric Stiffness Tester: - Test Platform: Flat surface for sample movement. - Graduated Scale: Measures the overhanging length of fabric. - Angle Indicator: Guides the measurement based on standard deflection angle. - Fabric Clamp or Guide: Helps place and move the sample smoothly. Applications of Fabric Stiffness Tester: - Apparel fabrics (e.g., for comfort and drape analysis) - Technical textiles (e.g., automotive, medical fabrics) - Paper, nonwovens, and films Benefits of Fabric Stiffness Tester:- Accurate Measurement of Flexibility - Provides reliable data on fabric stiffness, essential for quality control and product development.
- Improves Product Comfort - Helps assess how soft or rigid a fabric will feel in clothing or furnishings.
- Supports Material Selection - Aids designers and engineers in choosing the right fabric for specific applications based on stiffness.
- Quality Assurance - Detects fabric inconsistencies or defects that affect handling or drape.
- Standards Compliance - Enables testing as per international standards like ASTM D1388 and ISO 9073-7 for global product approval.
- Quick and Simple Operation - Delivers fast results with minimal operator training or preparation.
- Applicable to Multiple Materials - Suitable for woven, nonwoven, knitted fabrics, paper, and films.
- Enhances R&D Accuracy - Supports consistent material testing during product innovation and textile finishing.
- Graduated Measurement Scale - Precise scale to measure overhang length for accurate stiffness calculation.
- Flat Test Platform - Smooth, level surface ensures consistent and reliable fabric movement.
- Standard Deflection Angle Guide - Built-in 41.5° angle reference for consistent stiffness testing (per ASTM/ISO).
- Manual or Motorized Models - Available in both types for simple or automated operation depending on lab needs.
- Compact Design - Space-saving unit ideal for textile labs and quality control rooms.
- Sample Holder or Clamp - Ensures correct alignment and smooth feeding of fabric strips during testing.
- Durable Construction - Made of corrosion-resistant materials like stainless steel or aluminum for long-term use.
- Compliance with Standards - Supports methods like ASTM D1388, ISO 9073-7 for stiffness testing of fabrics.
- Lightweight and Portable - Easy to move and use in various lab settings.
- Low Maintenance - Simple mechanical parts require minimal servicing.
- Prepare the Sample - Cut the fabric into a rectangular strip (e.g., 25 mm × 200 mm), as per standard.
- Place the Sample - Lay the fabric strip flat on the test platform with one end aligned at the zero mark.
- Slide the Fabric - Gently push the fabric forward so it slowly overhangs the platform.
- Watch for Deflection - Stop sliding when the free end of the fabric bends down to the reference angle (typically 41.5°).
- Read the Bending Length - Measure the overhang distance from the scale. This is the bending length (C).
- Calculate Flexural Rigidity
- Repeat for Accuracy - Test both warp and weft directions and average the results for better accuracy.
 Scope of application
It is used to measure the stiffness of cotton,
wool, silk, linen, chemical fibers and other woven fabrics,
knitted fabrics, general nonwovens, coated fabrics, etc.
It is also suitable for measuring the stiffness of paper,
leather, film and other flexible materials.
Relevant Standards
GB/T 18318, ASTM D 1388, IS09073-7, BS EN22313 etc.
[Instrument Characteristics]
1. Infrared photoelectric invisible inclined plane
detection system replaces the traditional tangible inclined plane,
realizes non-contact detection, and overcomes the problem that
the measurement accuracy is affected by
the sample torsion lifted by the inclined plane.
2. The inclination adjustable mechanism of instrument
measurement to meet different test requirements.
3. Stepping motor drive, accurate measurement, smooth operation;
4. The color touch screen display can show the extended length,
bending length, bending stiffness of the sample, the warp average,
the weft average and the total average of the above values respectively.
5. Printing of Chinese report forms for thermal printers.
Technical parameters
1. Test methods: The two method (A method: Weft test, B method: Forward and backward test)
2. Measurement angle:41.5 degree, 43 degree and 45 degree adjustable
3. Extend the length range:5-220 mm (special requirements can be made at the time of ordering)
4. Length resolution:0.01mm
5. Measurement accuracy:±0.1mm
6. Specimen specifications:250×25mm
7. Work platform specifications:250×50mm
8. Specification of sample pressing plate:250×25mm
9. Pushing speed of press plate:3 mm/s; 4 mm/s; 5 mm/s
10. Display output: Touch screen display
11. Print Output: Chinese Report
12. Data Processing Volume: A total of 15 groups, each group less than 20 trials
13. Printer: Thermal printer
14, power supply:AC220V 50Hz
15. Host volume:570mm×360mm×490mm
16. Host weight:20kg
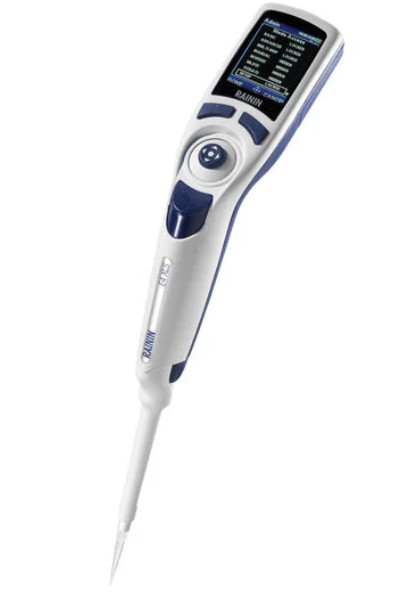
 Rainin Digital Pipette
Rainin Digital Pipette
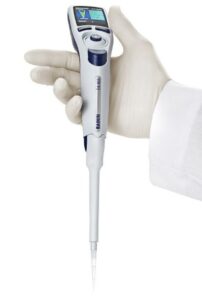
Digital Pipette
- Digital Volume Setting
- High Accuracy and Precision
- Ergonomic Design
- Easy Calibration and Maintenance
- Durable and Chemically Resistant - Built with high-quality materials that resist damage from chemicals and frequent use.
- Models and Volume Ranges - Available in single-channel and multi-channel versions.
- LTS (LiteTouch System) - Many Rainin pipettes use the LTS tip system which reduces tip ejection force and ensures a consistent seal.
- Compliance and Traceability - Some digital models offer data storage or integration with lab information systems for traceability.
- High Accuracy and Precision - Ensures reliable and reproducible results, essential for sensitive experiments.
- Digital Volume Control - Reduces human error with easy and precise volume setting via digital interface.
- Ergonomic Design- Minimizes hand strain and fatigue during prolonged use; ideal for repetitive pipetting tasks.
- LiteTouch System (LTS) - Eases tip attachment and ejection, reducing risk of RSI (Repetitive Strain Injury) and improving comfort.
- Versatile Volume Range - Available in multiple models to handle volumes from microliters to milliliters.
- Durable and Reliable - Built with high-quality materials for long life and resistance to chemicals and frequent use.
- Easy Maintenance and Calibration - Simplified calibration and cleaning ensure long-term performance and compliance.
- Data Integrity and Traceability -Some models store data, supporting audit trails and regulatory compliance.
- Enhanced Productivity - Quick setup, easy operation, and consistent performance speed up lab workflows.
- Digital Volume Adjustment - Precise and easy-to-read digital display for accurate volume setting.
- High Precision and Accuracy- Delivers consistent results, meeting ISO and GLP/GMP standards.
- Ergonomic Design- Lightweight, balanced with low plunger and tip ejection force to reduce fatigue.
- LiteTouch Tip Ejection System (LTS) - Reduces tip attachment/ejection force, improving comfort and consistency.
- Durable Construction - Built with high-quality, chemically resistant materials for long-term use.
- Wide Volume Range - Available in multiple models from 0.1 µL to 10 mL.
- Single-Channel and Multi-Channel Options - Suitable for various applications including high-throughput assays.
- Autoclavable Components- Some parts can be autoclaved for sterilization and contamination control.
- Easy Calibration and Maintenance - User-friendly calibration settings with accessible parts for cleaning.
- Optional Electronic Models - Some versions include programmable features, multiple modes (e.g., reverse pipetting), and memory storage.
HTHP Glycerin bath dyeing machine
HTHP Glycerin Bath Dyeing Machine
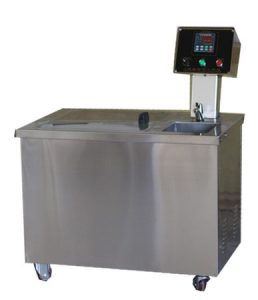
HTHP dyeing machine
- High Temperature Capability - Operates up to 140°C or more, ideal for disperse dyeing of polyester which requires elevated temperatures.
- Glycerin as Heat Transfer Medium - Glycerin allows for precise and uniform heating beyond the boiling point of water, without pressure buildup as in steam-based systems.
- Small Sample Dyeing - Used for lab-scale dyeing of fabric or yarn samples (commonly 5–10 g per tube), useful in R&D or color matching.
- Multiple Sample Capacity - Usually has multiple dyeing tubes/chambers for simultaneous dyeing of several samples under identical conditions.
- Accurate Temperature and Time Control - Digital or microprocessor-based controllers regulate temperature, heating rate, and timing precisely.
- Uniform Dyeing - Ensures even dye penetration due to consistent heat distribution and controlled rotation or agitation.
- Energy Efficient Glycerin’s heat retention reduces energy consumption compared to steam systems.
- Compact and Durable Design - Bench-top design, made from stainless steel and heat-resistant components for long life and lab use.
- Uniform Heating with Glycerin - Glycerin provides consistent heat transfer, ensuring even dye uptake and minimizing shade variation.
- Energy Efficient- Glycerin retains heat longer, reducing energy consumption compared to traditional steam-based dyeing.
- Accurate Process Control - Precise temperature and time control enhance reproducibility and dyeing consistency.
- Ideal for Lab and Sample Work - Perfect for R&D, shade matching, and recipe development with small fabric or yarn samples.
- Multi-Sample Dyeing - Allows multiple samples to be dyed simultaneously under identical conditions, saving time and effort.
- Compact and Safe - Bench-top design fits in laboratories and is safer than high-pressure steam systems.
- Low Maintenance - Simplified operation and fewer mechanical parts compared to steam-based systems lower upkeep needs.
- Faster Dyeing Cycles- Glycerin heats and cools quickly, reducing overall dyeing time.
- High-Temperature Operation - Capable of dyeing up to 140–150°C, suitable for synthetic fibers like polyester.
- Glycerin as Heat Medium - Uses glycerin for uniform, efficient heat transfer without generating high steam pressure.
- Multiple Dyeing Chambers - Usually equipped with 6–24 tubes for simultaneous multi-sample dyeing under identical conditions.
- Digital Temperature Controller- Offers precise control of temperature, time, and heating rate with programmable settings.
- Compact and Lab-Friendly Design - Bench-top model, easy to operate in laboratory environments with limited space.
- Stainless Steel Construction - Corrosion-resistant and durable for long-term, high-temperature operation.
- Safety Features - Includes over-temperature protection and thermal insulation to prevent heat loss and ensure operator safety.
- Agitation or Sample Rotation- Some models offer rotation or agitation for uniform dye penetration.
- Energy Efficient Heating - Glycerin’s heat retention improves energy efficiency over water- or steam-based systems.
- Low Maintenance - Simplified mechanical system reduces the need for frequent servicing.
IR Dyeing Machine Dunlin
IR Dyeing Machine Dunlin
IR Dyeing machine Dunlin is Safe, high efficiency, environment friendly, energy saving, optimum for new dyeing small sample machines0 - 3.5 ℃ / min Cooling rate 0.2 - 5 ℃ / min Cooling method Air-cooled Rotation speed 0 - 60 rpm Liquor ratio 1:5 -1:100 Power supply 1∮AC 220V 50/60HZ Dimensions( L x W x H) 670×670×780mm 860×680×780mm Weight 100kg 120kg Standard Accessories Cups 1set
Put the test sample. Cups stand 1set Place where to put cups. Protective glove 1set To avoid to be hurt by HT cups. Model: IF-24SCapacity: 24 pots Brad: DUNLIN Origin: China
Color dyeing tests for various dyestuffs of IR Dyeing machine Dunlin- Step dyeing tests. C. Dispersing, levelling and impregnating test. D. High or low liquor ratio exhausting tests. E. Fabric steak and staining tests. F. Concentration tests and others. Protection and Safety gates to protect. Temperature control accuracy +/- 0.2degree

IR Dyeing machine


 Products
 Martindale abrasion tester Updated

