
 Products
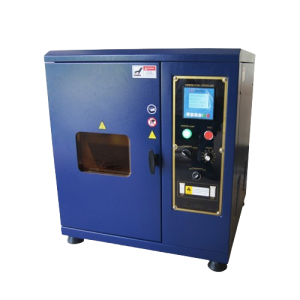
 Martindale abrasion tester Updated
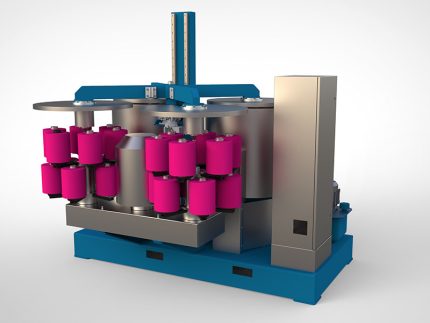
Automatic Bobbin Hydro extractor
Automatic Bobbin Hydro extractor

Automatic Bobbin Hydro extractor
- Computer system: Foshan HuaGao Chinese English computer, equipped with LG PLC.
- Electromagnetic valve: Ningbo Jiaerling
- Frequency converter: Use Made in China frequency converters.
- Pump: self-made high head and large flow centrifugal water pump.
- Main pump motor: Anhui Wannan Motor.
- Master cylinder liquid level: Use 4-20mA analog signal output.
- Level of deputy temporary worker: use foam water level gauge. (American Mike)
- Temperature detection and display: digital temperature display instrument, dual temperature measuring probes.
- The safety system has a triple cylinder head safety interlock mechanism, and the main cylinder is equipped with a stainless
- steel safety valve.
- Heat exchanger: external spacer heating.
- Feeding system: Quantitative feeding based on the process curve.
- Circulation system: The main pump flows internally and externally, which is automatically controlled by a computer or manually controlled by a relay.
- Valves: Y valves are used for heating, stainless steel Y valves are used for single inlet and single row, and other Y valves are produced by joint ventures.
- Temperature control: on-off temperature control, controlled by a computer, with automatic heating, cooling, and insulation functions.
- Dyeing method: air cushion type.
- Opening method: manual opening.
- Surface treatment: polishing inside and outside the cylinder.
- Cage: Each dyeing machine is equipped with butterfly blades and self-locking locks.
- Body plate: high-quality stainless steel. (S31603)
- Bath ratio: 1:5-1:6
- Chemical material system: including heating and water adding functions, including overflow type salt melting device.
- Overflow cleaning: The cleaning port is installed on the upper part of the cylinder port, and the bottom of the cylinder is filled with water, while the cylinder is drained for easy cleaning.
- Commutation method: Novel "U" type commutation.
- Random accessories: Each model comes with one set of mechanical seals, pot mouth rings, and reversing seals for the main and auxiliary pumps.
Automatic Bobbin Hydro extractor

Digital Yarn Twist Tester
Digital Yarn Twist Tester

Digital Yarn Twist Tester
Digital Yarn Twist Tester

GSM Cutter with Balance
GSM Cutter with Balance

GSM Cutter with Balance
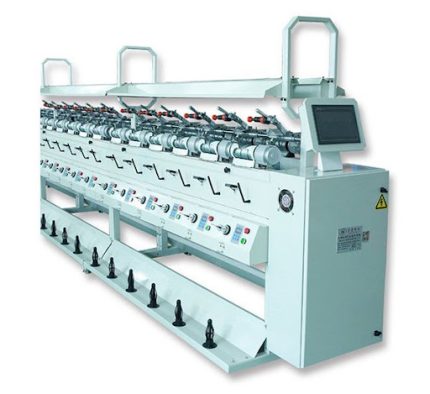
High speed hard winding machine
High Speed Hard Winding Machine

High Speed Hard Winding Machine
- Increased Productivity - High-speed operation reduces winding time significantly.
- Consistent Package Quality - Ensures uniform and firm yarn packages ideal for further processing.
- Reduced Yarn Breakage - Precise tension control minimizes yarn damage during winding.
- Versatility - Handles different types of yarns including delicate and coarse fibers.
- User-Friendly Operation - Simple controls and automation reduce operator fatigue.
- Improved Efficiency - Automatic package build-up reduces manual adjustments.
- Space Saving - Compact design fits well in production lines and labs.
- Set Up the Machine - Switch on the power and check all safety guards.
- Load Yarn - Thread the yarn through tension guides and eyelets as per the manual.
- Adjust Tension - Set tension according to yarn type to avoid slack or breakage.
- Place Empty Cone/Package - Mount the empty cone or package holder securely.
- Start Winding- Press the start button; machine will begin winding at set speed.
- Monitor the Process - Observe yarn package build-up and make adjustments if necessary.
- Stop and Remove Package - Once winding is complete, stop the machine and remove the yarn package carefully.
- Maintenance - Clean the machine regularly and lubricate moving parts as needed.
- High-Speed Operation - Capable of winding yarns at fast speeds (up to 3000 RPM) to boost productivity.
- Precise Tension Control - Adjustable tension mechanism to prevent yarn breakage and ensure tight winding.
- Automatic Package Formation - Uniform, firm package build-up for consistent yarn quality.
- Versatile Yarn Compatibility - Suitable for cotton, polyester, wool, and blended yarns.
- User-Friendly Interface - Easy controls with digital or analog panels for speed and tension adjustment.
- Robust Construction - Durable stainless steel or metal frame for long-term reliability.
- Safety Features - Includes emergency stop buttons and yarn break sensors.
- Compact Design - Space-saving structure ideal for labs and production floors.
- Low Maintenance - Designed for easy cleaning and minimal upkeep.
High Speed Hard Winding Machine

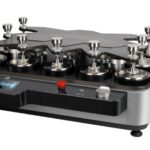
Perspiration Tester
Perspiration Tester
Perspiration Tester
- Fabric samples are treated with synthetic perspiration solution (acidic or alkaline).
- They are sandwiched with adjacent fabric and placed between glass or acrylic plates.
- The assembly is loaded into the tester and pressed under specific pressure.
- it’s then incubated at 37°C (body temperature) for a fixed time (typically 4 or 16 hours).
- Afterward, color change and staining are evaluated using a gray scale.
- Accurate Sweat Simulation - Mimics real-life effects of acidic and alkaline perspiration on fabrics.
- Improves Product Quality - Ensures textiles retain color and don’t bleed or stain when worn.
- Supports Standard Compliance - Follows ISO and AATCC test standards for global market approval.
- Protects Brand Reputation- Reduces customer complaints due to dye transfer or fading.
- Simple and Repeatable- Provides consistent pressure and conditions for reliable results.
- Multi-Sample Testing- Tests multiple specimens at once, saving time in labs.
- Durable and Low Maintenance- Robust frame with minimal moving parts makes it long-lasting and easy to care for.
- Stainless Steel Frame - Corrosion-resistant body for durability and long-term use.
- Multi-Sample Capacity - Can hold up to 20 or more specimens for batch testing.
- Standardized Loading Weight- Applies uniform pressure (usually 12.5 kPa) across all samples.
- Removable Plates - Glass or acrylic plates ensure even contact and easy cleaning.
- Compact Design- Space-saving, bench-top model ideal for lab environments.
- Complies with Test Standards - Meets ISO 105 E04, AATCC 15, and related perspiration fastness standards.
- Ease of Operation - Simple loading, unloading, and incubation process.
- High-Temperature Resistance - Can be used inside incubators at 37°C or ovens as required.
- Prepare the Test Solution - Mix artificial acidic or alkaline perspiration as per standard (ISO or AATCC).
- Cut the Fabric Samples - Cut both the test fabric and adjacent white fabric (usually cotton) to standard size.
- Soak the Samples - Immerse the fabric sandwich (test + adjacent) in the test solution for 30 minutes.
- Remove Excess Liquid - Gently squeeze or blot to remove extra moisture—do not dry.
- Load in the Tester- Place each sandwich between glass or acrylic separator plates in the tester.
- Apply Pressure - Tighten the top plate or place the standard weight on top to apply uniform pressure.
- Incubate - Keep the loaded tester in an oven or incubator at 37°C for 4–16 hours (depending on the method).
- Accurate Sweat Simulation - Mimics real-life effects of acidic and alkaline perspiration on fabrics.
- Improves Product Quality - Ensures textiles retain color and don’t bleed or stain when worn.
- Supports Standard Compliance - Follows ISO and AATCC test standards for global market approval.
- Protects Brand Reputation- Reduces customer complaints due to dye transfer or fading.
- Simple and Repeatable- Provides consistent pressure and conditions for reliable results.
- Multi-Sample Testing- Tests multiple specimens at once, saving time in labs.
- Durable and Low Maintenance- Robust frame with minimal moving parts makes it long-lasting and easy to care for.
- Dry and Evaluate - Remove, air dry the samples, then assess color change and staining using a gray scale.
- Fabric samples are treated with synthetic perspiration solution (acidic or alkaline).
- They are sandwiched with adjacent fabric and placed between glass or acrylic plates.
- The assembly is loaded into the tester and pressed under specific pressure.
- it’s then incubated at 37°C (body temperature) for a fixed time (typically 4 or 16 hours).
- Afterward, color change and staining are evaluated using a gray scale.
Perspiration Tester