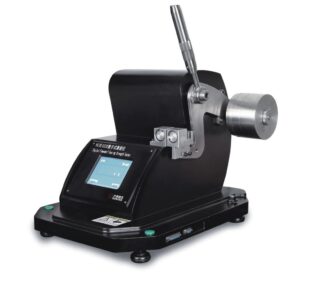
Fabric air permeability tester
$0.00
Fabric Air Permeability Tester
Fabric Air Permeability Tester is a lab instrument used to measure how easily air passes through a fabric. It quantifies the air permeability, which is crucial for evaluating breathability, comfort, and functional performance in textiles.
Purpose Fabric Air Permeability Tester:
It determines the rate of airflow through a fabric sample under a set air pressure, typically reported in units like cm³/cm²/s or L/m²/s.
Working Principle:
The tester creates a pressure difference across the fabric sample and measures the volume of air flowing through it. Higher air permeability means the fabric is more breathable.
Main Components of Fabric Air Permeability Tester:
– Test Head / Clamp: Holds the fabric securely without leakage.
– Pressure Regulator: Maintains a constant air pressure during testing.
– Flow Meter or Digital Sensor: Measures the actual airflow rate through the fabric.
– Display Unit: Shows readings of air permeability instantly.
Applications of Fabric Air Permeability Tester:
– Performance textiles (sportswear, PPE)
– Technical fabrics (filters, tents, airbags)
– Medical textiles (masks, gowns)
– Nonwovens and industrial materials
Benefits of Fabric Air Permeability Tester:
- Accurate Breathability Measurement – Precisely measures how breathable a fabric is, essential for comfort and performance.
- Supports Quality Control – Ensures consistent air permeability in fabric batches, critical for products like PPE, sportswear, and filters.
- Enhances Product Design – Helps in selecting or engineering fabrics with the right airflow properties for specific uses.
- Standard Compliance – Conforms to international testing standards (e.g., ASTM D737, ISO 9237), ensuring global credibility.
- Quick and Reliable Testing – Provides rapid results, increasing lab efficiency and production decision-making speed.
- Wide Material Compatibility – Suitable for woven, nonwoven, knitted fabrics, and even paper or coated materials.
- Improves Functional Performance – Helps optimize products for ventilation, moisture control, and thermal comfort.
- Reduces Product Failure – Identifies underperforming fabrics early, minimizing risks in high-performance applications.
Features of Fabric Air Permeability Tester:
- Digital Display – Shows air permeability readings clearly in units like L/m²/s or cm³/cm²/s.
- Precise Test Head/Clamp – Provides an airtight seal to prevent air leakage and ensure accurate results.
- Adjustable Pressure Settings – Allows testing under various pressure drops (e.g., 10–2500 Pa), depending on fabric type.
- Automatic Airflow Measurement – Built-in sensors or flow meters capture airflow rate automatically for quick analysis.
- Multiple Test Area Sizes – Interchangeable test plates to match different sample sizes and standard requirements.
- Data Logging and Export – Some models include USB or software connectivity for storing and exporting test results.
- Standard Compliance – Conforms to ASTM D737, ISO 9237, BS 5636, DIN 53887, etc.
- Robust Construction – Built with corrosion-resistant materials and durable components for long-term lab use.
- Low Maintenance – Simple cleaning and calibration process for reliable performance.
- Compact and User-Friendly Design – Ideal for lab benches and easy operation with minimal training.
How to Use Fabric Air Permeability Tester:
- Prepare the Sample – Cut the fabric sample to the required size (usually circular, e.g., 20 cm²).
- Mount the Sample – Place the fabric securely in the test clamp or holder, ensuring no wrinkles or gaps.
- Set Test Parameters – Adjust the air pressure drop according to the fabric type or standard (e.g., 100 Pa).
- Start the Test – Turn on the air supply and start the airflow through the fabric.
- Read the Measurement – The digital display will show the air permeability value in the selected units.
- Record the Results – Note the readings or export data if the device supports it.
- Repeat if needed – Test multiple samples or areas for accuracy and average the results.
- Clean and Maintain – After testing, clean the clamp and ensure the device is calibrated regularly.
Tip: Ensure the test environment maintains standard temperature and humidity for consistent results.
Fabric Ai r Permeability Tester
Appliance Range
It is used to TEST the air permeability of various textile fabrics, including industrial fabrics, nonwoven fabrics and other textile products and other breathable materials.
Related Standards
GB / T 5453, GB / T 13764, ISO 9237, ISO 5636, ASTM D737, etc.
Instrument characteristics
1. Automatic sample clamping, automatic nozzle replacement, and quick test.
2. Microcomputer processing, the test results are displayed directly, without manual table calculation;
3. Built-in continuous test mode, the test unit can be switched as needed.
4. Chinese LCD menu operation, configure computer interface.
Technical parameter
1. Range of sample pressure difference: 1 ~ 4000Pa
2. Measurable air permeability: 1 ~ 40,000mm / s
3. Measurement error: ≤ ± 2%
4. Measurable fabric thickness: ≤8mm
5. Test area: 5cm2; 20cm2; 50cm2; 100cm2
Ф50mm (≈19.6cm2)
Ф70mm (≈38.5cm2)
6. Nozzles: 11 in total (automatic replacement of digital setting)
CODE 00 01 02 03 04 05 06 07 08 09 10
DIAφ(mm)
0.8 1.2 2 3 4 6 8 10 12 16 20
7.Data Capacity:≤200 times tests
8.Power Supply:AC220V 50Hz 2KW
9.Weight:80Kg
10.Shape:1250×700×1250mm
Related products
Digital Bench top PH Meter
Digital Bench top PH Meter
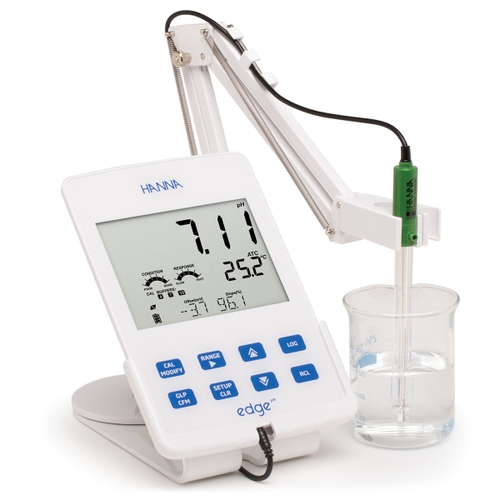
Digital Bench top PH Meter
Brand: Hanna Model: HI2002 Country of Manufacture: Romania Origin: USA
Digital Bench top PH Meter
Single parameter of Digital Bench top PH Meter features user-friendly tablet design with bench, portable or wall mount options for ultimate flexibility. Switch from portable to bench in the same procedure or clear the surface for easier working and hang on the wall. Digital Bench top PH Meter Range -2.00 to 16.00pH; pH Digital smart electrode compatible Accuracy: ±0.01 pH edge® pH is dedicated to testing pH. Using Hanna's latest innovation in technology and design, edge® can be adapted to suit your working method. Select from hand held, wall mount or bench top - or switch between them all. edge® is happy any which way. Simply plug in the electrode, then play. Measurement is simpler, quicker and more accurate than ever. Results are fast and reliable. Combining high precision technology with the user-friendly dimensions and format of a small digital tablet, edge® is breaking new ground in electrochemistry. This is a must-have meter for your laboratory.| pH Range | basic mode: -2.00 to 16.00 pH; standard mode: -2.000 to 16.000 pH | |
| Resolution | basic mode: 0.01 pH; standard mode: 0.001 pH | |
| Accuracy (@25°C) | basic mode: ±0.01 pH; standard mode: ±0.002 pH | |
| Calibration | basic mode: automatic, up to three points calibration, 5 standard buffers available; standard mode: automatic, up to five point calibration, 7 standard buffers available and two custom buffers | |
| Temperature Compensation | automatic, -5.0 to 100.0°C (using integral temperature sensor) | |
| Electrode Diagnostics | standard mode: probe condition, response time and out of calibration range | |
| mV pH Range | ±1000 mV | |
| Resolution | 0.1 mV | |
| Accuracy (@25°C) | ±0.2 mV | |
| ORP Range | ±2000 mV | |
| Resolution | 0.1 mV | |
| Accuracy (@25°C) | ±0.2 mV | |
| Temperature Range | -20.0 to 120.0°C | |
| Resolution | 0.1°C | |
| Accuracy | ±0.5°C | |
| Additional Specifications: | ||
| Probe | HI-11310 digital glass body pH electrode with 3.5mm connector and 1m cable | |
| Logging | up to 1000 (400 for basic mode) records organised in: manual log-on demand (max. 200 logs), manual log-on-stability (max. 200 logs), interval logging (max. 600 samples; 100 lots) | |
| Connectivity | 1 USB port for storage; 1 micro USB port for charging and PC connectivity | |
| Environment | 0 to 50°C; RH max 95% non-condensing | |
| Power Supply | 5 VDC adapter (included) | |
| Dimensions | 2020 x 140 x 12 mm | |
| Weight | 250 g |
- High Accuracy and Resolution
- Digital Display - Large, clear LCD or LED screen shows pH readings, temperature, and sometimes mV or ion concentration. - Some models include a backlit display for better visibility.
- Electrode System - Uses a pH-sensitive electrode (usually glass) connected to a reference electrode. Electrodes are often replaceable and require regular calibration and maintenance.
- Temperature Compensation - Automatic or manual temperature compensation to correct pH readings based on sample temperature. - Integrated temperature sensors or separate probes are used.
- Calibration Functions - Supports 2-point, 3-point, or multi-point calibration using standard buffer solutions. - Auto-recognition of calibration buffers in advanced models.
- Data Storage and Connectivity - Internal memory for storing results. - USB or RS232 ports for data export to PCs or printers; some models support wireless connectivity.
- Sturdy Design - Benchtop models are larger and more stable than portable meters. - Often come with a durable casing and electrode arm for hands-free operation.
- High Accuracy and Precision
- User-Friendly Interface- Digital displays (LCD/LED) make readings easy to see and interpret.- Many models offer intuitive controls and guided calibration, simplifying operation.
- Advanced Calibration Features- Supports multi-point calibration for improved accuracy across a wide pH range.- Some models automatically recognize buffer solutions, reducing user error.
- Temperature Compensation- Automatic temperature compensation (ATC) corrects readings based on sample temperature, ensuring accuracy.
- Stable and Durable Design- Benchtop units are more robust and stable than handheld devices, reducing the risk of spills or tipping.- Often include electrode holders or arms for secure, hands-free measurements.
- Data Management and Connectivity- Built-in memory for storing measurement data.USB, RS232, or wireless connectivity for exporting data to computers or laboratory information systems (LIS).
- Multi-Functionality- Some models also measure ORP (oxidation-reduction potential), ion concentration, or conductivity.- Suitable for a variety of testing needs beyond just pH.
- Ideal for Long-Term Use- Designed for prolonged and repeated use in laboratory environments.- Replaceable electrodes and parts extend the meter’s usable life.
- Compliance and Documentation- Data logging features support documentation and compliance with regulatory standards in regulated industries (e.g., pharma, food, environmental testing).
Digital hot plate-magnetic stirrer
Digital hot plate-magnetic stirrer
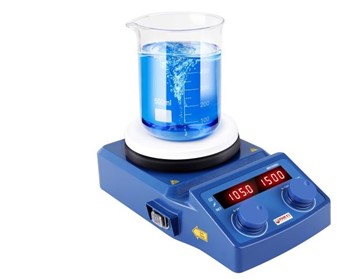
Digital hot plate-magnetic stirrer
- Magnetic Stirrer:
- Digital Display and Controls:
- Temperature Sensors: - Built-in or external probes (like a PT100 or thermocouple) for accurate temperature control.
- Precision and Control- Digital Interface: Allows accurate setting and monitoring of temperature and stirring speed.- Consistent Results: Ensures reproducibility in experiments and solution preparations.
- Efficient Mixing and Heating- Uniform Mixing: Magnetic stirring eliminates hotspots and ensures even distribution of solutes.- Simultaneous Operation: Ability to heat and stir at the same time improves efficiency.
- Safety Features- Overheat Protection: Prevents accidents by automatically shutting off at unsafe temperatures.- Sealed Surface: Reduces risk of contamination and easy to clean.
- Versatility
- Compact and User-Friendly- Takes up minimal bench space.- Simple to operate with user-friendly controls and displays.
- Durability- High-quality materials like ceramic or stainless steel tops resist corrosion and wear.
- Time-Saving Speeds up preparation of solutions and reactions compared to manual stirring and separate heating. Would you like these benefits presented in a slide format or for a product brochure?
Fastness Rotary Friction Tester
Fastness Rotary Friction Tester
A Fastness Rotary Friction Tester, also known as a Rotary Crock meter, is a specialized instrument used to evaluate the color fastness of textiles and materials when subjected to rotational rubbing. This test simulates the wear and friction that fabrics experience during use, helping manufacturers assess the durability of dyes and finishes. Purpose of Fastness Rotary Friction Tester The primary function of the Fastness Rotary Friction Tester is to determine how well a fabric's color withstands rubbing, both in dry and wet conditions. This is crucial for ensuring the longevity and appearance of textiles in real-world applications, such as clothing, upholstery, and footwear. Working Principle of Fastness Rotary Friction Tester The tester operates by applying a specified pressure to a fabric sample using a standardized rubbing finger covered with a test cloth. The rubbing finger performs a set number of rotational movements (typically 1.125 turns clockwise followed by 1.125 turns counterclockwise) over the fabric surface. After the test, the degree of color transfer to the test cloth and any changes in the fabric's appearance are evaluated against standardized gray scales. Common Testing Standards - AATCC 116: Colorfastness to Crocking: Rotary Vertical Crock meter Method. ISO 105 X16: Textiles—Tests for color fastness—Part X16: Color fastness to rubbing—small areas. - SATRA TM8: Color fastness to rubbing. Key Specifications of Fastness Rotary Friction Tester - Rubbing Head Diameter: Typically 16 mm. - Applied Pressure: Approximately 1134 grams (11.1 N). - Rotation: 1.125 turns clockwise followed by 1.125 turns counterclockwise. - Sample Size: Commonly 60 mm × 60 mm. - Test Cloth: Standardized white cotton cloth, either dry or wetted depending on the test condition. Benefits of Fastness Rotary Friction Tester - Realistic Simulation: Mimics the actual wear and friction fabrics undergo during use. - Versatility: Applicable to a wide range of materials, including textiles, leather, and printed fabrics. - Quality Assurance: Ensures products meet industry standards for color durability. - Standard Compliance: Aligns with international testing standards, facilitating global trade and quality benchmarks. Applications Fastness Rotary Friction Tester - Textile Industry: Assessing the color durability of garments, upholstery, and other fabric products. - Footwear Manufacturing: Testing the colorfastness of shoe uppers and linings. - Automotive Interiors: Evaluating the wear resistance of seat covers and other interior fabrics. Quality Control Laboratories: Routine testing to ensure product consistency and compliance with standards. Benefits of Fastness Rotary Friction Tester:- Accurate Colorfastness Evaluation- Provides precise assessment of how well fabric resists color loss and staining from rubbing.
- Simulates Real-World Wear - Recreates rotational friction found in actual use (e.g., seat covers, apparel wear points).
- Supports Wet & Dry Testing - Can test under both dry and wet conditions for comprehensive results.
- Standardized Testing - Complies with global standards (AATCC 116, ISO 105 X16), ensuring reliable and comparable results.
- Time-Saving & Efficient - Quick to set up and run, allowing for high-throughput testing in labs.
- Versatile Use- Suitable for textiles, leather, coated fabrics, and printed surfaces.
- Improves Quality Control - Identifies potential durability issues early in the production process.
- Enhances Product Performance - Helps in developing fabrics with better resistance to rubbing and abrasion.
- Rotary Rubbing Mechanism - Simulates 1.125 clockwise and 1.125 counterclockwise turns for realistic friction.
- Standardized Rubbing Head - Fixed diameter (typically 16 mm) with specified pressure (≈1134 g) for consistent results.
- Dry and Wet Testing Capability - Can perform tests using dry or wet rubbing cloths.
- Sample Holder- Secure and easy-to-use fixture for holding fabric samples in place.
- Test Cloth Mounting Arm- Quick attachment for standardized white rubbing cloths.
- Simple Operation - Manual or motorized operation depending on model; easy to handle for lab technicians.
- Compliance with Standards - Follows AATCC 116, ISO 105 X16, and SATRA TM8 protocols.
- Prepare the Sample - Cut a fabric piece (typically 60 × 60 mm) and condition it per standard requirements.
- Mount the Fabric - Secure the fabric sample on the sample holder or base plate of the tester.
- Attach Rubbing Cloth - Place a standard white test cloth (dry or wetted as required) over the rubbing head.
- Apply Pressure - Lower the rubbing head onto the fabric. Standard weight is about 1134 g.
- Start the Test - Operate the tester: the head performs 1.125 turns clockwise, then 1.125 turns counterclockwise.- Number of cycles (typically 10 or 20) is set based on the test standard.
- Remove and Inspect - After testing, remove the rubbing cloth and assess any color transfer using a gray scale.
- Evaluate Fabric Surface - Check the fabric for visible changes, fading, or wear.
- Record Results - Grade both staining and fabric change per standard gray scale ratings.
 It is used to change the color fastness of the textile,
printing and dyeing, printing and other products after a specific track friction.
[Related standards]
GB / T29865 AATCC116 ISO105-X16, etc.
[Instrument characteristics]:
1.Single-chip control, speed can be set freely
2.Imported motor, linear guide, low noise, suitable for long time work
3. Liquid crystal display, film panel
4. Freely set the number of friction, can count up and down,
and automatically stop the alarm when the set value is reached
[Technical Parameters]:
1. Friction head diameter: 16mm 25mm
2. Vertical pressure: 11.1N
3. Working mode: 405 ° clockwise and 405 ° counterclockwise
4. Speed range: constant 60 rpm, LCD display, thin mold panel
5. Counting range: 0-99999 times
6. Power supply: AC 220V 50Hz 80W
7. Weight: 20KG
8. Volume: L420mm × W260mm × H430mm
 ICI Pilling & Snagging Test Machine
Digital Elmendorf tearing tester
Digital Elmendorf Tearing Tester
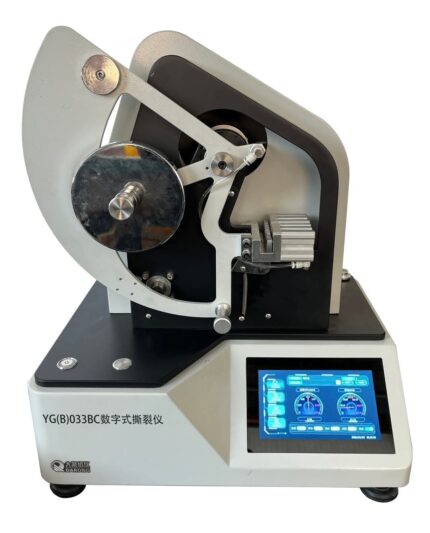
Digital Elmendorf Tearing Tester is a precision instrument used to measure the tear strength of materials like woven fabrics, paper, plastic films, and nonwovens. It determines how much force is required to continue tearing a pre-slit sample. Key Functions of Digital Elmendorf Tearing Tester: - Measures propagation tear resistance, not initial tear. - Uses a pendulum to apply force; the energy lost during tearing is calculated to determine tear strength. - Equipped with a digital display for direct reading of results in grams or millinewtons. Core Components: - Pendulum Arm: Applies tearing force. - Clamps: Secure the sample before and after the tear. - Cutting Blade: Creates a precise slit at the start of the test. - Digital Display Unit: Shows the tearing force result clearly and instantly. - Counterweights: Optional weights for increasing test range (for stronger materials). Applications of Digital Elmendorf Tearing Tester: - Testing tear resistance of: - Textile fabrics (especially woven) - Paper and cardboard - Plastic films - Nonwovens - Packaging materials Benefits of Digital Elmendorf Tearing Tester:- Accurate Tear Strength Measurement - Provides precise data on tear resistance, critical for quality control and product performance.
- Digital Readout - Easy-to-read display gives instant, reliable results without manual calculations.
- High Reproducibility - Ensures consistent test outcomes due to controlled tearing angle and speed.
- Fast Testing Process - Simple loading and quick test cycle increase lab efficiency.
- Suitable for Various Materials - Tests a wide range of flexible materials like textiles, paper, plastic, and packaging.
- Customizable Range - Use of optional weights extends the test range for low to high tear strength materials.
- Low Sample Waste - Requires small fabric or material samples, reducing waste during testing.
- Standards Compliance - Meets international testing standards (e.g., ASTM D1424, ISO 13937) for credibility and uniformity.
- Precision Sample Clamp - Securely holds samples in place to ensure accurate tear initiation.
- Pre-Cutting Blade - Integrated knife creates a precise initial slit in the sample before tearing.
- User-Friendly Interface - Simple buttons and screen navigation for ease of operation.
- Standard Test Compliance - Compatible with ASTM D1424, ISO 1974, ISO 13937, and other tear strength standards.
- Sturdy Construction - Made with durable materials for long-lasting performance and stable operation.
- Compact Design - Space-efficient footprint ideal for laboratory environments.
- Data Output Options- Some models offer USB or printer connectivity for result documentation.
- Prepare the Sample - Cut the material (fabric, paper, film, etc.) to standard size (typically 100 × 63 mm for textiles) and slit it with the pre-cutter as required.
- Select Pendulum Weight - Choose the appropriate pendulum or add counterweights based on expected tear strength.
- Calibrate the Machine - Set the pendulum to its starting position and zero the display.
- Clamp the Sample - Fix one half of the sample in the stationary clamp and the other in the moving clamp.
- Cut the Initial Slit - Use the integrated blade to make a precise cut at the marked slit area (usually 20 mm).
- Release the Pendulum - Trigger the pendulum to swing and tear the sample through the pre-slit.
- Read the Result - The digital display will show the tearing force automatically (in g, mN, or cN).
- Record or Export Data - Save or print the result if your model supports USB or printer connection.
- Reset for Next Test - Reposition the pendulum and prepare a new sample for the next cycle.
 Scope of application
It is used for the determination of the tear resistance of various woven
fabrics (Elmendorf method), and it can also be used for the determination
of the tear resistance of thick paper, plastic sheeting, electrical tape, etc.
Related standards
GB/T 3917.1 FZ/T60006 FZ/T75001 ISO1974/9290 ASTM D1424/5734
etc.
Instrument characteristics
1. Maximum 300N test range
2. Microcomputer control, digital decoding, support online
communication
3. Color touch screen control, Chinese and English menu operation
interface
4. Pneumatic clamping, automatic cutting
5. A variety of measurement units (cN, gf) selection
6. Fully automatic operation with safe operation protection.
7. Automatically increase potential energy
[Technical parameter]:
1. Test range: first gear: (0~16)N second gear: (0~32)N third gear: (0~
64)N fourth gear: (0~128)N fifth gear: (0~300)N
2. Test accuracy: ≤±0.2%F·S
3. Tearing length: 43mm (non-standard 30-60mm can be set)
4. Automatic incision length: (20±0.2)mm
5. Sample size: (100×63)mm
6. Specimen clamping: pneumatic way
7. Sample test: Up to 10 sets per group on the device side, and 30 sets
of data can be selected to be saved
8. Power supply: AC220V±10% 50Hz 100W
9. Dimensions: (650×660×680)mm
10. Weight: 50kg
[Sample of control interface]:(English version is also available.)
 Controller For IR Dyeing Machine
Controller For IR Dyeing Machine
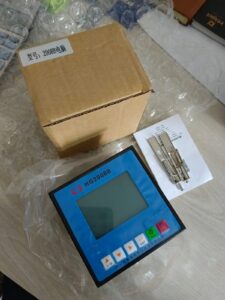
IR Dyeing machine controller
- Temperature Control:- Precisely regulates the infrared heaters to maintain uniform temperature across the dye bath. - Supports customizable heating curves (ramp-up, hold, and cool-down phases).
- Programmable Logic Control (PLC): - Allows operators to set and automate dyeing programs for different fabrics and dye types. - Supports multiple recipes or programs for different batches.
- Real-Time Monitoring and Feedback: - Monitors parameters like temperature, fabric rotation, bath circulation, and timing. - Provides real-time data and alarms for deviations.
- Touchscreen Interface / HMI (Human Machine Interface): - User-friendly interface for configuring and monitoring processes. - Multi-language support and graphical display of process curves.
- Data Logging and Traceability: - Records process data for quality control and traceability.
- Energy Efficiency Optimization: - Manages IR heater output to reduce energy usage. - Often includes features for auto shut-off or idle mode.
- Safety Features: - Includes emergency stop, over-temperature protection, and fault detection systems. 8. Connectivity: - Modern controllers may support Ethernet, Modbus, or other industrial communication protocols for integration into factory automation systems.
- Improved Dyeing Accuracy and Consistency
- Enhanced Energy Efficiency- Infrared heating is more energy-efficient than traditional heating methods.- The controller optimizes energy use by adjusting the IR output based on process needs, reducing overall energy consumption.
- Time Savings- Faster heating and cooling cycles due to infrared technology.- Automated processes reduce manual intervention and cycle times. 4. Better Process Control- Programmable dyeing cycles and precise control over each stage (heating, dyeing, rinsing, cooling).- Real-time monitoring and adjustments improve reliability.
- Reduced Water and Chemical Usage- More efficient dye penetration and fixation mean less water and fewer chemicals are needed for reprocessing or corrections.6. Lower Operational Costs
- Enhanced Safety Built-in alarms, emergency shut-off and automatic fault detection enhance operational safety.8. Data Logging and Traceability- Ability to record and review dyeing process data helps in quality control and troubleshooting.- Facilitates compliance with industry standards and audits.
- User-Friendly Operation- Modern touchscreen interfaces make it easier for operators to manage and monitor processes.- Multilingual support and visual feedback enhance usability.
VeriVide Colour Assessment Cabinets
VeriVide Colour Assessment Cabinets
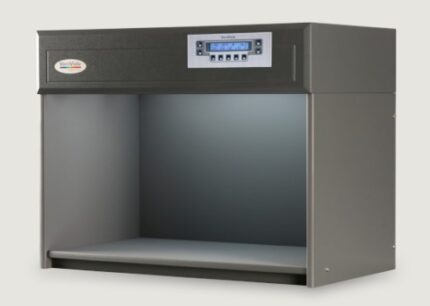
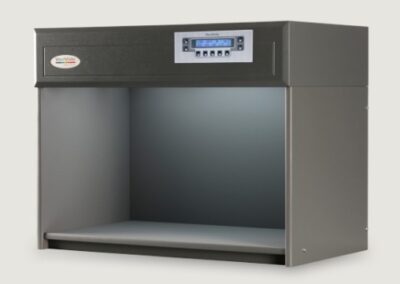 VeriVide offers high-quality Colour Assessment Cabinets (CACs) such as the CAC 60-4, CAC 60-5, and CAC 120-4&5. These cabinets, originating from the UK, are reliable tools for visual evaluation in quality assurance, meeting national, international, and retailer standards. They effectively mitigate issues related to color assessment.VeriVide Colour Assessment Cabinets
High-quality visual evaluation tool for quality assurance. Adhering to national, international and retailer standards.Colour Assessment Cabinet's (CACs) reduce problems associated with assessing products or samples in different environments,be though geological or seasonal, offering a cost-effective method to ensure visual accuracy and product quality.
Color Light Box Enhance color precision with VeriVide's cutting-edge Colour Assessment
Cabinets. These cabinets are meticulously designed to ensure accurate color evaluation in various industries. Invest in VeriVide Colour Assessment Cabinets to elevate your color assessment process.
Enhance Color Precision with VeriVide's Cutting-Edge Assessment Cabinets, which meet or surpass ISO 3664 and BS 950 Part 1 international standards. The cabinets are adaptable to user requirements, with lamp options to choose different light sources. Available in 60, 120, and 150cm widths, VeriVide Colour Assessment Cabinets provide a flexible solution for accurate color assessment.
Incorporate user-friendly features like servicing indicator, auto sequence, warm-up, power save and data storage.4 or 5 light source options Versions available for colour fastness testing and particulate testing both adhering to global standardsEnsure that you are using the best equipment available as they provide the best fluorescent D65 daylight simulator, with the highest Colour
Rendering Index (CRI), available. VeriVide Colour Assessment Cabinets products are known as light boxes, viewing booths, colour cabinets and others, depending on which industry or country they are serving in. They are used within a wide array of industry sectors throughout the world including textile and apparel, graphics, automotive, ceramics, cosmetics, pharmacology (CAC Particulate),
food, footwear, packaging and printing.Download the Datasheet below for more information or click 'VeriVide CAC Datasheet Here' to get in touch with colour experts.
VeriVide CAC Datasheet Here Features of VeriVide Colour Assessment Cabinets
• CAC 60, CAC 120 and CAC 150 accommodate 60, 120 and 150cm tubes respectively
- Either 4 or 5 light sources available for each model including D65, D50, 840P15, F and UV - see Lamp Options.• Internal finishes in Munsell N5, Munsell N7 or Grey 5574 • Diffuser and/or dimmer options available Dimensions of VeriVide Colour Assessment Cabinets CAC 60-4 Dimensions (mm) Width Height Depth Overall 710 545 420
Color Matching Cabinet-Light Box
Color Matching Cabinet-Light Box

Color Matching Cabinet-Light Box


 Products
 Martindale abrasion tester Updated


