

 Products
 Martindale abrasion tester Updated

0%
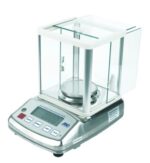
Digital precision balance
$0.00
digital precision balance
2/3/4/5 Digit Digital precision Balance
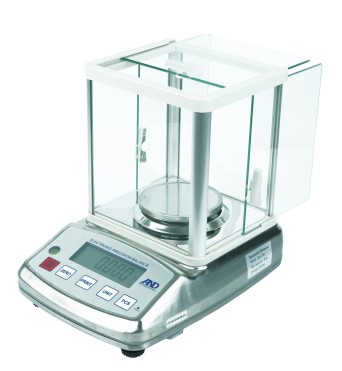
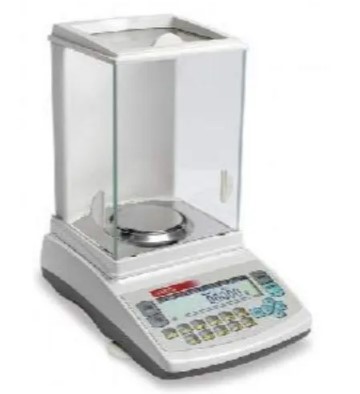
digital precision balance is a weight balance machine. It’s used to Low capacity balance. digital precision balance play an important role to accurate measurement. Digital precision balance is used to check weight paper, jewelry etc. It shows accurate result. We have the best collection of digital precision balance. MAAM TEX IS the best supplier of Precision Balance in Bangladesh
A Digital Precision Balance is a high-accuracy electronic weighing device used in laboratories, industries, and educational institutions for measuring mass with a high degree of precision. It is essential for tasks that require meticulous weight measurements, such as chemical analysis, formulation, and quality control.
Key Features:
- High Accuracy & Precision: – Typically offers readability from 0.1 g to 0.001 g (or even finer). – Ideal for weighing small amounts of material where accuracy is crucial.
- Digital Display: – Large, backlit LCD or LED display for easy reading. – Some models include touch screen interfaces.
- Tarring Function: – Allows you to subtract the weight of a container or packaging to get the net weight.
- Calibration: – Internal or external calibration to maintain accuracy over time. – Some advanced models have auto-calibration features.
- Weighing Units: – Supports multiple units like grams (g), milligrams (mg), carats (ct), and ounces (oz). Stable Platform: – Includes a draft shield to protect against air currents and vibrations, which can affect measurement accuracy.
Common Applications:- Laboratory Analysis: Precise measurement of chemicals and reagents.- Pharmaceuticals: Formulation and quality control.- Jewelry: Accurate measurement of precious metals and stones.- Education: Scientific experiments in schools and universities.
Benefits:- Reliable and Consistent Measurements- User-Friendly Operation- Compact Design with Minimal Footprint- Improved Workflow Efficiency- Enhanced Data Handling (USB or RS232 ports for data transfer in advanced models)
Benefits of digital precision balance Here are the key benefits of using a Digital Precision Balance:
- High Accuracy and Precision- Delivers extremely accurate weight measurements, often down to 0.001 g or better.- Crucial for experiments and applications where even slight variations can affect outcomes.
- User-Friendly Interface- Digital display makes readings easy to read and interpret.- Most models include intuitive controls for functions like tarring, unit conversion, and calibration.3. Speed and Efficiency- Provides instant, stable readings, saving time compared to manual or mechanical balances.- Streamlines lab workflows and enhances productivity.
- Versatile Applications- Suitable for various fields including chemistry, biology, pharmacology, food testing, and gemology.- Can handle diverse weighing tasks from solids to liquids and powders.
- Advanced Features- Tare Function: Subtracts the weight of containers automatically.- Multiple Weighing Units: Supports various measurement units.- Data Connectivity: Many models allow connection to computers or printers for data logging.
- Portability and Space Efficiency- Compact design fits easily in most laboratory setups.- Lightweight models are easy to move and store.
- Enhanced Safety and Reliability- Stable platform and draft shields reduce environmental interference.- Built-in calibration ensures ongoing accuracy.
Here’s a step-by-step guide on how to use a Digital Precision Balance safely and accurately:
1. Set Up the Balance- Place the balance on a stable, vibration-free, and level surface.- Avoid placing near fans, windows, or air vents to prevent air drafts.- Allow the balance to warm up (usually 15–30 minutes) if it has just been turned on.
⚙️ 2. Calibrate the Balance
– If it’s manual calibration, use certified calibration weights.
– For auto-calibration models, follow on-screen instructions.
– Calibration ensures accuracy in measurements.
⚖️ 3. Tare the Balance
– Place the container or weighing paper on the balance.
– Press the “Tare” or “Zero” button to set the display to zero. This subtracts the container’s weight.
4. Weigh the Sample
– Carefully add the sample into the container.
– Wait for the reading to stabilize (usually indicated by a stable icon or beep).
– Read the weight from the digital display.
5. Repeat or Change Units (if needed)
– You can press the unit button to switch between grams, milligrams, ounces, etc., depending on your needs.
6. Clean After Use
– Remove any spilled substances.
– Wipe the surface with a soft, lint-free cloth.
Do not use harsh chemicals unless specified by the manufacturer.
⚠️ Tips for Best Use:
– Avoid touching the container with bare hands (use tweezers or gloves to avoid adding extra weight from oils or moisture).- Use a draft shield if available to minimize airflow interference.- Do not overload the balance beyond its maximum capacity—it can damage the sensors.
Shipping & Delivery
Related products

Bursting strength tester
Bursting strength tester

true burst
- Available with automatic test strip feeder Measurements are simple to make with the Mullen type Bursting Strength Tester. Fast automatic measurements Measurement starts automatically once a test piece has been placed in the measuring gap. The clamping foot descends, and a bursting strength measurement is made.
- Bursting pressure can reach up to 1.2MPa 5. The maximum burst and expansion degree can reach 70mm. 6. Strengthen the lighting system on the test surface. 7. The main aerodynamic force helps to clamp the sample system. 8. A variety of test areas are available, and the switching is easy.
- A variety of unit conversions between Chinese and English. 10. Reliable anti-pinch safety protection design. [Technical parameter]: 1. Test range: (0~1)Mpa (the range above 1Mpa needs to be customized) 2. The minimum graduation value: 0.0001Mpa 3. Pressurization mode: direct pressurization, timing pressurization, and expansion degree pressurization.
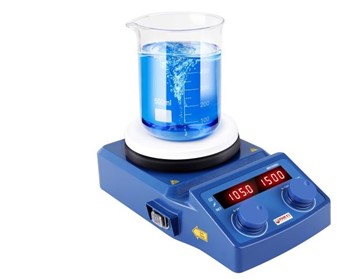

Digital hot plate-magnetic stirrer
Digital hot plate-magnetic stirrer
Digital hot plate-magnetic stirrer
- Magnetic Stirrer:
- Digital Display and Controls:
- Temperature Sensors: - Built-in or external probes (like a PT100 or thermocouple) for accurate temperature control.
- Precision and Control- Digital Interface: Allows accurate setting and monitoring of temperature and stirring speed.- Consistent Results: Ensures reproducibility in experiments and solution preparations.
- Efficient Mixing and Heating- Uniform Mixing: Magnetic stirring eliminates hotspots and ensures even distribution of solutes.- Simultaneous Operation: Ability to heat and stir at the same time improves efficiency.
- Safety Features- Overheat Protection: Prevents accidents by automatically shutting off at unsafe temperatures.- Sealed Surface: Reduces risk of contamination and easy to clean.
- Versatility
- Compact and User-Friendly- Takes up minimal bench space.- Simple to operate with user-friendly controls and displays.
- Durability- High-quality materials like ceramic or stainless steel tops resist corrosion and wear.
- Time-Saving Speeds up preparation of solutions and reactions compared to manual stirring and separate heating. Would you like these benefits presented in a slide format or for a product brochure?
Color Matching Cabinet-Light Box
Color Matching Cabinet-Light Box
Color Matching Cabinet-Light Box

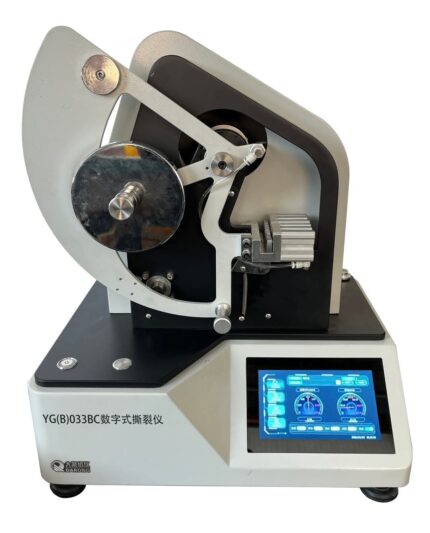
Digital Elmendorf tearing tester
Digital Elmendorf Tearing Tester
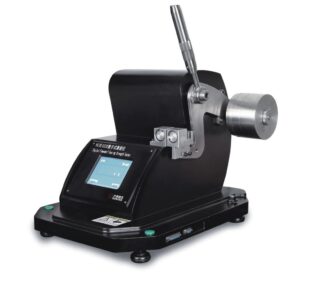
Digital Elmendorf Tearing Tester
- Accurate Tear Strength Measurement - Provides precise data on tear resistance, critical for quality control and product performance.
- Digital Readout - Easy-to-read display gives instant, reliable results without manual calculations.
- High Reproducibility - Ensures consistent test outcomes due to controlled tearing angle and speed.
- Fast Testing Process - Simple loading and quick test cycle increase lab efficiency.
- Suitable for Various Materials - Tests a wide range of flexible materials like textiles, paper, plastic, and packaging.
- Customizable Range - Use of optional weights extends the test range for low to high tear strength materials.
- Low Sample Waste - Requires small fabric or material samples, reducing waste during testing.
- Standards Compliance - Meets international testing standards (e.g., ASTM D1424, ISO 13937) for credibility and uniformity.
- Precision Sample Clamp - Securely holds samples in place to ensure accurate tear initiation.
- Pre-Cutting Blade - Integrated knife creates a precise initial slit in the sample before tearing.
- User-Friendly Interface - Simple buttons and screen navigation for ease of operation.
- Standard Test Compliance - Compatible with ASTM D1424, ISO 1974, ISO 13937, and other tear strength standards.
- Sturdy Construction - Made with durable materials for long-lasting performance and stable operation.
- Compact Design - Space-efficient footprint ideal for laboratory environments.
- Data Output Options- Some models offer USB or printer connectivity for result documentation.
- Prepare the Sample - Cut the material (fabric, paper, film, etc.) to standard size (typically 100 × 63 mm for textiles) and slit it with the pre-cutter as required.
- Select Pendulum Weight - Choose the appropriate pendulum or add counterweights based on expected tear strength.
- Calibrate the Machine - Set the pendulum to its starting position and zero the display.
- Clamp the Sample - Fix one half of the sample in the stationary clamp and the other in the moving clamp.
- Cut the Initial Slit - Use the integrated blade to make a precise cut at the marked slit area (usually 20 mm).
- Release the Pendulum - Trigger the pendulum to swing and tear the sample through the pre-slit.
- Read the Result - The digital display will show the tearing force automatically (in g, mN, or cN).
- Record or Export Data - Save or print the result if your model supports USB or printer connection.
- Reset for Next Test - Reposition the pendulum and prepare a new sample for the next cycle.
 Scope of application
It is used for the determination of the tear resistance of various woven
fabrics (Elmendorf method), and it can also be used for the determination
of the tear resistance of thick paper, plastic sheeting, electrical tape, etc.
Related standards
GB/T 3917.1 FZ/T60006 FZ/T75001 ISO1974/9290 ASTM D1424/5734
etc.
Instrument characteristics
1. Maximum 300N test range
2. Microcomputer control, digital decoding, support online
communication
3. Color touch screen control, Chinese and English menu operation
interface
4. Pneumatic clamping, automatic cutting
5. A variety of measurement units (cN, gf) selection
6. Fully automatic operation with safe operation protection.
7. Automatically increase potential energy
[Technical parameter]:
1. Test range: first gear: (0~16)N second gear: (0~32)N third gear: (0~
64)N fourth gear: (0~128)N fifth gear: (0~300)N
2. Test accuracy: ≤±0.2%F·S
3. Tearing length: 43mm (non-standard 30-60mm can be set)
4. Automatic incision length: (20±0.2)mm
5. Sample size: (100×63)mm
6. Specimen clamping: pneumatic way
7. Sample test: Up to 10 sets per group on the device side, and 30 sets
of data can be selected to be saved
8. Power supply: AC220V±10% 50Hz 100W
9. Dimensions: (650×660×680)mm
10. Weight: 50kg
[Sample of control interface]:(English version is also available.)
Scope of application
It is used for the determination of the tear resistance of various woven
fabrics (Elmendorf method), and it can also be used for the determination
of the tear resistance of thick paper, plastic sheeting, electrical tape, etc.
Related standards
GB/T 3917.1 FZ/T60006 FZ/T75001 ISO1974/9290 ASTM D1424/5734
etc.
Instrument characteristics
1. Maximum 300N test range
2. Microcomputer control, digital decoding, support online
communication
3. Color touch screen control, Chinese and English menu operation
interface
4. Pneumatic clamping, automatic cutting
5. A variety of measurement units (cN, gf) selection
6. Fully automatic operation with safe operation protection.
7. Automatically increase potential energy
[Technical parameter]:
1. Test range: first gear: (0~16)N second gear: (0~32)N third gear: (0~
64)N fourth gear: (0~128)N fifth gear: (0~300)N
2. Test accuracy: ≤±0.2%F·S
3. Tearing length: 43mm (non-standard 30-60mm can be set)
4. Automatic incision length: (20±0.2)mm
5. Sample size: (100×63)mm
6. Specimen clamping: pneumatic way
7. Sample test: Up to 10 sets per group on the device side, and 30 sets
of data can be selected to be saved
8. Power supply: AC220V±10% 50Hz 100W
9. Dimensions: (650×660×680)mm
10. Weight: 50kg
[Sample of control interface]:(English version is also available.) 
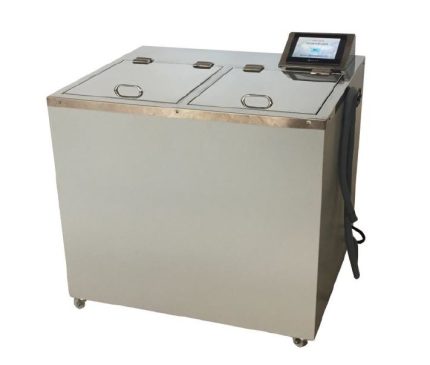
Color fastness to washing machine
COLOR FASTNESS TO WASHING MACHINE
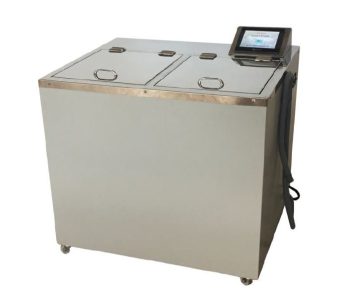
COLOR FASTNESS TO WASH MACHINE
- Drying: - After washing, the sample is dried, typically air-dried or tumble-dried.4. Evaluation: - Color change and staining on adjacent fabrics are assessed using a gray scale (1 to 5 scale; 5 = no change, 1 = severe change). - Results may also be evaluated visually under standard lighting.
- Supports Brand Reputation - Reliable color fastness contributes to a premium product image and consistent performance.4. Compliance with Standards - Meets industry requirements (e.g., ISO, AATCC), crucial for export, certifications, and regulatory compliance.
- Improves Process Control- Helps identify dyeing or finishing process issues early, leading to better production control.6. Reduces Rework and Waste - Minimizes production losses due to color defects after washing.
- Essential for Specific End Uses - Critical for items subject to frequent washing (e.g., uniforms, baby clothes, hospital linens).8. Supports Material Selection - Guides textile manufacturers in choosing appropriate dyes and fabrics for specific applications.
- Assessment of Color Change and Staining- Evaluates both the fabric’s color retention and the staining of adjacent fabrics using grey scales (1 to 5 rating).4. Multi-Fiber Fabric Use - Tests include fabric stitched with adjacent test strips (cotton, wool, etc.) to assess color bleeding onto different fibers.
- Multiple Test Options - Includes domestic, accelerated, and industrial washing conditions depending on the end-use of the fabric.6. Temperature and Time Control - Precise control over wash temperature (e.g., 40°C, 60°C) and duration (e.g., 30 mins), simulating specific washing cycles.
- Detergent and Additive Use - Uses standardized detergent formulations with/without optical brighteners, and sometimes alkaline or oxidizing agents.8. Reproducible and Quantifiable - Provides repeatable results that can be objectively measured and documented.
- Applicability to All Textile Types - Suitable for dyed, printed, or coated fabrics across various fibers (cotton, polyester, blends, etc.).
- Rate of temperature rise: Maximum speed for 2ºC/min 7. Internal materials: Imported Stainless Steel 316L 8. Control panel: Touch screen
- Rack point control function helps to replace containers easily 10. Safety device: Safety door switch, over-temperature protector and dry heating protector 11. Heating media: Distilled water 12. Power supply: AC220V 50Hz 30A

Hydraulic GSM Cutter
Hydraulic GSM Cutter
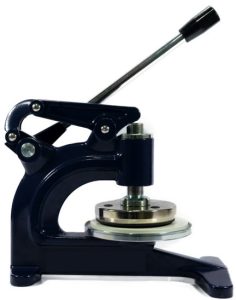
Hydraulic GSM Cutter
- High Cutting Precision - Ensures consistent and accurate fabric sample size for reliable GSM results.
- Effortless Operation- Hydraulic action reduces manual effort and operator fatigue.
- Ideal for Thick or Multi-Layer Fabrics - Cuts through dense or multiple fabric layers cleanly.
- Time-Saving - Speeds up the sample preparation process, especially for high-volume testing.
- Improves Test Accuracy - Uniform samples help eliminate errors in GSM calculation.
- Durable and Long-Lasting - Robust construction ensures stability and extended service life.
- Safety Enhancement - Reduces risk of injury compared to manual rotary cutters.
- Consistent Pressure Application - Hydraulic mechanism maintains steady force for each cut.
- Hydraulic Press Mechanism - Applies consistent and strong pressure for clean, even cuts.
- Standard Cutting Die (100 cm²) - Produces fabric samples suitable for GSM testing with standard area.
- Heavy-Duty Construction - Built with robust metal frame for long-term lab or industrial use.
- Sharp Stainless Steel Blades - Durable and replaceable blades ensure smooth, precise cuts.
- Cutting Pad Included - Comes with a rubber or nylon base to protect blades and ensure clean edges.
- Simple Lever or Button Operation - Easy to use with minimal training required.
- Non-slip Base - Provides stability during operation for safe, accurate cutting.
- Supports Various Fabric Types
- Place the Cutting Pad - Lay the rubber or nylon cutting pad on a flat surface.
- Position the Fabric - Place the fabric sample flat and smooth on the cutting pad.
- Align the Cutter - Position the GSM cutter die over the desired area of the fabric.
- Activate Hydraulic Press - Pull the lever or press the button to apply hydraulic pressure and cut the sample.
- Remove the Sample - Lift the cutter and carefully take out the circular fabric piece (usually 100 cm²).
- Weigh the Sample - Place the cut sample on a precision balance or GSM scale to determine weight.
- Calculate GSM - Multiply the sample weight (in grams) by 100 to get GSM.
Hydraulic GSM Cutter

Perspiration Tester
Perspiration Tester
Perspiration Tester
- Fabric samples are treated with synthetic perspiration solution (acidic or alkaline).
- They are sandwiched with adjacent fabric and placed between glass or acrylic plates.
- The assembly is loaded into the tester and pressed under specific pressure.
- it’s then incubated at 37°C (body temperature) for a fixed time (typically 4 or 16 hours).
- Afterward, color change and staining are evaluated using a gray scale.
- Accurate Sweat Simulation - Mimics real-life effects of acidic and alkaline perspiration on fabrics.
- Improves Product Quality - Ensures textiles retain color and don’t bleed or stain when worn.
- Supports Standard Compliance - Follows ISO and AATCC test standards for global market approval.
- Protects Brand Reputation- Reduces customer complaints due to dye transfer or fading.
- Simple and Repeatable- Provides consistent pressure and conditions for reliable results.
- Multi-Sample Testing- Tests multiple specimens at once, saving time in labs.
- Durable and Low Maintenance- Robust frame with minimal moving parts makes it long-lasting and easy to care for.
- Stainless Steel Frame - Corrosion-resistant body for durability and long-term use.
- Multi-Sample Capacity - Can hold up to 20 or more specimens for batch testing.
- Standardized Loading Weight- Applies uniform pressure (usually 12.5 kPa) across all samples.
- Removable Plates - Glass or acrylic plates ensure even contact and easy cleaning.
- Compact Design- Space-saving, bench-top model ideal for lab environments.
- Complies with Test Standards - Meets ISO 105 E04, AATCC 15, and related perspiration fastness standards.
- Ease of Operation - Simple loading, unloading, and incubation process.
- High-Temperature Resistance - Can be used inside incubators at 37°C or ovens as required.
- Prepare the Test Solution - Mix artificial acidic or alkaline perspiration as per standard (ISO or AATCC).
- Cut the Fabric Samples - Cut both the test fabric and adjacent white fabric (usually cotton) to standard size.
- Soak the Samples - Immerse the fabric sandwich (test + adjacent) in the test solution for 30 minutes.
- Remove Excess Liquid - Gently squeeze or blot to remove extra moisture—do not dry.
- Load in the Tester- Place each sandwich between glass or acrylic separator plates in the tester.
- Apply Pressure - Tighten the top plate or place the standard weight on top to apply uniform pressure.
- Incubate - Keep the loaded tester in an oven or incubator at 37°C for 4–16 hours (depending on the method).
- Accurate Sweat Simulation - Mimics real-life effects of acidic and alkaline perspiration on fabrics.
- Improves Product Quality - Ensures textiles retain color and don’t bleed or stain when worn.
- Supports Standard Compliance - Follows ISO and AATCC test standards for global market approval.
- Protects Brand Reputation- Reduces customer complaints due to dye transfer or fading.
- Simple and Repeatable- Provides consistent pressure and conditions for reliable results.
- Multi-Sample Testing- Tests multiple specimens at once, saving time in labs.
- Durable and Low Maintenance- Robust frame with minimal moving parts makes it long-lasting and easy to care for.
- Dry and Evaluate - Remove, air dry the samples, then assess color change and staining using a gray scale.
- Fabric samples are treated with synthetic perspiration solution (acidic or alkaline).
- They are sandwiched with adjacent fabric and placed between glass or acrylic plates.
- The assembly is loaded into the tester and pressed under specific pressure.
- it’s then incubated at 37°C (body temperature) for a fixed time (typically 4 or 16 hours).
- Afterward, color change and staining are evaluated using a gray scale.
Perspiration Tester
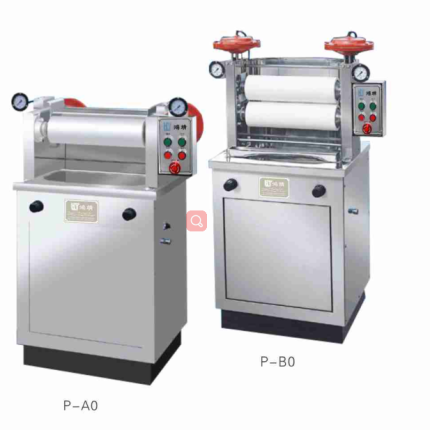
Laboratory Padder
Laboratory Padder
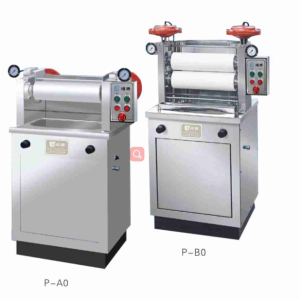
Mini Lab Dyeing Padder
- Adjustable Rollers - The fabric is passed through two or more rollers to apply even pressure and squeeze out excess solution, ensuring uniform chemical or dye application.
- Variable Pressure Control - Allows adjustment of roller pressure for different fabric types and chemical formulations, ensuring optimal penetration without damage.
- Solution Bath - Holds the liquid (e.g., dye, finish, or other chemical treatments) in a bath through which the fabric is dipped before passing through the rollers.
- Fabric Speed Control - Adjustable conveyor speed allows for control over the time the fabric spends in contact with the liquid solution, affecting the degree of treatment.
- Digital Control Panel - Provides easy adjustment of pressure, speed, and solution volume to ensure precise and reproducible results.
- Compact Design - Smaller, lab-scale version of industrial padders, ideal for research, development, and small-scale testing.
- Safety Features - Safety guards, emergency stops, and proper handling mechanisms to prevent accidents during operation.
- Precise Application of Chemicals - Provides uniform and controlled application of dyes, finishes, and other chemicals, ensuring consistent results.
- Small-Scale Testing - Ideal for small sample testing, allowing for fabric treatment without needing full-scale production equipment.
- Versatile Use - Suitable for dyeing, finishing, and applying various chemical treatments, making it a flexible tool for R&D labs.
- Cost-Effective - Reduces the need for large-scale machinery and the associated costs, while providing reliable results for small batches.
- Controlled Fabric Treatment - Offers adjustable pressure, speed, and solution concentration, enabling fine-tuned processing for different fabric types and applications.
- Accelerates Development - Speeds up the testing and development of new products or finishes, improving time-to-market for textile manufacturers.
- Energy Efficient - Consumes less energy compared to larger, industrial-scale machines, making it suitable for lab use.
- Compact and Space-Saving - Designed for laboratory environments with limited space, without compromising on functionality.
- Reproducible Results - Ensures consistent application of treatments across multiple samples, aiding in accurate testing and comparison.
- Adjustable Roller Pressure - Allows precise control over the pressure applied to the fabric, ensuring uniform chemical or dye application.
- Variable Speed Control - Adjustable conveyor speed for controlling the time the fabric spends in the solution bath, influencing the absorption rate.
- Solution Bath - Holds dye, chemicals, or finishes, and the fabric passes through this bath before moving to the rollers.
- Digital Control Panel - Easy-to-use interface for setting and adjusting parameters like speed, pressure, and solution concentration.
- Compact and Lab-Friendly Design - Designed for smaller, space-efficient use in textile labs, allowing for small sample testing.
- Roller Gap Adjustment - Allows for fine-tuning of the gap between rollers to regulate the amount of solution squeezed out of the fabric.
- Stainless Steel Construction - Durable and resistant to corrosion from the chemicals used in textile treatments.
- Safety Mechanisms - Includes safety guards, emergency stops, and user protection features during operation.
- Even and Controlled Application - Ensures even distribution of treatments (dye, finish, etc.) on fabric with minimal waste.
- Versatility in Application - Can be used for a wide range of textiles and treatments, including dyeing, softening, flame-retardant treatments, etc.
- Prepare the Fabric Sample - Cut the fabric sample to the required size for the experiment. Ensure it’s clean and free of any debris.
- Prepare the Solution - Mix the dye, chemical, or finish solution according to the desired concentration and the fabric's needs. Ensure that the solution is homogeneous.
- Set the Parameters - Pressure: Adjust the roller pressure based on the fabric type. Different fabrics require different pressure levels to ensure uniform application. - Speed: Set the fabric conveyor speed depending on the desired treatment time (longer exposure for deeper treatment).
- Load the Fabric into the Machine - Place the fabric carefully into the machine. The fabric should go through the solution bath and then pass between the rollers.
- Start the Machine - Turn on the machine and allow the fabric to pass through the rollers. The solution will be evenly applied to the fabric as it moves through the bath and is squeezed by the rollers.
- Monitor the Process - Keep an eye on the fabric to ensure it is being treated uniformly and there are no blockages or fabric jams.
- Unload the Fabric - Once the fabric has been treated, carefully remove it from the machine. Inspect for even application of the solution and any excess liquid.
- Dry or Process Further - Depending on the treatment, proceed with further steps such as drying, heat setting, or curing, as required by the experiment or process.
Mini Lab Dyeing Padder

