Analog Thickness Gauge
$0.00
Analog Thickness Gauge
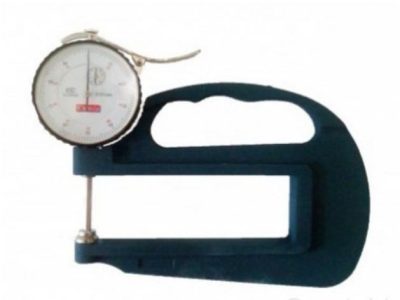
Analog Thickness Gauge
An Analog Thickness Gauge is a manual instrument used to measure the thickness of materials such as fabric, paper, leather, rubber, and plastic. Unlike digital gauges, it displays readings through a mechanical dial or scale.
Purpose Analog Thickness Gauge:
To measure material thickness with reasonable accuracy in lab or production settings.
Commonly used in textiles, packaging, leather goods, and quality control labs.
Working Principle :
The sample is placed between a flat anvil and a presser foot.
When the presser foot contacts the sample under uniform pressure, the thickness is indicated on a dial scale, typically in millimeters.
Types of Analog Thickness Gauge:
Dial Thickness Gauge – With a needle and graduated scale.
Micrometer-Type Gauge – For finer precision and small samples.
Applications:
Textile and fabric inspection
Leather and rubber sheet measurement
Paper and film thickness control

Brand : DUNLIN
Origin : TAIWAN Measuring Range : 0mm ~ 10mm
Accuracy : 0.01mm
Deep Throat Range : 120mm
Dimension : ( 195 × 130 × 25 ) mm
Benefits
High Durability – Since analog thickness gauges do not rely on electronic circuits, they are more durable and resistant to environmental factors such as dust and moisture.
No Power Requirement – These gauges operate mechanically, eliminating the need for batteries or power sources.
Cost-Effective – Analog meters are generally more affordable compared to digital alternatives while still providing precise measurements.
Ease of Use – Simple mechanical operation ensures that even non-technical users can easily measure thickness.
Reliable Performance – Analog thickness gauges provide consistent and accurate readings without the risk of software malfunctions.
Advantages
Immediate Readings – No waiting time for booting or calibration, providing instant measurement results.
Long-Lasting Accuracy – These devices do not suffer from battery drainage or electronic failures, ensuring accuracy over long periods.
Lightweight and Portable – Many analog thickness gauge meters are compact and easy to carry, making them convenient for on-the-go use.
Wide Material Compatibility – Suitable for measuring the thickness of metals, textiles, paper, and various industrial materials.
Minimal Maintenance – Without electronic parts, maintenance requirements are significantly reduced.
Applications
Manufacturing Industry – Used in quality control to ensure material thickness meets specified standards.
Automotive Sector – Helps measure paint and coating thickness on vehicles to ensure uniform application.
Metalworking and Fabrication – Used to measure sheet metal and pipe thickness to maintain precision in production.
Plastic and Rubber Industry – Ensures uniform thickness in plastic sheets, films, and rubber products.
Paper and Textile Industry – Essential for measuring paper thickness in printing industries and fabric thickness in textile production.
Aerospace and Aviation – Used for checking the thickness of coatings and composite materials in aircraft manufacturing.

An Analog Thickness Gauge is a manual instrument used to measure the thickness of materials such as fabric, paper, leather, rubber, and plastic. Unlike digital gauges, it displays readings through a mechanical dial or scale.
Related products
Counting Balance-Weighing Scale
Counting Balance-Weighing Scale
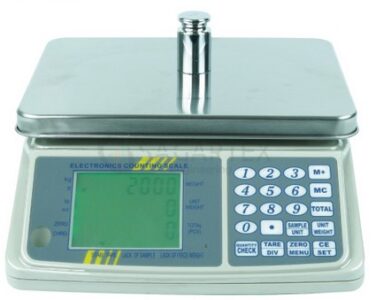
Counting Balance-Weighing Scale

Counting Balance-Weighing Scale
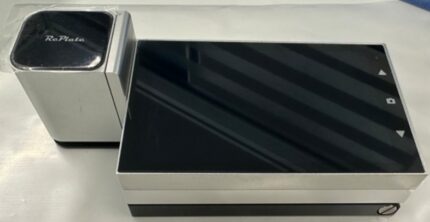
Digital Paper Dot Meter Densitometer
Digital Paper Dot Meter Densitometer
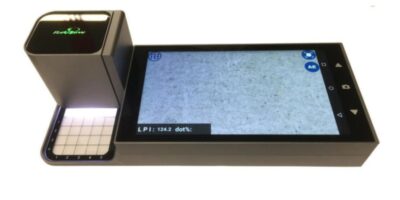
Digital Paper Dot Meter Densitometer
- Calibration: Performing white and black calibration using provided standards to ensure measurement accuracy.
- Sample Placement: Positioning the printed sample under the measurement aperture.
- Measurement: Initiating the measurement process via the touch screen or connected software.
- Data Analysis: Reviewing the displayed results and, if necessary, transferring data to a computer for further analysis.Regular calibration and maintenance are recommended to maintain the device's accuracy and longevity.
- Accurate Dot Analysis - Precisely measures dot gain, dot area, and enlargement for high-quality printing.
- Consistent Print Quality - Helps maintain uniform color density and contrast across print runs.
- Time-Saving - Quick digital readings eliminate the need for manual inspection and reduce errors.
- Multi-Parameter Testing - Measures density, color difference (ΔE), tone error, and gray balance in one device.
- Supports Industry Standards - Complies with ISO and other standards for print quality control.
- User-Friendly Interface - Touchscreen and onboard storage make it easy to operate and manage test data.
- Portable and Rechargeable - Battery-powered with thousands of readings per charge—ideal for field and lab use.
- Enhances Process Control - Enables precise adjustments during printing to reduce waste and reprints.
- High-Resolution CMOS Sensor - Ensures precise optical density and color measurements.
- Measurement Geometry: 45°/0° - Ideal for accurate reflection density readings on printed materials.
- Multiple Light Sources - Includes visible and UV LEDs for versatile testing conditions.
- Touchscreen Display - 3.5-inch color LCD with intuitive controls for easy operation.
- Multi-Function Measurement - Measures dot area, dot gain, density difference, tone error, and gray balance.
- Large Data Storage - Stores over 10,000 measurements for tracking and reporting.
- Rechargeable Battery - Long-lasting lithium battery supports up to 5,000 readings per charge.
- USB and Bluetooth Connectivity - Allows data transfer and remote operation via PC or mobile apps.
- Standard Compliance - Supports ISO Status A, E, I, T and CIE color spaces like LAB, LCh, XYZ.
- Multiple Observer Angles - Select between 2° and 10° for different visual perception simulations.
- Power On - Turn on the device using the power button.
- Calibrate - Perform black and white calibration using the provided standard tiles to ensure accuracy.
- Select Measurement Mode - Choose desired mode: density, dot area, dot gain, ΔE, contrast, or gray balance.
- Place Sample - Position the printed paper sample under the measurement aperture.
- Take Measurement - Press the measure button or tap the screen. The device will scan and display results instantly.
- Analyze Results - View data on the touchscreen. You can switch between values like density, dot area, and color difference.
- Save or Export Data - Store results in internal memory or transfer via USB/Bluetooth if needed.
- Power Off and Store - Turn off after use. Keep in a dust-free area to protect sensors.

Digital Paper Dot Meter Densitometer
VeriVide Colour Assessment Cabinets
VeriVide Colour Assessment Cabinets
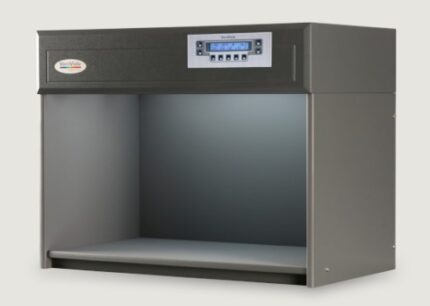
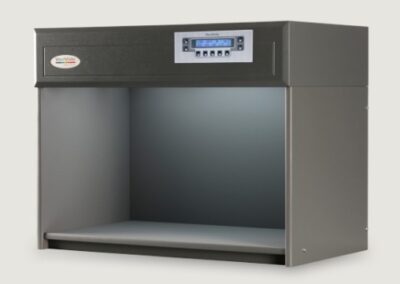 VeriVide offers high-quality Colour Assessment Cabinets (CACs) such as the CAC 60-4, CAC 60-5, and CAC 120-4&5. These cabinets, originating from the UK, are reliable tools for visual evaluation in quality assurance, meeting national, international, and retailer standards. They effectively mitigate issues related to color assessment.VeriVide Colour Assessment Cabinets
High-quality visual evaluation tool for quality assurance. Adhering to national, international and retailer standards.Colour Assessment Cabinet's (CACs) reduce problems associated with assessing products or samples in different environments,be though geological or seasonal, offering a cost-effective method to ensure visual accuracy and product quality.
Color Light Box Enhance color precision with VeriVide's cutting-edge Colour Assessment
Cabinets. These cabinets are meticulously designed to ensure accurate color evaluation in various industries. Invest in VeriVide Colour Assessment Cabinets to elevate your color assessment process.
Enhance Color Precision with VeriVide's Cutting-Edge Assessment Cabinets, which meet or surpass ISO 3664 and BS 950 Part 1 international standards. The cabinets are adaptable to user requirements, with lamp options to choose different light sources. Available in 60, 120, and 150cm widths, VeriVide Colour Assessment Cabinets provide a flexible solution for accurate color assessment.
Incorporate user-friendly features like servicing indicator, auto sequence, warm-up, power save and data storage.4 or 5 light source options Versions available for colour fastness testing and particulate testing both adhering to global standardsEnsure that you are using the best equipment available as they provide the best fluorescent D65 daylight simulator, with the highest Colour
Rendering Index (CRI), available. VeriVide Colour Assessment Cabinets products are known as light boxes, viewing booths, colour cabinets and others, depending on which industry or country they are serving in. They are used within a wide array of industry sectors throughout the world including textile and apparel, graphics, automotive, ceramics, cosmetics, pharmacology (CAC Particulate),
food, footwear, packaging and printing.Download the Datasheet below for more information or click 'VeriVide CAC Datasheet Here' to get in touch with colour experts.
VeriVide CAC Datasheet Here Features of VeriVide Colour Assessment Cabinets
• CAC 60, CAC 120 and CAC 150 accommodate 60, 120 and 150cm tubes respectively
- Either 4 or 5 light sources available for each model including D65, D50, 840P15, F and UV - see Lamp Options.• Internal finishes in Munsell N5, Munsell N7 or Grey 5574 • Diffuser and/or dimmer options available Dimensions of VeriVide Colour Assessment Cabinets CAC 60-4 Dimensions (mm) Width Height Depth Overall 710 545 420
IR Dyeing Machine Dunlin
IR Dyeing Machine Dunlin
IR Dyeing machine Dunlin is Safe, high efficiency, environment friendly, energy saving, optimum for new dyeing small sample machines0 - 3.5 ℃ / min Cooling rate 0.2 - 5 ℃ / min Cooling method Air-cooled Rotation speed 0 - 60 rpm Liquor ratio 1:5 -1:100 Power supply 1∮AC 220V 50/60HZ Dimensions( L x W x H) 670×670×780mm 860×680×780mm Weight 100kg 120kg Standard Accessories Cups 1set
Put the test sample. Cups stand 1set Place where to put cups. Protective glove 1set To avoid to be hurt by HT cups. Model: IF-24SCapacity: 24 pots Brad: DUNLIN Origin: China
Color dyeing tests for various dyestuffs of IR Dyeing machine Dunlin- Step dyeing tests. C. Dispersing, levelling and impregnating test. D. High or low liquor ratio exhausting tests. E. Fabric steak and staining tests. F. Concentration tests and others. Protection and Safety gates to protect. Temperature control accuracy +/- 0.2degree

IR Dyeing machine
Hydraulic GSM Cutter
Hydraulic GSM Cutter
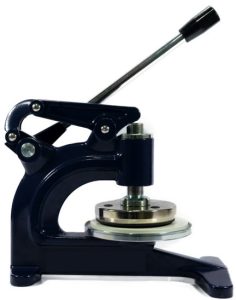
Hydraulic GSM Cutter
- High Cutting Precision - Ensures consistent and accurate fabric sample size for reliable GSM results.
- Effortless Operation- Hydraulic action reduces manual effort and operator fatigue.
- Ideal for Thick or Multi-Layer Fabrics - Cuts through dense or multiple fabric layers cleanly.
- Time-Saving - Speeds up the sample preparation process, especially for high-volume testing.
- Improves Test Accuracy - Uniform samples help eliminate errors in GSM calculation.
- Durable and Long-Lasting - Robust construction ensures stability and extended service life.
- Safety Enhancement - Reduces risk of injury compared to manual rotary cutters.
- Consistent Pressure Application - Hydraulic mechanism maintains steady force for each cut.
- Hydraulic Press Mechanism - Applies consistent and strong pressure for clean, even cuts.
- Standard Cutting Die (100 cm²) - Produces fabric samples suitable for GSM testing with standard area.
- Heavy-Duty Construction - Built with robust metal frame for long-term lab or industrial use.
- Sharp Stainless Steel Blades - Durable and replaceable blades ensure smooth, precise cuts.
- Cutting Pad Included - Comes with a rubber or nylon base to protect blades and ensure clean edges.
- Simple Lever or Button Operation - Easy to use with minimal training required.
- Non-slip Base - Provides stability during operation for safe, accurate cutting.
- Supports Various Fabric Types
- Place the Cutting Pad - Lay the rubber or nylon cutting pad on a flat surface.
- Position the Fabric - Place the fabric sample flat and smooth on the cutting pad.
- Align the Cutter - Position the GSM cutter die over the desired area of the fabric.
- Activate Hydraulic Press - Pull the lever or press the button to apply hydraulic pressure and cut the sample.
- Remove the Sample - Lift the cutter and carefully take out the circular fabric piece (usually 100 cm²).
- Weigh the Sample - Place the cut sample on a precision balance or GSM scale to determine weight.
- Calculate GSM - Multiply the sample weight (in grams) by 100 to get GSM.

Hydraulic GSM Cutter
Color Matching Cabinet-Light Box
Color Matching Cabinet-Light Box

Color Matching Cabinet-Light Box
Controller For IR Dyeing Machine
Controller For IR Dyeing Machine
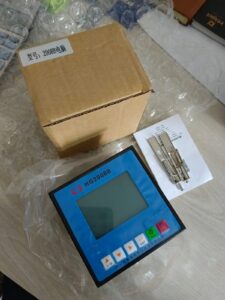
IR Dyeing machine controller
- Temperature Control:- Precisely regulates the infrared heaters to maintain uniform temperature across the dye bath. - Supports customizable heating curves (ramp-up, hold, and cool-down phases).
- Programmable Logic Control (PLC): - Allows operators to set and automate dyeing programs for different fabrics and dye types. - Supports multiple recipes or programs for different batches.
- Real-Time Monitoring and Feedback: - Monitors parameters like temperature, fabric rotation, bath circulation, and timing. - Provides real-time data and alarms for deviations.
- Touchscreen Interface / HMI (Human Machine Interface): - User-friendly interface for configuring and monitoring processes. - Multi-language support and graphical display of process curves.
- Data Logging and Traceability: - Records process data for quality control and traceability.
- Energy Efficiency Optimization: - Manages IR heater output to reduce energy usage. - Often includes features for auto shut-off or idle mode.
- Safety Features: - Includes emergency stop, over-temperature protection, and fault detection systems. 8. Connectivity: - Modern controllers may support Ethernet, Modbus, or other industrial communication protocols for integration into factory automation systems.
- Improved Dyeing Accuracy and Consistency
- Enhanced Energy Efficiency- Infrared heating is more energy-efficient than traditional heating methods.- The controller optimizes energy use by adjusting the IR output based on process needs, reducing overall energy consumption.
- Time Savings- Faster heating and cooling cycles due to infrared technology.- Automated processes reduce manual intervention and cycle times. 4. Better Process Control- Programmable dyeing cycles and precise control over each stage (heating, dyeing, rinsing, cooling).- Real-time monitoring and adjustments improve reliability.
- Reduced Water and Chemical Usage- More efficient dye penetration and fixation mean less water and fewer chemicals are needed for reprocessing or corrections.6. Lower Operational Costs
- Enhanced Safety Built-in alarms, emergency shut-off and automatic fault detection enhance operational safety.8. Data Logging and Traceability- Ability to record and review dyeing process data helps in quality control and troubleshooting.- Facilitates compliance with industry standards and audits.
- User-Friendly Operation- Modern touchscreen interfaces make it easier for operators to manage and monitor processes.- Multilingual support and visual feedback enhance usability.
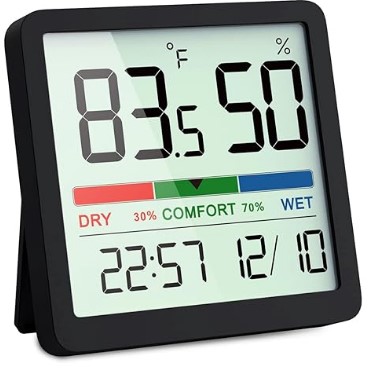
Digital Temperature Humidity Meter
Digital Temperature Humidity Meter
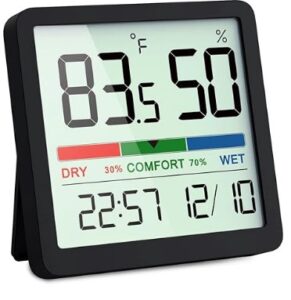
Digital Temperature Humidity Meter


 Products
 Martindale abrasion tester Updated

